Visualisation Assets Example
Introduction
This document walks through the process of converting an existing Doughnut visualisation into an Asset-based visualisation.
Document the Source Visualisation
We’re converting System/Visualisations/Visualisations/Version3/Doughnut, so we’ll open it up and see how it is configured.
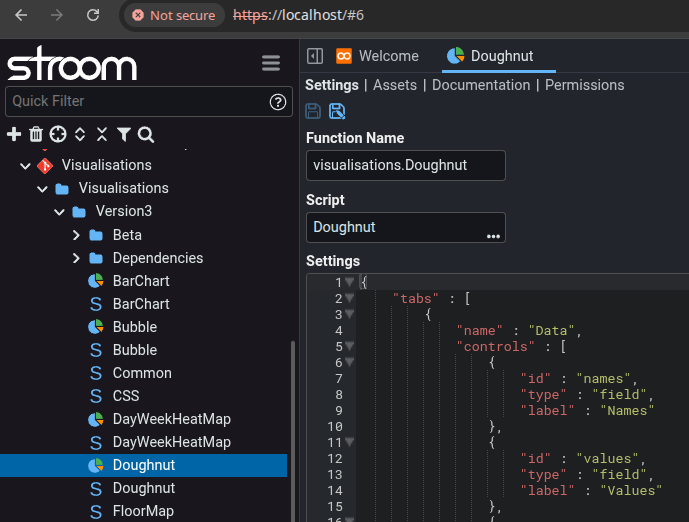
Function Name - We’re going to need to copy this to our new document.
Script - We’re going to leave this bit blank - our new document won’t reference a Script document.
Settings - We’re going to need to copy this to our new document.
Dependencies
Visualisation documents depend on a Script document. In turn, this depends on other Script documents.
The Doughnut Script document looks like this:
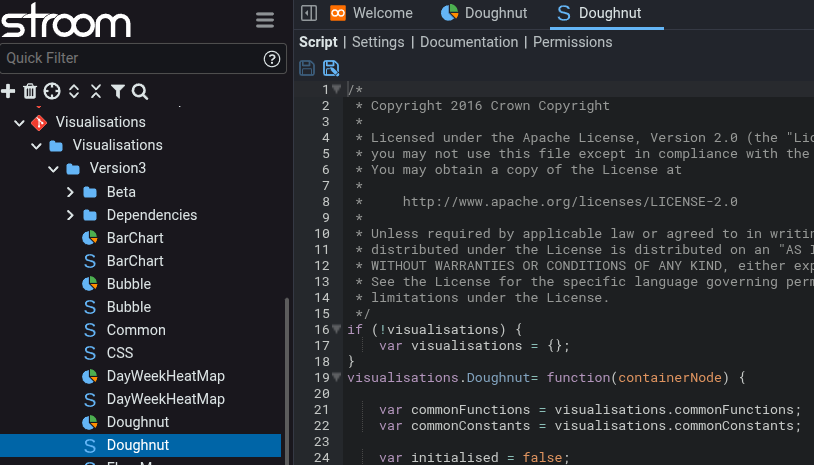
We’re going to need the script file, so copy-and-paste it into a text editor and save it somewhere.
We also need to look at the Settings tab which looks like this:
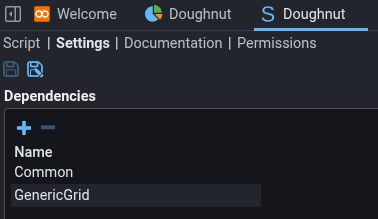
This shows the Script documents that the Doughnut Script depends on. In turn, the dependencies can depend on other Script documents. We need to extract all these scripts so we can convert them into assets.
All Script documents hold Javascript. However, sometimes CSS is needed instead of Javascript, so the CSS is held in a Javascript String. This needs to be converted into plain Javascript to create a plain CSS file.
Convert CSS in Javascript into CSS
The Script will look something like this (cut down for this example):
(function() {
var cssStr = "" +
"/*" +
" * Copyright 2016 Crown Copyright" +
" *" +
" * Licensed under the Apache License, Version 2.0 (the \"License\");" +
" * you may not use this file except in compliance with the License." +
" * You may obtain a copy of the License at" +
" *" +
" *     http://www.apache.org/licenses/LICENSE-2.0" +
" *" +
" * Unless required by applicable law or agreed to in writing, software" +
" * distributed under the License is distributed on an \"AS IS\" BASIS," +
" * WITHOUT WARRANTIES OR CONDITIONS OF ANY KIND, either express or implied." +
" * See the License for the specific language governing permissions and" +
" * limitations under the License." +
" */" +
"@CHARSET \"UTF-8\";" +
"" +
"html, body {" +
"  width: 100%;" +
"  height: 100%;" +
"  padding: 0px;" +
"  margin: 0px;" +
"  overflow: hidden;" +
"  font-family: Roboto, arial, tahoma, verdana;" +
"  font-size: 13px;" +
"  font-weight: 400;" +
"}" +
"" +
"text {" +
"  fill: var(--vis-text-color);" +
"}" +
"" +
".vis {" +
"  margin: 0px;" +
"  padding: 0px;" +
"}" +
"" +
".vis-text {" +
"  shape-rendering: crispEdges;" +
"}" +
"" +
".vis-line {" +
"  stroke-width: 0.5px;" +
"}" +
"" +
".vis-area {" +
"}" +
"" +
".vis-axis {" +
"}" +
"" +
"::-webkit-scrollbar-corner {" +
"  background: transparent;" +
"}" +
"";
d3.select(document).select("head").insert("style").text(cssStr);
})();
You will need to remove the quotes, + signs, prefix and suffix Javascript to end up with this:
/*
 * Copyright 2016 Crown Copyright
 *
 * Licensed under the Apache License, Version 2.0 (the \"License\");
 * you may not use this file except in compliance with the License.
 * You may obtain a copy of the License at
 *
 *     http://www.apache.org/licenses/LICENSE-2.0
 *
 * Unless required by applicable law or agreed to in writing, software
 * distributed under the License is distributed on an \"AS IS\" BASIS,
 * WITHOUT WARRANTIES OR CONDITIONS OF ANY KIND, either express or implied.
 * See the License for the specific language governing permissions and
 * limitations under the License.
 */
@CHARSET \"UTF-8\";

html, body {
  width: 100%;
  height: 100%;
  padding: 0px;
  margin: 0px;
  overflow: hidden;
  font-family: Roboto, arial, tahoma, verdana;
  font-size: 13px;
  font-weight: 400;
}

text {
  fill: var(--vis-text-color);
}

.vis {
  margin: 0px;
  padding: 0px;
}

.vis-text {
  shape-rendering: crispEdges;
}

.vis-line {
  stroke-width: 0.5px;
}

.vis-area {
}

.vis-axis {
}

::-webkit-scrollbar-corner {
  background: transparent;
}
Regular expression search-and-replace is very useful for this, using the terms ^" and " \+$.
Resulting Assets
Once all this is done we end up with the following files stored in a folder on our local machine:
common-css.csscommon.jsd3-grid.jsd3-tip.jsd3.jsdoughnut.jsgeneric-grid.jsjs-hashes.jsstroom-theme.css
The names are not important as long as they match up with the index.html file below.
Create a New Visualisation Document
Add the Assets
Select the Assets tab within your new Visualisation document.
Use the / Upload File menu items to upload all the CSS and Javascript files in turn.
No folders are necessary - everything can go into the root directory.
Settings
Select the Settings tab within your new Visualisation document.
Function Name - Copy from the old visualisation, or just set it to visualisations.Doughnut.
Script - Leave this blank
Settings - Copy from the old visualisation. Make sure you get the whole file.
index.html Asset
We need an HTML file which will form the core of our visualisation.
This must be named index.html to be considered for loading by Stroom.
It needs to look like this:
<html>
  <head>
    <meta charset="UTF-8">
    <link rel="stylesheet" href="theme-css.css" type="text/css" />
    <link rel="stylesheet" href="/ui/css/vis.css" type="text/css" />
    <link rel="stylesheet" href="common-css.css" type="text/css" />
    <script type="text/javascript" charset="UTF-8" src='../../../../../ui/vis.js'></script>
    <script type="text/javascript" charset="UTF-8" src='common.js'></script>
    <script type="text/javascript" charset="UTF-8" src='d3.js'></script>
    <script type="text/javascript" charset="UTF-8" src='d3-grid.js'></script>
    <script type="text/javascript" charset="UTF-8" src='d3-tip.js'></script>
    <script type="text/javascript" charset="UTF-8" src='generic-grid.js'></script>
    <script type="text/javascript" charset="UTF-8" src='js-hashes.js'></script>
    <script type="text/javascript" charset="UTF-8" src='doughnut.js'></script>
  </head>
  <body>
    <!-- Empty -->
  </body>
</html>
All the assets we’ve uploaded need to be linked into the HTML file.
Note that there are a couple of files that use the /ui/ path:
/ui/css/vis.cssStroom visualisation CSS/ui/vis.jsHolds the code that Stroom uses to communicate with the visualisation.
Both of these files must be included in your index.html for the visualisation to work.
Add to Dashboard
This new visualisation can be added to a Dashboard and configured in the usual way.