Node Cluster URL Setup
In a Stroom cluster, Nodes are expected to communicate with each other on port 8080 over http. To facilitate this, we need to set each node’s Cluster URL and the following demonstrates this process.
Assumptions
- an account with the
AdministratorApplication Permission is currently logged in. - we have a multi node Stroom cluster with two nodes,
stroomp00andstroomp01 - appropriate firewall configurations have been made
- in the scenario of adding a new node to our multi node deployment, the node added will be
stroomp02
Configure Two Nodes
To configure the nodes, move to the Monitoring item of the Main Menu and select it to bring up the Monitoring sub-menu.
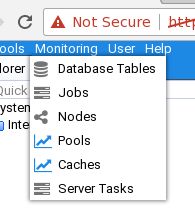
then move down and select the Nodes sub-item to be presented with the Nodes configuration tab as seen below.

To set stroomp00’s Cluster URL, move to its line in the display and select it. It will be highlighted.

Then move the cursor to the Edit Node icon in the top left of
the Nodes tab and select it. On selection the Edit Node configuration window will be displayed and into
the Cluster URL: entry box, enter the first node’s URL of http://stroomp00.strmdev00.org:8080/stroom/clustercall.rpc
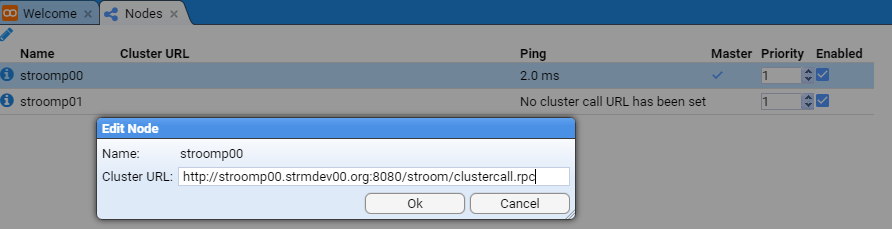
then press the at which we see the Cluster URL has been set for the first node as per

We next select the second node

then move the cursor to the Edit Node icon in the top left of
the Nodes tab and select it. On selection the Edit Node configuration window will be displayed and into
the Cluster URL: entry box, enter the second node’s URL of http://stroomp01.strmdev00.org:8080/stroom/clustercall.rpc

then press the button.
At this point we will see both nodes have the Cluster URLs set.
.

You may need to press the Refresh icon found at top left of Nodes configuration tab, until both nodes show healthy pings.
.

If you do not get ping results for each node, then they are not configured correctly. In that situation, review all log files and processes that you have performed.
Once you have set the Cluster URLs of each node you should also set the master assignment priority for each node to
be different to all of the others. In the image above both have been assigned equal priority - 1. We will
change stroomp00 to have a different priority - 3. You should note that the node with the highest
priority gains the Master node status.
.

Configure New Node
When one expands a Multi Node Stroom cluster deployment, after the installation of the Stroom Proxy and Application software and services on the new node, one has to configure the new node’s Cluster URL.
To configure the new node, move to the Monitoring item of the Main Menu and select it to bring up the Monitoring sub-menu.
then move down and select the Nodes sub-item to be presented with the Nodes configuration tab as seen below.

To set stroomp02’s Cluster URL, move to its line in the display and select it. It will be highlighted.

Then move the cursor to the Edit Node icon in the top left
of the Nodes tab and select it. On selection the Edit Node configuration window will be displayed
and into the Cluster URL: entry box, enter the first node’s URL of http://stroomp02.strmdev00.org:8080/stroom/clustercall.rpc
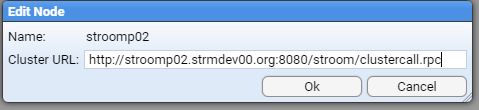
then press the button at which we see the Cluster URL has been set for the first node as per

You need to press the Refresh icon found at top left of Nodes configuration tab, until the new node shows a healthy ping.
.

If you do not get a ping results for the new node, then it is not configured correctly. In that situation, review all log files and processes that you have performed.
Once you have set the Cluster URL you should also set the master assignment priority for each node to
be different to all of the others. In the image above both stroomp01 and the new node, stroomp02, have been
assigned equal priority - 1. We will change stroomp01 to have a different priority - 2. You should note that the node
with the highest priority maintains the Master node status.
.
