This is the multi-page printable view of this section. Click here to print.
User Guide
- 1: Application Programming Interfaces (API)
- 1.1: API Specification
- 1.2: Calling an API
- 1.3: Query APIs
- 1.4: Export Content API
- 1.5: Reference Data
- 2: Indexing data
- 2.1: Elasticsearch
- 2.1.1: Introduction
- 2.1.2: Getting Started
- 2.1.3: Indexing data
- 2.1.4: Exploring Data in Kibana
- 2.2: Lucene Indexes
- 2.3: Solr Integration
- 3: Content Naming Conventions
- 4: Concepts
- 4.1: Streams
- 5: Dashboards
- 5.1: Elasticsearch
- 5.2: Search Extraction
- 5.3: Dashboard Expressions
- 5.3.1: Aggregate Functions
- 5.3.2: Cast Functions
- 5.3.3: Date Functions
- 5.3.4: Link Functions
- 5.3.5: Logic Funtions
- 5.3.6: Mathematics Functions
- 5.3.7: Rounding Functions
- 5.3.8: Selection Functions
- 5.3.9: String Functions
- 5.3.10: Type Checking Functions
- 5.3.11: URI Functions
- 5.3.12: Value Functions
- 5.4: Dictionaries
- 5.5: Direct URLs
- 5.6: Queries
- 6: Data Retention
- 7: Data Splitter
- 7.1: Simple CSV Example
- 7.2: Simple CSV example with heading
- 7.3: Complex example with regex and user defined names
- 7.4: Multi Line Example
- 7.5: Element Reference
- 7.5.1: Content Providers
- 7.5.2: Expressions
- 7.5.3: Variables
- 7.5.4: Output
- 7.6: Match References, Variables and Fixed Strings
- 7.6.1: Expression match references
- 7.6.2: Variable reference
- 7.6.3: Use of fixed strings
- 7.6.4: Concatenation of references
- 8: Editing and Viewing Data
- 9: Event Feeds
- 10: Finding Things
- 11: Nodes
- 12: Pipelines
- 12.1: Parser
- 12.1.1: Context Data
- 12.1.2: XML Fragments
- 12.2: XSLT Conversion
- 12.2.1: XSLT Functions
- 12.2.2: XSLT Includes
- 12.3: File Output
- 12.4: Element Reference
- 12.5: Reference Data
- 13: Properties
- 14: Roles
- 15: Security
- 16: Stroom Jobs
- 17: Tools
- 17.1: Command Line Tools
- 17.2: Stream Dump Tool
- 18: Volumes
1 - Application Programming Interfaces (API)
Stroom has many public REST APIs to allow other systems to interact with Stroom. Everything that can be done via the user interface can also be done using the API.
All methods on the API will are authenticated and authorised, so the permissions will be exactly the same as if the API user is using the Stroom user interface directly.
1.1 - API Specification
Swagger UI
The APIs are available as a Swagger Open API specification in the following forms:
- JSON - stroom.json
- YAML - stroom.yaml
A dynamic Swagger user interface is also available for viewing all the API endpoints with details of parameters and data types. This can be found in two places.
- Published on GitHub for each minor version Swagger user interface .
- Published on a running stroom instance at the path
/stroom/noauth/swagger-ui.
API Endpoints in Application Logs
The API methods are also all listed in the application logs when Stroom first boots up, e.g.
INFO  2023-01-17T11:09:30.244Z main i.d.j.DropwizardResourceConfig The following paths were found for the configured resources:

    GET     /api/account/v1/ (stroom.security.identity.account.AccountResourceImpl)
    POST    /api/account/v1/ (stroom.security.identity.account.AccountResourceImpl)
    POST    /api/account/v1/search (stroom.security.identity.account.AccountResourceImpl)
    DELETE  /api/account/v1/{id} (stroom.security.identity.account.AccountResourceImpl)
    GET     /api/account/v1/{id} (stroom.security.identity.account.AccountResourceImpl)
    PUT     /api/account/v1/{id} (stroom.security.identity.account.AccountResourceImpl)
    GET     /api/activity/v1 (stroom.activity.impl.ActivityResourceImpl)
    POST    /api/activity/v1 (stroom.activity.impl.ActivityResourceImpl)
    POST    /api/activity/v1/acknowledge (stroom.activity.impl.ActivityResourceImpl)
    GET     /api/activity/v1/current (stroom.activity.impl.ActivityResourceImpl)
    ...
You will also see entries in the logs for the various servlets exposed by Stroom, e.g.
INFO  ... main s.d.common.Servlets            Adding servlets to application path/port:
INFO  ... main s.d.common.Servlets            	stroom.core.servlet.DashboardServlet          => /stroom/dashboard
INFO  ... main s.d.common.Servlets            	stroom.core.servlet.DynamicCSSServlet         => /stroom/dynamic.css
INFO  ... main s.d.common.Servlets            	stroom.data.store.impl.ImportFileServlet      => /stroom/importfile.rpc
INFO  ... main s.d.common.Servlets            	stroom.receive.common.ReceiveDataServlet      => /stroom/noauth/datafeed
INFO  ... main s.d.common.Servlets            	stroom.receive.common.ReceiveDataServlet      => /stroom/noauth/datafeed/*
INFO  ... main s.d.common.Servlets            	stroom.receive.common.DebugServlet            => /stroom/noauth/debug
INFO  ... main s.d.common.Servlets            	stroom.data.store.impl.fs.EchoServlet         => /stroom/noauth/echo
INFO  ... main s.d.common.Servlets            	stroom.receive.common.RemoteFeedServiceRPC    => /stroom/noauth/remoting/remotefeedservice.rpc
INFO  ... main s.d.common.Servlets            	stroom.core.servlet.StatusServlet             => /stroom/noauth/status
INFO  ... main s.d.common.Servlets            	stroom.core.servlet.SwaggerUiServlet          => /stroom/noauth/swagger-ui
INFO  ... main s.d.common.Servlets            	stroom.resource.impl.SessionResourceStoreImpl => /stroom/resourcestore/*
INFO  ... main s.d.common.Servlets            	stroom.dashboard.impl.script.ScriptServlet    => /stroom/script
INFO  ... main s.d.common.Servlets            	stroom.security.impl.SessionListServlet       => /stroom/sessionList
INFO  ... main s.d.common.Servlets            	stroom.core.servlet.StroomServlet             => /stroom/ui
1.2 - Calling an API
Authentication
In order to use the API endpoints you will need to authenticate. Authentication is achieved using an API Key or Token .
You will either need to create an API key for your personal Stroom user account or for a shared processing user account. Whichever user account you use it will need to have the necessary permissions for each API endpoint it is to be used with.
To create an API key (token) for a user:
- In the top menu, select:

- Click Create.
- Enter a suitable expiration date. Short expiry periods are more secure in case the key is compromised.
- Select the user account that you are creating the key for.
- Click
- Select the newly created API Key from the list of keys and double click it to open it.
- Click to copy the key to the clipboard.
To make an authenticated API call you need to provide a header of the form Authorization:Bearer ${TOKEN}, where ${TOKEN} is your API Key as copied from Stroom.
Calling an API method with curl
This section describes how to call an API method using the command line tool curl as an example client.
Other clients can be used, e.g. using python, but these examples should provide enough help to get started using another client.
HTTP Requests Without a Body
Typically HTTP GET requests will have no body/payload
Often PUT and DELETE requests will also have no body/payload.
The following is an example of how to call an HTTP GET method (i.e. a method that does not require a request body) on the API using curl.
Warning
The --insecure argument is used in this example which means certificate verification will not take place.
It is recommended not to use this argument and instead supply curl with client and certificate authority certificates to make a secure connection.
You can either call the API via Nginx (or similar reverse proxy) at https://stroom-fddn/api/some/path or if you are making the call from one of the stroom hosts you can go direct using http://localhost:8080/api/some/path. The former is preferred as it is more secure.
Requests With a Body
A lot of the API methods in Stroom require complex bodies/payloads for the request.
The following example is an HTTP POST to perform a reference data lookup on the local host.
Create a file req.json containing:
{
  "mapName": "USER_ID_TO_STAFF_NO_MAP",
  "effectiveTime": "2024-12-02T08:37:02.772Z",
  "key": "user2",
  "referenceLoaders": [
    {
      "loaderPipeline" : {
        "name" : "Reference Loader",
        "uuid" : "da1c7351-086f-493b-866a-b42dbe990700",
        "type" : "Pipeline"
      },
      "referenceFeed" : {
        "name": "STAFF-NO-REFERENCE",
        "uuid": "350003fe-2b6c-4c57-95ed-2e6018c5b3d5",
        "type" : "Feed"
      }
    }
  ]
}
Now send the request with curl.
This API method returns plain text or XML depending on the reference data value.
Note
This assumes you are using curl version 7.82.0 or later that supports the --json argument.
If not you will need to replace --json with --data and add these arguments:
--header "Content-Type: application/json"
--header "Accept: application/json"
Handling JSON
jq is a utility for processing JSON and is very useful when using the API methods.
For example to get just the build version from the node info endpoint:
1.3 - Query APIs
The Query APIs use common request/response models and end points for querying each type of data source held in Stroom. The request/response models are defined in stroom-query .
Currently Stroom exposes a set of query endpoints for the following data source types. Each data source type will have its own endpoint due to differences in the way the data is queried and the restrictions imposed on the query terms. However they all share the same API definition.
-
 stroom-index Queries
-
The Lucene based search indexes.
stroom-index Queries
-
The Lucene based search indexes. -
 Sql Statistics Query
-
Stroom’s SQL Statistics store.
Sql Statistics Query
-
Stroom’s SQL Statistics store. -
 Searchable
-
Searchables are various data sources that allow you to search the internals of Stroom, e.g. local reference data store, annotations, processor tasks, etc.
Searchable
-
Searchables are various data sources that allow you to search the internals of Stroom, e.g. local reference data store, annotations, processor tasks, etc.
The detailed documentation for the request/responses is contained in the Swagger definition linked to above.
Common endpoints
The standard query endpoints are
Datasource
The Data Source endpoint is used to query Stroom for the details of a data source with a given DocRef . The details will include such things as the fields available and any restrictions on querying the data.
Search
The search endpoint is used to initiate a search against a data source or to request more data for an active search. A search request can be made using iterative mode, where it will perform the search and then only return the data it has immediately available. Subsequent requests for the same queryKey will also return the data immediately available, expecting that more results will have been found by the query. Requesting a search in non-iterative mode will result in the response being returned when the query has completed and all known results have been found.
The SearchRequest model is fairly complicated and contains not only the query terms but also a definition of how the data should be returned. A single SearchRequest can include multiple ResultRequest sections to return the queried data in multiple ways, e.g. as flat data and in an alternative aggregated form.
Stroom as a query builder
Stroom is able to export the json form of a SearchRequest model from its dashboards. This makes the dashboard a useful tool for building a query and the table settings to go with it. You can use the dashboard to defined the data source, define the query terms tree and build a table definition (or definitions) to describe how the data should be returned. The, clicking the download icon on the query pane of the dashboard will generate the SearchRequest json which can be immediately used with the /search API or modified to suit.
Destroy
This endpoint is used to kill an active query by supplying the queryKey for query in question.
Keep alive
Stroom will only hold search results from completed queries for a certain lenght of time. It will also terminate running queries that are too old. In order to prevent queries being aged off you can hit this endpoint to indicate to Stroom that you still have an interest in a particular query by supplying the query key.
1.4 - Export Content API
Stroom has API methods for exporting content in Stroom to a single zip file.
Export All - /api/export/v1
This method will export all content in Stroom to a single zip file. This is useful as an alternative backup of the content or where you need to export the content for import into another Stroom instance.
In order to perform a full export, the user (identified by their API Key) performing the export will need to ensure the following:
- Have created an API Key
- The system property
stroom.export.enabledis set totrue. - The user has the application permission
Export ConfigurationorAdministrator.
Only those items that the user has Read permission on will be exported, so to export all items, the user performing the export will need Read permission on all items or have the Administrator application permission.
Performing an Export
To export all readable content to a file called export.zip do something like the following:
Note
If you encounter problems then replace--silent with --verbose to get more information.
Export Zip Format
The export zip will contain a number of files for each document exported. The number and type of these files will depend on the type of document, however every document will have the following two file types:
.node- This file represents the document’s location in the explorer tree along with its name and UUID..meta- This is the metadata for the document independent of the explorer tree. It contains the name, type and UUID of the document along with the unique identifier for the version of the document.
Documents may also have files like these (a non-exhaustive list):
.json- JSON data holding the content of the document, as used for Dashboards..txt- Plain text data holding the content of the document, as used for Dictionaries..xml- XML data holding the content of the document, as used for Pipelines..xsd- XML Schema content..xsl- XSLT content.
The following is an example of the content of an export zip file:
TEST_FEED_CERT.Feed.fcee4270-a479-4cc0-a79c-0e8f18a4bad8.meta
TEST_FEED_CERT.Feed.fcee4270-a479-4cc0-a79c-0e8f18a4bad8.node
TEST_FEED_PROXY.Feed.f06d4416-8b0e-4774-94a9-729adc5633aa.meta
TEST_FEED_PROXY.Feed.f06d4416-8b0e-4774-94a9-729adc5633aa.node
TEST_REFERENCE_DATA_EVENTS_XXX.XSLT.4f74999e-9d69-47c7-97f7-5e88cc7459f7.meta
TEST_REFERENCE_DATA_EVENTS_XXX.XSLT.4f74999e-9d69-47c7-97f7-5e88cc7459f7.xsl
TEST_REFERENCE_DATA_EVENTS_XXX.XSLT.4f74999e-9d69-47c7-97f7-5e88cc7459f7.node
Standard_Pipelines/Reference_Loader.Pipeline.da1c7351-086f-493b-866a-b42dbe990700.xml
Standard_Pipelines/Reference_Loader.Pipeline.da1c7351-086f-493b-866a-b42dbe990700.meta
Standard_Pipelines/Reference_Loader.Pipeline.da1c7351-086f-493b-866a-b42dbe990700.node
Filenames
When documents are added to the zip, they are added with a directory structure that mirrors the explorer tree.
The filenames are of the form:
<name>.<type>.<UUID>.<extension>
As Stroom allows characters in document and folder names that would not be supported in operating system paths (or cause confusion), some characters in the name/directory parts are replaced by _ to avoid this. e.g. Dashboard 01/02/2020 would become Dashboard_01_02_2020.
If you need to see the contents of the zip as if viewing it within Stroom you can run this bash script in the root of the extracted zip.
#!/usr/bin/env bash

shopt -s globstar
for node_file in **/*.node; do
  name=
  name="$(grep -o -P "(?<=name=).*" "${node_file}" )"
  path=
  path="$(grep -o -P "(?<=path=).*" "${node_file}" )"

  echo "./${path}/${name}   (./${node_file})"
done
This will output something like:
./Standard Pipelines/Json/Events to JSON   (./Standard_Pipelines/Json/Events_to_JSON.XSLT.1c3d42c2-f512-423f-aa6a-050c5cad7c0f.node)
./Standard Pipelines/Json/JSON Extraction   (./Standard_Pipelines/Json/JSON_Extraction.Pipeline.13143179-b494-4146-ac4b-9a6010cada89.node)
./Standard Pipelines/Json/JSON Search Extraction   (./Standard_Pipelines/Json/JSON_Search_Extraction.XSLT.a8c1aa77-fb90-461a-a121-d4d87d2ff072.node)
./Standard Pipelines/Reference Loader   (./Standard_Pipelines/Reference_Loader.Pipeline.da1c7351-086f-493b-866a-b42dbe990700.node)
1.5 - Reference Data
The reference data store has an API to allow other systems to access the reference data store.
/api/refData/v1/lookup
The /lookup endpoint requires the caller to provide details of the reference feed and loader pipeline so if the effective stream is not in the store it can be loaded prior to performing the lookup.
It is useful for forcing a reference load into the store and for performing ad-hoc lookups.
Note
As reference data stores are local to a node, it is best to send the request to a node that does processing as it is more likely to have already loaded the data. If you send it to a UI node that does not do processing, it is likely to trigger a load as the data will not be there.Below is an example of a lookup request file req.json.
{
  "mapName": "USER_ID_TO_LOCATION",
  "effectiveTime": "2020-12-02T08:37:02.772Z",
  "key": "jbloggs",
  "referenceLoaders": [
    {
      "loaderPipeline" : {
        "name" : "Reference Loader",
        "uuid" : "da1c7351-086f-493b-866a-b42dbe990700",
        "type" : "Pipeline"
      },
      "referenceFeed" : {
        "name": "USER_ID_TOLOCATION-REFERENCE",
        "uuid": "60f9f51d-e5d6-41f5-86b9-ae866b8c9fa3",
        "type" : "Feed"
      }
    }
  ]
}
This is an example of how to perform the lookup on the local host.
2 - Indexing data
2.1 - Elasticsearch
2.1.1 - Introduction
Stroom supports using an external Elasticsearch cluster to index event data. This allows you to leverage all the features of the Elastic Stack, such as shard allocation, replication, fault tolerance and aggregations.
With Elasticsearch as an external service, your search infrastructure can scale independently of your Stroom data processing cluster, enhancing interoperability with other platforms by providing a performant and resilient time-series event data store. For instance, you can deploy Kibana to search and visualise Elasticsearch data.
Stroom achieves indexing and search integration by interfacing securely with the Elasticsearch REST API using the Java high-level client.
This guide will walk you through configuring a Stroom indexing pipeline, creating an Elasticsearch index template, activating a stream processor and searching the indexed data in both Stroom and Kibana.
Assumptions
- You have created an Elasticsearch cluster. Elasticsearch 8.x is recommended, though the latest supported 7.x version will also work. For test purposes, you can quickly create a single-node cluster using Docker by following the steps in the Elasticsearch Docs .
- The Elasticsearch cluster is reachable via HTTPS from all Stroom nodes participating in stream processing.
- Elasticsearch security is enabled. This is mandatory and is enabled by default in Elasticsearch 8.x and above.
- The Elasticsearch HTTPS interface presents a trusted X.509 server certificate. The Stroom node(s) connecting to Elasticsearch need to be able to verify the certificate, so for custom PKI, a Stroom truststore entry may be required.
- You have a feed containing
Eventstreams to index.
Key differences
Indexing data with Elasticsearch differs from Solr and built-in Lucene methods in a number of ways:
- Unlike with Solr and built-in Lucene indexing, Elasticsearch field mappings are managed outside Stroom, through the use of index and component templates . These are normally created either via the Elasticsearch API, or interactively using Kibana.
- Aside from creating the mandatory
StreamIdandEventIdfield mappings, explicitly defining mappings for other fields is optional. Elasticsearch will use dynamic mapping by default, to infer each field’s type at index time. Explicitly defining mappings is recommended where consistency or greater control are required, such as for IP address fields (Elasticsearch mapping typeip).
Next page - Getting Started
2.1.2 - Getting Started
Establish an Elasticsearch cluster connection in Stroom
The first step is to configure Stroom to connect to an Elasticsearch cluster.
You can configure multiple cluster connections if required, such as a separate one for production and another for development.
Each cluster connection is defined by an Elastic Cluster document within the Stroom UI.
- In the Stroom Explorer pane (
 ), right-click on the folder where you want to create the
 Elastic Clusterdocument. - Select:


- Give the cluster document a name and press .
- Complete the fields as explained in the section below. Any fields not marked as “Optional” are mandatory.
- Click
Test Connection. A dialog will display with the test result. IfConnection Success, details of the target cluster will be displayed. Otherwise, error details will be displayed. - Click
 to commit changes.
Warning
Ensure you restrict permissions to theElastic Cluster document.
The Read privilege permits retrieval of the Elasticsearch API key and secret, granting the holder the same level of privilege as Stroom.
Users authorised to search Elasticsearch indices via Stroom dashboards should only be assigned the Use privilege.
Elastic Cluster document fields
Description
(Optional) You might choose to enter the Elasticsearch cluster name or purpose here.
Connection URLs
Enter one or more node or cluster addresses, including protocol, hostname and port. Only HTTPS is supported; attempts to use plain-text HTTP will fail.
Examples
- Local development node: https://localhost:9200
- FQDN: https://elasticsearch.example.com:9200
- Kubernetes service: https://prod-es-http.elastic.svc:9200
CA certificate
PEM-format CA certificate chain used by Stroom to verify TLS connections to the Elasticsearch HTTPS REST interface. This is usually your organisation’s root enterprise CA certificate. For development, you can provide a self-signed certificate.
Use authentication
(Optional) Tick this box if Elasticsearch requires authentication. This is enabled by default from Elasticsearch version 8.0.
API key ID
Required if Use authentication is checked. Specifies the Elasticsearch API key ID for a valid Elasticsearch user account.
This user requires at a minimum the following
privileges
:
Cluster privileges
- monitor
- manage_own_api_key
Index privileges
- all
API key secret
Required if Use authentication is checked.
Socket timeout (ms)
Number of milliseconds to wait for an Elasticsearch indexing or search REST call to complete. Set to -1 (the default) to wait indefinitely, or until Elasticsearch closes the connection.
Next page - Indexing data
2.1.3 - Indexing data
A typical workflow is for a Stroom pipeline to convert XML Event elements into the XML equivalent of JSON, complying with the schema http://www.w3.org/2005/xpath-functions, using a format identical to the output of the XML function xml-to-json().
Understanding JSON XML representation
In an Elasticsearch indexing pipeline translation, you model JSON documents in a compatible XML representation.
Common JSON primitives and examples of their XML equivalents are outlined below.
Arrays
Array of maps
<array key="users" xmlns="http://www.w3.org/2005/xpath-functions">
  <map>
    <string key="name">John Smith</string>
  </map>
</array>
Array of strings
<array key="userNames" xmlns="http://www.w3.org/2005/xpath-functions">
  <string>John Smith</string>
  <string>Jane Doe</string>
</array>
Maps and properties
<map key="user" xmlns="http://www.w3.org/2005/xpath-functions">
  <string key="name">John Smith</string>
  <boolean key="active">true</boolean>
  <number key="daysSinceLastLogin">42</number>
  <string key="loginDate">2022-12-25T01:59:01.000Z</string>
  <null key="emailAddress" />
  <array key="phoneNumbers">
    <string>1234567890</string>
  </array>
</map>
Note
It is recommended to insert a schema validation filter into your pipeline XML (with schema groupJSON), to make it easier to diagnose JSON conversion errors.
We will now explore how create an Elasticsearch index template, which specifies field mappings and settings for one or more indices.
Create an Elasticsearch index template
For information on what index and component templates are, consult the Elastic documentation .
When Elasticsearch first receives a document from Stroom targeting an index, whose name matches any of the index_patterns entries in the index template, Elasticsearch creates a new index using the settings and mappings properties from the template.
The following example creates a basic index template stroom-events-v1 in a local Elasticsearch cluster, with the following explicit field mappings:
StreamId– mandatory, data typelongorkeyword.EventId– mandatory, data typelongorkeyword.@timestamp– required if the index is to be part of a data stream (recommended).User– An object containing propertiesId,NameandActive, each with their own data type.Tags– An array of one or more strings.Message– Contains arbitrary content such as unstructured raw log data. Supports full-text search. Nested fieldwildcardsupports regexp queries .
Note
Elasticsearch does not have a dedicated array field mapping data type.
An Elasticsearch field may contain zero or more values by default.
See:
In Kibana Dev Tools, execute the following query:
PUT _index_template/stroom-events-v1
{
  "index_patterns": [
    "stroom-events-v1*" // Apply this template to index names matching this pattern.
  ],
  "data_stream": {}, // For time-series data. Recommended for event data.
  "template": {
    "settings": {
      "number_of_replicas": 1, // Replicas impact indexing throughput. This setting can be changed at any time.
      "number_of_shards": 10, // Consider the shard sizing guide: https://www.elastic.co/guide/en/elasticsearch/reference/current/size-your-shards.html#shard-size-recommendation
      "refresh_interval": "10s", // How often to refresh the index. For high-throughput indices, it's recommended to increase this from the default of 1s
      "lifecycle": {
        "name": "stroom_30d_retention_policy" // (Optional) Apply an ILM policy https://www.elastic.co/guide/en/elasticsearch/reference/current/set-up-lifecycle-policy.html
      }
    },
    "mappings": {
      "dynamic_templates": [],
      "properties": {
        "StreamId": { // Required.
          "type": "long"
        },
        "EventId": { // Required.
          "type": "long"
        },
        "@timestamp": { // Required if the index is part of a data stream.
          "type": "date"
        },
        "User": {
          "properties": {
            "Id": {
              "type": "keyword"
            },
            "Name": {
              "type": "keyword"
            },
            "Active": {
              "type": "boolean"
            }
          }
        },
        "Tags": {
          "type": "keyword"
        },
        "Message": {
          "type": "text",
          "fields": {
            "wildcard": {
              "type": "wildcard"
            }
          }
        }
      }
    }
  },
  "composed_of": [
    // Optional array of component template names.
  ]
}
Create an Elasticsearch indexing pipeline template
An Elasticsearch indexing pipeline is similar in structure to the built-in packaged Indexing template pipeline.
It typically consists of the following pipeline elements:


")


-
 XSLTFilter
contains the translation mapping
XSLTFilter
contains the translation mapping Eventsto JSONarray. -
 SchemaFilter
uses schema group
SchemaFilter
uses schema group JSON.
It is recommended to create a template Elasticsearch indexing pipeline, which can then be re-used.
Procedure
- Right-click on the

Template Pipelinesfolder in the Stroom Explorer pane (
). - Select:

- Enter the name
Indexing (Elasticsearch)and click . - Define the pipeline structure as above, and customise the following pipeline elements:
- Set the Split Filter
splitCountproperty to a sensible default value, based on the expected source XML element count (e.g.100). - Set the Schema Filter
schemaGroupproperty toJSON. - Set the Elastic Indexing Filter
clusterproperty to point to theElastic Clusterdocument you created earlier. - Set the Write Record Count filter
countReadproperty tofalse.
- Set the Split Filter
Now you have created a template indexing pipeline, it’s time to create a feed-specific pipeline that inherits this template.
Create an Elasticsearch indexing pipeline
Procedure
- Right-click on a folder (
) in the Stroom Explorer pane (
).
- Select:
- Enter a name for your pipeline and click .
- Click the
Inherit From button.
 - In the dialog that appears, select the template pipeline you created named
Indexing (Elasticsearch)and click . - Select the Elastic Indexing Filter pipeline element.
- Set its properties as per one of the examples below.
Example 1: Single index or data stream
This is the simplest use case and is suitable where you want to write to a single
data stream
(for time-series data) or index.
If your index template contains the property data_stream: {}, be sure to include a string field named @timestamp in the output JSON XML.
If targeting a data stream, you may choose to use Elasticsearch ILM to manage its lifecycle.
indexBaseName: stroom-events-v1
Example 2: Dynamic time-based data streams
In this example, Stroom creates data streams as needed, named according to the value of a particular JSON date field and date pattern. This is useful when you need to roll over data streams manually, such as maintaining older data on slower storage tiers.
For instance, you may have data spanning many years and want to have Stroom create a separate data stream for each year, such as stroom-events-v1-2020, stroom-events-v1-2021, stroom-events-v1-2022 and so on.
indexBaseName: stroom-events-v1
indexNameDateFieldName: @timestamp
indexNameDateFormat: -yyyy
Other options
There are other options available for the Elastic Indexing Filter. These are documented in the UI.
Create an indexing translation
In this example, let’s assume you have event data that looks like the following:
<?xml version="1.1" encoding="UTF-8"?>
<Events
xmlns="event-logging:3"
xmlns:xsi="http://www.w3.org/2001/XMLSchema-instance"
xsi:schemaLocation="event-logging:3 file://event-logging-v3.5.2.xsd"
Version="3.5.2">
<Event>
<EventTime>
<TimeCreated>2022-12-16T02:46:29.218Z</TimeCreated>
</EventTime>
<EventSource>
<System>
<Name>Nginx</Name>
<Environment>Development</Environment>
</System>
<Generator>Filebeat</Generator>
<Device>
<HostName>localhost</HostName>
</Device>
<User>
<Id>john.smith1</Id>
<Name>John Smith</Name>
<State>active</State>
</User>
</EventSource>
<EventDetail>
<View>
<Resource>
<URL>http://localhost:8080/index.html</URL>
</Resource>
<Data Name="Tags" Value="dev,testing" />
<Data
Name="Message"
Value="TLSv1.2 AES128-SHA 1.1.1.1 "Mozilla/5.0 (X11; Linux x86_64; rv:45.0) Gecko/20100101 Firefox/45.0"" />
</View>
</EventDetail>
</Event>
<Event>
...
</Event>
</Events>
We need to write an XSL transform (XSLT) to form a JSON document for each stream processed.
Each document must consist of an array element one or more map elements (each representing an Event), each with the necessary properties as per our index template.
See XSLT Conversion for instructions on how to write an XSLT.
The output from your XSLT should match the following:
<?xml version="1.1" encoding="UTF-8"?>
<array
    xmlns="http://www.w3.org/2005/xpath-functions"
    xmlns:xsi="http://www.w3.org/2001/XMLSchema-instance"
    xsi:schemaLocation="http://www.w3.org/2005/xpath-functions file://xpath-functions.xsd">
  <map>
    <number key="StreamId">3045516</number>
    <number key="EventId">1</number>
    <string key="@timestamp">2022-12-16T02:46:29.218Z</string>
    <map key="User">
      <string key="Id">john.smith1</string>
      <string key="Name">John Smith</string>
      <boolean key="Active">true</boolean>
    </map>
    <array key="Tags">
      <string>dev</string>
      <string>testing</string>
    </array>
    <string key="Message">TLSv1.2 AES128-SHA 1.1.1.1 "Mozilla/5.0 (X11; Linux x86_64; rv:45.0) Gecko/20100101 Firefox/45.0"</string>
  </map>
  <map>
    ...
  </map>
</array>
Assign the translation to the indexing pipeline
Having created your translation, you need to reference it in your indexing pipeline.
- Open the pipeline you created.
- Select the
Structuretab. - Select the
XSLTFilter
pipeline element.
- Double-click the
xsltproperty value cell. - Select the XSLT you created and click .
- Click
.
Step the pipeline
At this point, you will want to step the pipeline to ensure there are no errors and that output looks as expected.
Execute the pipeline
Create a pipeline processor and filter to run the pipeline against one or more feeds. Stroom will distribute processing tasks to enabled nodes and send documents to Elasticsearch for indexing.
You can monitor indexing status via your Elasticsearch monitoring tool of choice.
Detecting and handling errors
If any errors occur while a stream is being indexed, an Error stream is created, containing details of each failure. Error streams can be found under the Data tab of either the indexing pipeline or receiving Feed.
Note
You can filter the selected pipeline or feed to list only Error streams.
Click

then add a condition Type = Error.
Once you have addressed the underlying cause for a particular type of error (such as an incorrect field mapping), reprocess affected streams:
- Select any
Errorstreams relating for reprocessing, by clicking the relevant checkboxes in the stream list (top pane). - Click
 .
. - In the dialog that appears, check
Reprocess dataand click . - Click for any confirmation prompts that follow.
Stroom will re-send data from the selected Event streams to Elasticsearch for indexing.
Any existing documents matching the StreamId of the original Event stream are first deleted automatically to avoid duplication.
Tips and tricks
Use a common schema for your indices
An example is Elastic Common Schema (ECS) . This helps users understand the purpose of each field and to build cross-index queries simpler by using a set of common fields (such as a user ID).
With this in mind, it is important that common fields also have the same data type in each index. Component templates help make this easier and reduce the chance of error, by centralising the definition of common fields to a single component.
Use a version control system (such as git) to track index and component templates
This helps keep track of changes over time and can be an important resource for both administrators and users.
Rebuilding an index
Sometimes it is necessary to rebuild an index. This could be due to a change in field mapping, shard count or responding to a user feature request.
To rebuild an index:
- Drain the indexing pipeline by deactivating any processor filters and waiting for any running tasks to complete.
- Delete the index or data stream via the Elasticsearch API or Kibana.
- Make the required changes to the index template and/or XSL translation.
- Create a new processor filter either from scratch or using the
 button.
 - Activate the new processor filter.
Use a versioned index naming convention
As with the earlier example stroom-events-v1, a version number is appended to the name of the index or data stream.
If a new field is added, or some other change occurred requiring the index to be rebuilt, users would experience downtime.
This can be avoided by incrementing the version and performing the rebuild against a new index: stroom-events-v2.
Users could continue querying stroom-events-v1 until it is deleted.
This approach involves the following steps:
- Create a new Elasticsearch index template targeting the new index name (in this case,
stroom-events-v2). - Create a copy of the indexing pipeline, targeting the new index in the Elastic Indexing Filter.
- Create and activate a processing filter for the new pipeline.
- Once indexing is complete, update the Elastic Index document to point to
stroom-events-v2. Users will now be searching against the new index. - Drain any tasks for the original indexing pipeline and delete it.
- Delete index
stroom-events-v1using either the Elasticsearch API or Kibana.
If you created a data view in Kibana, you’ll also want to update this to point to the new index / data stream.
2.1.4 - Exploring Data in Kibana
Kibana is part of the Elastic Stack and provides users with an interactive, visual way to query, visualise and explore data in Elasticsearch.
It is highly customisable and provides users and teams with tools to create and share dashboards, searches, reports and other content.
Once data has been indexed by Stroom into Elasticsearch, it can be explored in Kibana. You will first need to create a *data view* in order to query your indices.
Why use Kibana?
There are several use cases that benefit from Kibana:
- Convenient and powerful drag-and-drop charts and other visualisation types using Kibana Lens. Much more performant and easier to customise than built-in Stroom dashboard visualisations.
- Field statistics and value summaries with Kibana Discover. Great for doing initial audit data survey.
- Geospatial analysis and visualisation.
- Search field auto-completion.
- Runtime fields . Good for data exploration, at the cost of performance.
2.2 - Lucene Indexes
Stroom uses Apache Lucene for its built-in indexing solution. Index documents are stored in a Volume .
TODO
Complete this page.Field configuration
Field Types
Id- Treated as aLong.Boolean- True/False values.Integer- Whole numbers from -2,147,483,648 to 2,147,483,647.Long- Whole numbers from -9,223,372,036,854,775,808 to 9,223,372,036,854,775,807.Float- Fractional numbers. Sufficient for storing 6 to 7 decimal digits.Double- Fractional numbers. Sufficient for storing 15 decimal digits.Date- Date and time values.Text- Text data.Number- An alias forLong.
Stored fields
If a field is Stored then it means the complete field value will be stored in the index. This means the value can be retrieved from the index when building search results rather than using the slower Search Extraction process. Storing field values comes at the cost of hight storage requirements for the index. If storage space is not an issue then storing all fields that you want to return in search results is the optimum.
Indexed fields
An Indexed field is one that will be processed by Lucene so that the field can be queried. How the field is indexed will depend on the Field type and the Analyser used.
If you have fields that you do not want to be able to filter (i.e. that you won’t use as a query term) then you can include them as non-Indexed fields. Including a non-indexed field means it will be available for the user to select in the Dashboard table. A non-indexed field would either need to be Stored in the index or added via Search Extraction to be available in the search results.
Positions
If Positions is selected then Lucene will store the positions of all the field terms in the document.
Analyser types
The Analyser determines how Lucene reads the fields value and extracts tokens from it. The choice of Analyser will depend on the date in the field and how you want to search it.
Keyword- Treats the whole field value as one token. Useful for things like IDs and post codes. Supports the Case Sensitivity setting.Alpha- Tokenises on any non-letter characters, e.g.one1 two2 three 3=>onetwothree. Strips non-letter characters. Supports the Case Sensitivity setting.Numeric-Alpha numeric- Tokenises on any non-letter/digit characters, e.g.one1 two2 three 3=>one1two2three3. Supports the Case Sensitivity setting.Whitespace- Tokenises only on white space. Not affected by the Case Sensitivity setting, case sensitive.Stop words- Tokenises bases on non-letter characters and removes Stop Words, e.g.and. Not affected by the Case Sensitivity setting. Case insensitive.Standard- The most common analyser. Tokenises the value on spaces and punctuation but recognises URLs and email addresses. Removes Stop Words, e.g.and. Not affected by the Case Sensitivity setting. Case insensitive. e.g.Find Stroom at github.com/stroom=>FindStroomatgithub.com/stroom.
Stop words
Some of the Analysers use a set of stop words for the tokenisers. This is the list of stop words that will not be indexed.
a, an, and, are, as, at, be, but, by, for, if, in, into, is, it, no, not, of, on, or, such, that, the, their, then, there, these, they, this, to, was, will, with
Case sensitivity
Some of the Analyser types support case (in)sensitivity.
For example if the Analyser supports it the value TWO two would either be tokenised as TWO two or two two.
2.3 - Solr Integration
TODO
Complete this section.3 - Content Naming Conventions
Stroom has been in use by GCHQ for many years and is used to process logs from a large number of different systems. This sections aims to provide some guidelines on how to name and organise your content, e.g. Feeds, XSLTs, Pipelines, Folders, etc. These are not hard rules and you do not have to follow them, however it may help when it comes to sharing content.
TODO
Complete this4 - Concepts
4.1 - Streams
Streams can either be created when data is directly POSTed in to Stroom or during the proxy aggregation process. When data is directly POSTed to Stroom the content of the POST will be stored as one Stream. With proxy aggregation multiple files in the proxy repository will/can be aggregated together into a single Stream.
Anatomy of a Stream
A Stream is made up of a number of parts of which the raw or cooked data is just one. In addition to the data the Stream can contain a number of other child stream types, e.g. Context and Meta Data.
The hierarchy of a stream is as follows:
- Stream nnn
- Part [1 to *]
- Data [1-1]
- Context [0-1]
- Meta Data [0-1]
- Part [1 to *]
Although all streams conform to the above hierarchy there are three main types of Stream that are used in Stroom:
- Non-segmented Stream - Raw events, Raw Reference
- Segmented Stream - Events, Reference
- Segmented Error Stream - Error
Segmented means that the data has been demarcated into segments or records.
Child Stream Types
Data
This is the actual data of the stream, e.g. the XML events, raw CSV, JSON, etc.
Context
This is additional contextual data that can be sent with the data. Context data can be used for reference data lookups.
Meta Data
This is the data about the Stream (e.g. the feed name, receipt time, user agent, etc.). This meta data either comes from the HTTP headers when the data was POSTed to Stroom or is added by Stroom or Stroom-Proxy on receipt/processing.
Non-Segmented Stream
The following is a representation of a non-segmented stream with three parts, each with Meta Data and Context child streams.

Raw Events and Raw Reference streams contain non-segmented data, e.g. a large batch of CSV, JSON, XML, etc. data. There is no notion of a record/event/segment in the data, it is simply data in any form (including malformed data) that is yet to be processed and demarcated into records/events, for example using a Data Splitter or an XML parser.
The Stream may be single-part or multi-part depending on how it is received. If it is the product of proxy aggregation then it is likely to be multi-part. Each part will have its own context and meta data child streams, if applicable.
Segmented Stream
The following is a representation of a segmented stream that contains three records (i.e events) and the Meta Data.

Cooked Events and Reference data are forms of segmented data. The raw data has been parsed and split into records/events and the resulting data is stored in a way that allows Stroom to know where each record/event starts/ends. These streams only have a single part.
Error Stream

Error streams are similar to segmented Event/Reference streams in that they are single-part and have demarcated records (where each error/warning/info message is a record). Error streams do not have any Meta Data or Context child streams.
5 - Dashboards
5.1 - Elasticsearch
Searching using a Stroom dashboard
Searching an Elasticsearch index (or data stream) using a Stroom dashboard is conceptually similar to the process described in Dashboards.
Before you set the dashboard’s data source, you must first create an Elastic Index document to tell Stroom which index (or indices) you wish to query.
Create an Elastic Index document
- Right-click a folder in the Stroom Explorer pane (
).
- Select:
- Enter a name for the index document and click .
- Click
 next to the
 Cluster configurationfield label. - In the dialog that appears, select the Elastic Cluster document where the index exists, and click .
- Enter the name of an index or data stream in
Index name or pattern. Data view (formerly known as index pattern) syntax is supported, which enables you to query multiple indices or data streams at once. For example:stroom-events-v1. - (Optional) Set
Search slices, which is the number of parallel workers that will query the index. For very large indices, increasing this value up to and including the number of shards can increase scroll performance, which will allow you to download results faster. - (Optional) Set
Search scroll size, which specifies the number of documents to return in each search response. Greater values generally increase efficiency. By default, Elasticsearch limits this number to10,000. - Click
Test Connection. A dialog will appear with the result, which will stateConnection Successif the connection was successful and the index pattern matched one or more indices. - Click
.
Set the Elastic Index document as the dashboard data source
- Open or create a dashboard.
- Click
 in the
 Querypanel. - Click
next to the
Data Sourcefield label. - Select the Elastic Index document you created and click .
- Configure the query expression as explained in Dashboards. Note the tips for particular Elasticsearch field mapping data types.
- Configure the table.
Query expression tips
Certain Elasticsearch field mapping types support special syntax when used in a Stroom dashboard query expression.
To identify the field mapping type for a particular field:
- Click
in the
Querypanel to add a new expression item. - Select the Elasticsearch field name in the drop-down list.
- Note the blue data type indicator to the far right of the row.
Common examples are:
keyword,textandnumber.
After you identify the field mapping type, move the mouse cursor over the mapping type indicator. A tooltip appears, explaining various types of queries you can perform against that particular field’s type.
Searching multiple indices
Using data view (index pattern) syntax, you can create powerful dashboards that query multiple indices at a time.
An example of this is where you have multiple indices covering different types of email systems.
Let’s assume these indices are named: stroom-exchange-v1, stroom-domino-v1 and stroom-mailu-v1.
There is a common set of fields across all three indices: @timestamp, Subject, Sender and Recipient.
You want to allow search across all indices at once, in effect creating a unified email dashboard.
You can achieve this by creating an Elastic Index document called (for example) Elastic-Email-Combined and setting the property Index name or pattern to: stroom-exchange-v1,stroom-domino-v1,stroom-mailu-v1.
Click
and re-open the dashboard.
You’ll notice that the available fields are a union of the fields across all three indices.
You can now search by any of these - in particular, the fields common to all three.
5.2 - Search Extraction
When indexing data it is possible to store (see Stored Fields all data in the index. This comes with a storage cost as the data is then held in two places; the event; and the index document.
Stroom has the capability of doing Search Extraction at query time. This involves combining the data stored in the index document with data extracted using a search extraction pipeline. Extracting data in this way is slower but reduces the data stored in the index, so it is a trade off between performance and storage space consumed.
Search Extraction relies on the StreamId and EventId being stored in the Index. Stroom can then used these two fields to locate the event in the stream store and process it with the search extraction pipeline.
TODO
Add more detail5.3 - Dashboard Expressions
Expressions can be used to manipulate data on Stroom Dashboards.
Each function has a name, and some have additional aliases.
In some cases, functions can be nested. The return value for some functions being used as the arguments for other functions.
The arguments to functions can either be other functions, literal values, or they can refer to fields on the input data using the field reference ${val} syntax.
5.3.1 - Aggregate Functions
Aggregate functions require that the dashboard columns without aggregate functions have a grouping level applied. The aggregate function will then be evaluated against the values in the group.
Average
Takes an average value of the arguments
average(arg)
mean(arg)
Examples
average(${val})
${val} = [10, 20, 30, 40]
> 25
mean(${val})
${val} = [10, 20, 30, 40]
> 25
Count
Counts the number of records that are passed through it. Doesn’t take any notice of the values of any fields.
count()
Example
Supplying 3 values...

count()
> 3
Count Groups
This is used to count the number of unique values where there are multiple group levels. For Example, a data set grouped as follows
- Group by Name
- Group by Type
A groupCount could be used to count the number of distinct values of ’type’ for each value of ’name'
Count Unique
This is used to count the number of unique values passed to the function where grouping is used to aggregate values in other columns. For Example, a data set grouped as follows
- Group by Name
- Group by Type
countUnique() could be used to count the number of distinct values of ’type’ for each value of ’name'
Example
countUnique(${val})
${val} = ['bill', 'bob', 'fred', 'bill']
> 3
Distinct
Concatenates all distinct (unique) values together into a single string.
Works in the same way as joining() except that it discards duplicate values.
Values are concatenated in the order that they are given to the function.
If a delimiter is supplied then the delimiter is placed between each concatenated string.
If a limit is supplied then it will only concatenate up to limit values.
distinct(values)
distinct(values, delimiter)
distinct(values, delimiter, limit)
Examples
distinct(${val}, ', ')
${val} = ['bill', 'bill', 'bob', 'fred', 'bill']
> 'bill, bob, fred'
distinct(${val}, '|', 2)
${val} = ['bill', 'bill', 'bob', 'fred', 'bill']
> 'bill|bob'
See Also
Selection Functions that work in a similar way to distinct().
Joining
Concatenates all values together into a single string.
Works in the same way as distinct() except that duplicate values are included.
Values are concatenated in the order that they are given to the function.
If a delimiter is supplied then the delimiter is placed between each concatenated string.
If a limit is supplied then it will only concatenate up to limit values.
joining(values)
joining(values, delimiter)
joining(values, delimiter, limit)
Example
joining(${val}, ', ')
${val} = ['bill', 'bob', 'fred', 'bill']
> 'bill, bob, fred, bill'
See Also
Selection Functions that work in a similar way to joining().
Max
Determines the maximum value given in the args.
max(arg)
Examples
max(${val})
${val} = [100, 30, 45, 109]
> 109
# They can be nested
max(max(${val}), 40, 67, 89)
${val} = [20, 1002]
> 1002
Min
Determines the minimum value given in the args.
min(arg)
Examples
min(${val})
${val} = [100, 30, 45, 109]
> 30
# They can be nested
min(max(${val}), 40, 67, 89)
${val} = [20, 1002]
> 20
Standard Deviation
Calculate the standard deviation for a set of input values.
stDev(arg)
Examples
round(stDev(${val}))
${val} = [600, 470, 170, 430, 300]
> 147
Sum
Sums all the arguments together
sum(arg)
Examples
sum(${val})
${val} = [89, 12, 3, 45]
> 149
Variance
Calculate the variance of a set of input values.
variance(arg)
Examples
variance(${val})
${val} = [600, 470, 170, 430, 300]
> 21704
5.3.2 - Cast Functions
To Boolean
Attempts to convert the passed value to a boolean data type.
toBoolean(arg1)
Examples:
toBoolean(1)
> true
toBoolean(0)
> false
toBoolean('true')
> true
toBoolean('false')
> false
To Double
Attempts to convert the passed value to a double data type.
toDouble(arg1)
Examples:
toDouble('1.2')
> 1.2
To Integer
Attempts to convert the passed value to a integer data type.
toInteger(arg1)
Examples:
toInteger('1')
> 1
To Long
Attempts to convert the passed value to a long data type.
toLong(arg1)
Examples:
toLong('1')
> 1
To String
Attempts to convert the passed value to a string data type.
toString(arg1)
Examples:
toString(1.2)
> '1.2'
5.3.3 - Date Functions
Parse Date
Parse a date and return a long number of milliseconds since the epoch.
parseDate(aString)
parseDate(aString, pattern)
parseDate(aString, pattern, timeZone)
Example
parseDate('2014 02 22', 'yyyy MM dd', '+0400')
> 1393012800000
Format Date
Format a date supplied as milliseconds since the epoch.
formatDate(aLong)
formatDate(aLong, pattern)
formatDate(aLong, pattern, timeZone)
Example
formatDate(1393071132888, 'yyyy MM dd', '+1200')
> '2014 02 23'
Ceiling Year/Month/Day/Hour/Minute/Second
ceilingYear(args...)
ceilingMonth(args...)
ceilingDay(args...)
ceilingHour(args...)
ceilingMinute(args...)
ceilingSecond(args...)
Examples
ceilingSecond("2014-02-22T12:12:12.888Z"
> "2014-02-22T12:12:13.000Z"
ceilingMinute("2014-02-22T12:12:12.888Z"
> "2014-02-22T12:13:00.000Z"
ceilingHour("2014-02-22T12:12:12.888Z"
> "2014-02-22T13:00:00.000Z"
ceilingDay("2014-02-22T12:12:12.888Z"
> "2014-02-23T00:00:00.000Z"
ceilingMonth("2014-02-22T12:12:12.888Z"
> "2014-03-01T00:00:00.000Z"
ceilingYear("2014-02-22T12:12:12.888Z"
> "2015-01-01T00:00:00.000Z"
Floor Year/Month/Day/Hour/Minute/Second
floorYear(args...)
floorMonth(args...)
floorDay(args...)
floorHour(args...)
floorMinute(args...)
floorSecond(args...)
Examples
floorSecond("2014-02-22T12:12:12.888Z"
> "2014-02-22T12:12:12.000Z"
floorMinute("2014-02-22T12:12:12.888Z"
> "2014-02-22T12:12:00.000Z"
floorHour("2014-02-22T12:12:12.888Z"
> 2014-02-22T12:00:00.000Z"
floorDay("2014-02-22T12:12:12.888Z"
> "2014-02-22T00:00:00.000Z"
floorMonth("2014-02-22T12:12:12.888Z"
> "2014-02-01T00:00:00.000Z"
floorYear("2014-02-22T12:12:12.888Z"
> "2014-01-01T00:00:00.000Z"
Round Year/Month/Day/Hour/Minute/Second
roundYear(args...)
roundMonth(args...)
roundDay(args...)
roundHour(args...)
roundMinute(args...)
roundSecond(args...)
Examples
roundSecond("2014-02-22T12:12:12.888Z")
> "2014-02-22T12:12:13.000Z"
roundMinute("2014-02-22T12:12:12.888Z")
> "2014-02-22T12:12:00.000Z"
roundHour("2014-02-22T12:12:12.888Z"
> "2014-02-22T12:00:00.000Z"
roundDay("2014-02-22T12:12:12.888Z"
> "2014-02-23T00:00:00.000Z"
roundMonth("2014-02-22T12:12:12.888Z"
> "2014-03-01T00:00:00.000Z"
roundYear("2014-02-22T12:12:12.888Z"
> "2014-01-01T00:00:00.000Z"
5.3.4 - Link Functions
Annotation
A helper function to make forming links to annotations easier than using Link. The Annotation function allows you to create a link to open the Annotation editor, either to view an existing annotation or to begin creating one with pre-populated values.
annotation(text, annotationId)
annotation(text, annotationId, [streamId, eventId, title, subject, status, assignedTo, comment])
If you provide just the text and an annotationId then it will produce a link that opens an existing annotation with the supplied ID in the Annotation Edit dialog.
Example
annotation('Open annotation', ${annotation:Id})
> [Open annotation](?annotationId=1234){annotation}
annotation('Create annotation', '', ${StreamId}, ${EventId})
> [Create annotation](?annotationId=&streamId=1234&eventId=45){annotation}
annotation('Escalate', '', ${StreamId}, ${EventId}, 'Escalation', 'Triage required')
> [Escalate](?annotationId=&streamId=1234&eventId=45&title=Escalation&subject=Triage%20required){annotation}
If you don’t supply an annotationId then the link will open the Annotation Edit dialog pre-populated with the optional arguments so that an annotation can be created.
If the annotationId is not provided then you must provide a streamId and an eventId.
If you don’t need to pre-populate a value then you can use '' or null() instead.
Example
annotation('Create suspect event annotation', null(), 123, 456, 'Suspect Event', null(), 'assigned', 'jbloggs')
> [Create suspect event annotation](?streamId=123&eventId=456&title=Suspect%20Event&assignedTo=jbloggs){annotation}
Dashboard
A helper function to make forming links to dashboards easier than using Link.
dashboard(text, uuid)
dashboard(text, uuid, params)
Example
dashboard('Click Here','e177cf16-da6c-4c7d-a19c-09a201f5a2da')
> [Click Here](?uuid=e177cf16-da6c-4c7d-a19c-09a201f5a2da){dashboard}
dashboard('Click Here','e177cf16-da6c-4c7d-a19c-09a201f5a2da', 'userId=user1')
> [Click Here](?uuid=e177cf16-da6c-4c7d-a19c-09a201f5a2da¶ms=userId%3Duser1){dashboard}
Data
Creates a clickable link to open a sub-set of a source of data (i.e. part of a stream) for viewing.
The data can either be opened in a popup dialog (dialog) or in another stroom tab (tab).
It can also be display in preview form (with formatting and syntax highlighting) or unaltered source form.
data(text, id, partNo, [recordNo, lineFrom, colFrom, lineTo, colTo, viewType, displayType])
Stroom deals in two main types of stream, segmented and non-segmented (see Streams).
Data in a non-segmented (i.e. raw) stream is identified by an id, a partNo and optionally line and column positions to define the sub-set of that stream part to display.
Data in a segmented (i.e. cooked) stream is identified by an id, a recordNo and optionally line and column positions to define the sub-set of that record (i.e. event) within that stream.
The line and column positions will define a highlight block of text within the part/record.
Arguments:
text- The link text that will be displayed in the table.id- The stream ID.partNo- The part number of the stream (one based). Always1for segmented (cooked) streams.recordNo- The record number within a segmented stream (optional). Not applicable for non-segmented streams so usenull()instead.lineFrom- The line number of the start of the sub-set of data (optional, one based).colFrom- The column number of the start of the sub-set of data (optional, one based).lineTo- The line number of the end of the sub-set of data (optional, one based).colTo- The column number of the end of the sub-set of data (optional, one based).viewType- The type of view of the data (optional, defaults topreview):preview: Display the data as a formatted preview of a limited portion of the data.source: Display the un-formatted data in its original form with the ability to navigate around all of the data source.
displayType- The way of displaying the data (optional, defaults todialog):dialog: Open as a modal popup dialog.tab: Open as a top level tab within the Stroom browser tab.
data('Quick View', ${StreamId}, 1)
> [Quick View]?id=1234&&partNo=1)
Example of non-segmented raw data section, viewed un-formatted in a stroom tab:
data('View Raw', ${StreamId}, ${partNo}, null(), 5, 1, 5, 342, 'source', 'tab')
Example of a single record (event) from a segmented stream, viewed formatted in a popup dialog:
data('View Cooked', ${StreamId}, 1, ${eventId})
Example of a single record (event) from a segmented stream, viewed formatted in a stroom tab:
data('View Cooked', ${StreamId}, 1, ${eventId}, null(), null(), null(), null(), 'preview', 'tab')
Note
To make full use of the data() function foe viewing raw data, you need to use the stroom:source() XSLT Function to decorate an event with the details of the source location it derived from.
Link
Create a string that represents a hyperlink for display in a dashboard table.
link(url)
link(text, url)
link(text, url, type)
Example
link('http://www.somehost.com/somepath')
> [http://www.somehost.com/somepath](http://www.somehost.com/somepath)
link('Click Here','http://www.somehost.com/somepath')
> [Click Here](http://www.somehost.com/somepath)
link('Click Here','http://www.somehost.com/somepath', 'dialog')
> [Click Here](http://www.somehost.com/somepath){dialog}
link('Click Here','http://www.somehost.com/somepath', 'dialog|Dialog Title')
> [Click Here](http://www.somehost.com/somepath){dialog|Dialog Title}
Type can be one of:
dialog: Display the content of the link URL within a stroom popup dialog.tab: Display the content of the link URL within a stroom tab.browser: Display the content of the link URL within a new browser tab.dashboard: Used to launch a stroom dashboard internally with parameters in the URL.
If you wish to override the default title or URL of the target link in either a tab or dialog you can. Both dialog and tab types allow titles to be specified after a |, e.g. dialog|My Title.
Stepping
Open the Stepping tab for the requested data source.
stepping(text, id)
stepping(text, id, partNo)
stepping(text, id, partNo, recordNo)
Example
stepping('Click here to step',${StreamId})
> [Click here to step](?id=1)
5.3.5 - Logic Funtions
Equals
Evaluates if arg1 is equal to arg2
arg1 = arg2
equals(arg1, arg2)
Examples
'foo' = 'bar'
> false
'foo' = 'foo'
> true
51 = 50
> false
50 = 50
> true

equals('foo', 'bar')
> false
equals('foo', 'foo')
> true
equals(51, 50)
> false
equals(50, 50)
> true
Note that equals cannot be applied to null and error values, e.g. x=null() or x=err(). The isNull() and isError() functions must be used instead.
Greater Than
Evaluates if arg1 is greater than to arg2
arg1 > arg2
greaterThan(arg1, arg2)
Examples
51 > 50
> true
50 > 50
> false
49 > 50
> false

greaterThan(51, 50)
> true
greaterThan(50, 50)
> false
greaterThan(49, 50)
> false
Greater Than or Equal To
Evaluates if arg1 is greater than or equal to arg2
arg1 >= arg2
greaterThanOrEqualTo(arg1, arg2)
Examples
51 >= 50
> true
50 >= 50
> true
49 >= 50
> false

greaterThanOrEqualTo(51, 50)
> true
greaterThanOrEqualTo(50, 50)
> true
greaterThanOrEqualTo(49, 50)
> false
If
Evaluates the supplied boolean condition and returns one value if true or another if false
if(expression, trueReturnValue, falseReturnValue)
Examples
if(5 < 10, 'foo', 'bar')
> 'foo'
if(5 > 10, 'foo', 'bar')
> 'bar'
if(isNull(null()), 'foo', 'bar')
> 'foo'
Less Than
Evaluates if arg1 is less than to arg2
arg1 < arg2
lessThan(arg1, arg2)
Examples
51 < 50
> false
50 < 50
> false
49 < 50
> true

lessThan(51, 50)
> false
lessThan(50, 50)
> false
lessThan(49, 50)
> true
Less Than or Equal To
Evaluates if arg1 is less than or equal to arg2
arg1 <= arg2
lessThanOrEqualTo(arg1, arg2)
Examples
51 <= 50
> false
50 <= 50
> true
49 <= 50
> true

lessThanOrEqualTo(51, 50)
> false
lessThanOrEqualTo(50, 50)
> true
lessThanOrEqualTo(49, 50)
> true
Not
Inverts boolean values making true, false etc.
not(booleanValue)
Examples
not(5 > 10)
> true
not(5 = 5)
> false
not(false())
> true
5.3.6 - Mathematics Functions
Add
arg1 + arg2
Or reduce the args by successive addition
add(args...)
Examples
34 + 9
> 43
add(45, 6, 72)
> 123
Average
Takes an average value of the arguments
average(args...)
mean(args...)
Examples
average(10, 20, 30, 40)
> 25
mean(8.9, 24, 1.2, 1008)
> 260.525
Divide
Divides arg1 by arg2
arg1 / arg2
Or reduce the args by successive division
divide(args...)
Examples
42 / 7
> 6
divide(1000, 10, 5, 2)
> 10
divide(100, 4, 3)
> 8.33
Max
Determines the maximum value given in the args
max(args...)
Examples
max(100, 30, 45, 109)
> 109

# They can be nested
max(max(${val}), 40, 67, 89)
${val} = [20, 1002]
> 1002
Min
Determines the minimum value given in the args
min(args...)
Examples
min(100, 30, 45, 109)
> 30
They can be nested
min(max(${val}), 40, 67, 89)
${val} = [20, 1002]
> 20
Modulo
Determines the modulus of the dividend divided by the divisor.
modulo(dividend, divisor)
Examples
modulo(100, 30)
> 10
Multiply
Multiplies arg1 by arg2
arg1 * arg2
Or reduce the args by successive multiplication
multiply(args...)
Examples
4 * 5
> 20
multiply(4, 5, 2, 6)
> 240
Negate
Multiplies arg1 by -1
negate(arg1)
Examples
negate(80)
> -80
negate(23.33)
> -23.33
negate(-9.5)
> 9.5
Power
Raises arg1 to the power arg2
arg1 ^ arg2
Or reduce the args by successive raising to the power
power(args...)
Examples
4 ^ 3
> 64
power(2, 4, 3)
> 4096
Random
Generates a random number between 0.0 and 1.0
random()
Examples
random()
> 0.78
random()
> 0.89
...you get the idea
Subtract
arg1 - arg2
Or reduce the args by successive subtraction
subtract(args...)
Examples
29 - 8
> 21
subtract(100, 20, 34, 2)
> 44
Sum
Sums all the arguments together
sum(args...)
Examples
sum(89, 12, 3, 45)
> 149
5.3.7 - Rounding Functions
These functions require a value, and an optional decimal places. If the decimal places are not given it will give you nearest whole number.
Ceiling
ceiling(value, decimalPlaces<optional>)
Examples
ceiling(8.4234)
> 9
ceiling(4.56, 1)
> 4.6
ceiling(1.22345, 3)
> 1.223
Floor
floor(value, decimalPlaces<optional>)
Examples
floor(8.4234)
> 8
floor(4.56, 1)
> 4.5
floor(1.2237, 3)
> 1.223
Round
round(value, decimalPlaces<optional>)
Examples
round(8.4234)
> 8
round(4.56, 1)
> 4.6
round(1.2237, 3)
> 1.224
5.3.8 - Selection Functions
Selection functions are a form of aggregate function operating on grouped data. They select a sub-set of the child values.
See Also
Aggregate functions joining() and distinct() that work in a similar way to these selection functions.
Any
Selects the first value found in the group that is not null() or err().
If no explicit ordering is set then the value selected is indeterminate.
any(${val})
Examples
any(${val})
${val} = [10, 20, 30, 40]
> 10
Bottom
Selects the bottom N values and returns them as a delimited string in the order they are read.
bottom(${val}, delimiter, limit)
Example
bottom(${val}, ', ', 2)
${val} = [10, 20, 30, 40]
> '30, 40'
First
Selects the first value found in the group even if it is null() or err().
If no explicit ordering is set then the value selected is indeterminate.
first(${val})
Example
first(${val})
${val} = [10, 20, 30, 40]
> 10
Last
Selects the last value found in the group even if it is null() or err().
If no explicit ordering is set then the value selected is indeterminate.
last(${val})
Example
last(${val})
${val} = [10, 20, 30, 40]
> 40
Nth
Selects the Nth value in a set of grouped values. If there is no explicit ordering on the field selected then the value returned is indeterminate.
nth(${val}, position)
Example
nth(${val}, 2)
${val} = [20, 40, 30, 10]
> 40
Top
Selects the top N values and returns them as a delimited string in the order they are read.
top(${val}, delimiter, limit)
Example
top(${val}, ', ', 2)
${val} = [10, 20, 30, 40]
> '10, 20'
5.3.9 - String Functions
Concat
Appends all the arguments end to end in a single string
concat(args...)
Example
concat('this ', 'is ', 'how ', 'it ', 'works')
> 'this is how it works'
Current User
Returns the username of the user running the query.
currentUser()
Example
currentUser()
> 'jbloggs'
Decode
The arguments are split into 3 parts
- The input value to test
- Pairs of regex matchers with their respective output value
- A default result, if the input doesn’t match any of the regexes
decode(input, test1, result1, test2, result2, ... testN, resultN, otherwise)
It works much like a Java Switch/Case statement
Example
decode(${val}, 'red', 'rgb(255, 0, 0)', 'green', 'rgb(0, 255, 0)', 'blue', 'rgb(0, 0, 255)', 'rgb(255, 255, 255)')
${val}='blue'
> rgb(0, 0, 255)
${val}='green'
> rgb(0, 255, 0)
${val}='brown'
> rgb(255, 255, 255) // falls back to the 'otherwise' value
in Java, this would be equivalent to
String decode(value) {
    switch(value) {
        case "red":
            return "rgb(255, 0, 0)"
        case "green":
            return "rgb(0, 255, 0)"
        case "blue":
            return "rgb(0, 0, 255)"
        default:
            return "rgb(255, 255, 255)"
    }
}
decode('red')
> 'rgb(255, 0, 0)'
DecodeUrl
Decodes a URL
decodeUrl('userId%3Duser1')
> userId=user1
EncodeUrl
Encodes a URL
encodeUrl('userId=user1')
> userId%3Duser1
Exclude
If the supplied string matches one of the supplied match strings then return null, otherwise return the supplied string
exclude(aString, match...)
Example
exclude('hello', 'hello', 'hi')
> null
exclude('hi', 'hello', 'hi')
> null
exclude('bye', 'hello', 'hi')
> 'bye'
Hash
Cryptographically hashes a string
hash(value)
hash(value, algorithm)
hash(value, algorithm, salt)
Example
hash(${val}, 'SHA-512', 'mysalt')
> A hashed result...
If not specified the hash() function will use the SHA-256 algorithm. Supported algorithms are determined by Java runtime environment.
Include
If the supplied string matches one of the supplied match strings then return it, otherwise return null
include(aString, match...)
Example
include('hello', 'hello', 'hi')
> 'hello'
include('hi', 'hello', 'hi')
> 'hi'
include('bye', 'hello', 'hi')
> null
Index Of
Finds the first position of the second string within the first
indexOf(firstString, secondString)
Example
indexOf('aa-bb-cc', '-')
> 2
Last Index Of
Finds the last position of the second string within the first
lastIndexOf(firstString, secondString)
Example
lastIndexOf('aa-bb-cc', '-')
> 5
Lower Case
Converts the string to lower case
lowerCase(aString)
Example
lowerCase('Hello DeVeLoPER')
> 'hello developer'
Match
Test an input string using a regular expression to see if it matches
match(input, regex)
Example
match('this', 'this')
> true
match('this', 'that')
> false
Query Param
Returns the value of the requested query parameter.
queryParam(paramKey)
Examples
queryParam('user')
> 'jbloggs'
Query Params
Returns all query parameters as a space delimited string.
queryParams()
Examples
queryParams()
> 'user=jbloggs site=HQ'
Replace
Perform text replacement on an input string using a regular expression to match part (or all) of the input string and a replacement string to insert in place of the matched part
replace(input, regex, replacement)
Example
replace('this', 'is', 'at')
> 'that'
String Length
Takes the length of a string
stringLength(aString)
Example
stringLength('hello')
> 5
Substring
Take a substring based on start/end index of letters
substring(aString, startIndex, endIndex)
Example
substring('this', 1, 2)
> 'h'
Substring After
Get the substring from the first string that occurs after the presence of the second string
substringAfter(firstString, secondString)
Example
substringAfter('aa-bb', '-')
> 'bb'
Substring Before
Get the substring from the first string that occurs before the presence of the second string
substringBefore(firstString, secondString)
Example
substringBefore('aa-bb', '-')
> 'aa'
Upper Case
Converts the string to upper case
upperCase(aString)
Example
upperCase('Hello DeVeLoPER')
> 'HELLO DEVELOPER'
5.3.10 - Type Checking Functions
Is Boolean
Checks if the passed value is a boolean data type.
isBoolean(arg1)
Examples:
isBoolean(toBoolean('true'))
> true
Is Double
Checks if the passed value is a double data type.
isDouble(arg1)
Examples:
isDouble(toDouble('1.2'))
> true
Is Error
Checks if the passed value is an error caused by an invalid evaluation of an expression on passed values, e.g. some values passed to an expression could result in a divide by 0 error.
Note that this method must be used to check for error as error equality using x=err() is not supported.
isError(arg1)
Examples:
isError(toLong('1'))
> false
isError(err())
> true
Is Integer
Checks if the passed value is an integer data type.
isInteger(arg1)
Examples:
isInteger(toInteger('1'))
> true
Is Long
Checks if the passed value is a long data type.
isLong(arg1)
Examples:
isLong(toLong('1'))
> true
Is Null
Checks if the passed value is null.
Note that this method must be used to check for null as null equality using x=null() is not supported.
isNull(arg1)
Examples:
isNull(toLong('1'))
> false
isNull(null())
> true
Is Number
Checks if the passed value is a numeric data type.
isNumber(arg1)
Examples:
isNumber(toLong('1'))
> true
Is String
Checks if the passed value is a string data type.
isString(arg1)
Examples:
isString(toString(1.2))
> true
Is Value
Checks if the passed value is a value data type, e.g. not null or error.
isValue(arg1)
Examples:
isValue(toLong('1'))
> true
isValue(null())
> false
Type Of
Returns the data type of the passed value as a string.
typeOf(arg1)
Examples:
typeOf('abc')
> string
typeOf(toInteger(123))
> integer
typeOf(err())
> error
typeOf(null())
> null
typeOf(toBoolean('false'))
> false
5.3.11 - URI Functions
Fields containing a Uniform Resource Identifier (URI) in string form can queried to extract the URI’s individual components of authority, fragment, host, path, port, query, scheme, schemeSpecificPart and userInfo. See either RFC 2306: Uniform Resource Identifiers (URI): Generic Syntax or Java’s java.net.URI Class for details regarding the components. If any component is not present within the passed URI, then an empty string is returned.
The extraction functions are
- extractAuthorityFromUri() - extract the Authority component
- extractFragmentFromUri() - extract the Fragment component
- extractHostFromUri() - extract the Host component
- extractPathFromUri() - extract the Path component
- extractPortFromUri() - extract the Port component
- extractQueryFromUri() - extract the Query component
- extractSchemeFromUri() - extract the Scheme component
- extractSchemeSpecificPartFromUri() - extract the Scheme specific part component
- extractUserInfoFromUri() - extract the UserInfo component
If the URI is http://foo:bar@w1.superman.com:8080/very/long/path.html?p1=v1&p2=v2#more-details the table below displays the extracted components
| Expression | Extraction |
|---|---|
| extractAuthorityFromUri(${URI}) | foo:bar@w1.superman.com:8080 |
| extractFragmentFromUri(${URI}) | more-details |
| extractHostFromUri(${URI}) | w1.superman.com |
| extractPathFromUri(${URI}) | /very/long/path.html |
| extractPortFromUri(${URI}) | 8080 |
| extractQueryFromUri(${URI}) | p1=v1&p2=v2 |
| extractSchemeFromUri(${URI}) | http |
| extractSchemeSpecificPartFromUri(${URI}) | //foo:bar@w1.superman.com:8080/very/long/path.html?p1=v1&p2=v2 |
| extractUserInfoFromUri(${URI}) | foo:bar |
extractAuthorityFromUri
Extracts the Authority component from a URI
extractAuthorityFromUri(uri)
Example
extractAuthorityFromUri('http://foo:bar@w1.superman.com:8080/very/long/path.html?p1=v1&p2=v2#more-details')
> 'foo:bar@w1.superman.com:8080'
extractFragmentFromUri
Extracts the Fragment component from a URI
extractFragmentFromUri(uri)
Example
extractFragmentFromUri('http://foo:bar@w1.superman.com:8080/very/long/path.html?p1=v1&p2=v2#more-details')
> 'more-details'
extractHostFromUri
Extracts the Host component from a URI
extractHostFromUri(uri)
Example
extractHostFromUri('http://foo:bar@w1.superman.com:8080/very/long/path.html?p1=v1&p2=v2#more-details')
> 'w1.superman.com'
extractPathFromUri
Extracts the Path component from a URI
extractPathFromUri(uri)
Example
extractPathFromUri('http://foo:bar@w1.superman.com:8080/very/long/path.html?p1=v1&p2=v2#more-details')
> '/very/long/path.html'
extractPortFromUri
Extracts the Port component from a URI
extractPortFromUri(uri)
Example
extractPortFromUri('http://foo:bar@w1.superman.com:8080/very/long/path.html?p1=v1&p2=v2#more-details')
> '8080'
extractQueryFromUri
Extracts the Query component from a URI
extractQueryFromUri(uri)
Example
extractQueryFromUri('http://foo:bar@w1.superman.com:8080/very/long/path.html?p1=v1&p2=v2#more-details')
> 'p1=v1&p2=v2'
extractSchemeFromUri
Extracts the Scheme component from a URI
extractSchemeFromUri(uri)
Example
extractSchemeFromUri('http://foo:bar@w1.superman.com:8080/very/long/path.html?p1=v1&p2=v2#more-details')
> 'http'
extractSchemeSpecificPartFromUri
Extracts the SchemeSpecificPart component from a URI
extractSchemeSpecificPartFromUri(uri)
Example
extractSchemeSpecificPartFromUri('http://foo:bar@w1.superman.com:8080/very/long/path.html?p1=v1&p2=v2#more-details')
> '//foo:bar@w1.superman.com:8080/very/long/path.html?p1=v1&p2=v2'
extractUserInfoFromUri
Extracts the UserInfo component from a URI
extractUserInfoFromUri(uri)
Example
extractUserInfoFromUri('http://foo:bar@w1.superman.com:8080/very/long/path.html?p1=v1&p2=v2#more-details')
> 'foo:bar'
5.3.12 - Value Functions
Err
Returns err
err()
False
Returns boolean false
false()
Null
Returns null
null()
True
Returns boolean true
true()
5.4 - Dictionaries
Creating
Right click on a folder in the explorer tree that you want to create a dictionary in. Choose ‘New/Dictionary’ from the popup menu:
TODO: Fix image
Call the dictionary something like ‘My Dictionary’ and click OK.
TODO: Fix image
Now just add any search terms you want to the newly created dictionary and click save.
TODO: Fix image
You can add multiple terms.
- Terms on separate lines act as if they are part of an ‘OR’ expression when used in a search.
- Terms on a single line separated by spaces act as if they are part of an ‘AND’ expression when used in a search.
Using
To perform a search using your dictionary, just choose the newly created dictionary as part of your search expression:
TODO: Fix image
5.5 - Direct URLs
It is possible to navigate directly to a specific Stroom dashboard using a direct URL. This can be useful when you have a dashboard that needs to be viewed by users that would otherwise not be using the Stroom user interface.
URL format
The format for the URL is as follows:
https://<HOST>/stroom/dashboard?type=Dashboard&uuid=<DASHBOARD UUID>[&title=<DASHBOARD TITLE>][¶ms=<DASHBOARD PARAMETERS>]
Example:
https://localhost/stroom/dashboard?type=Dashboard&uuid=c7c6b03c-5d47-4b8b-b84e-e4dfc6c84a09&title=My%20Dash¶ms=userId%3DFred%20Bloggs
Host and path
The host and path are typically https://<HOST>/stroom/dashboard where <HOST> is the hostname/IP for Stroom.
type
type is a required parameter and must always be Dashboard since we are opening a dashboard.
uuid
uuid is a required parameter where <DASHBOARD UUID> is the UUID for the dashboard you want a direct URL to, e.g. uuid=c7c6b03c-5d47-4b8b-b84e-e4dfc6c84a09
The UUID for the dashboard that you want to link to can be found by right clicking on the dashboard icon in the explorer tree and selecting Info.
The Info dialog will display something like this and the UUID can be copied from it:
DB ID: 4
UUID: c7c6b03c-5d47-4b8b-b84e-e4dfc6c84a09
Type: Dashboard
Name: Stroom Family App Events Dashboard
Created By: INTERNAL
Created On: 2018-12-10T06:33:03.275Z
Updated By: admin
Updated On: 2018-12-10T07:47:06.841Z
title (Optional)
title is an optional URL parameter where <DASHBOARD TITLE> allows the specification of a specific title for the opened dashboard instead of the default dashboard name.
The inclusion of ${name} in the title allows the default dashboard name to be used and appended with other values, e.g. 'title=${name}%20-%20' + param.name
params (Optional)
params is an optional URL parameter where <DASHBOARD PARAMETERS> includes any parameters that have been defined for the dashboard in any of the expressions, e.g. params=userId%3DFred%20Bloggs
Permissions
In order for as user to view a dashboard they will need the necessary permission on the various entities that make up the dashboard.
For a Lucene index query and associated table the following permissions will be required:
- Read permission on the Dashboard entity.
- Use permission on any Indexe entities being queried in the dashboard.
- Use permission on any Pipeline entities set as search extraction Pipelines in any of the dashboard’s tables.
- Use permission on any XSLT entities used by the above search extraction Pipeline entites.
- Use permission on any ancestor pipelines of any of the above search extraction Pipeline entites (if applicable).
- Use permission on any Feed entities that you want the user to be able to see data for.
For a SQL Statistics query and associated table the following permissions will be required:
- Read permission on the Dashboard entity.
- Use permission on the StatisticStore entity being queried.
For a visualisation the following permissions will be required:
- Read permission on any Visualiation entities used in the dashboard.
- Read permission on any Script entities used by the above Visualiation entities.
- Read permission on any Script entities used by the above Script entities.
5.6 - Queries
Dashboard queries are created with the query expression builder. The expression builder allows for complex boolean logic to be created across multiple index fields. The way in which different index fields may be queried depends on the type of data that the index field contains.
Date Time Fields
Time fields can be queried for times equal, greater than, greater than or equal, less than, less than or equal or between two times.
Times can be specified in two ways:
-
Absolute times
-
Relative times
Absolute Times
An absolute time is specified in ISO 8601 date time format, e.g. 2016-01-23T12:34:11.844Z
Relative Times
In addition to absolute times it is possible to specify times using expressions. Relative time expressions create a date time that is relative to the execution time of the query. Supported expressons are as follows:
-
now() - The current execution time of the query.
-
second() - The current execution time of the query rounded down to the nearest second.
-
minute() - The current execution time of the query rounded down to the nearest minute.
-
hour() - The current execution time of the query rounded down to the nearest hour.
-
day() - The current execution time of the query rounded down to the nearest day.
-
week() - The current execution time of the query rounded down to the first day of the week (Monday).
-
month() - The current execution time of the query rounded down to the start of the current month.
-
year() - The current execution time of the query rounded down to the start of the current year.
Adding/Subtracting Durations
With relative times it is possible to add or subtract durations so that queries can be constructed to provide for example, the last week of data, the last hour of data etc.
To add/subtract a duration from a query term the duration is simply appended after the relative time, e.g.
now() + 2d
Multiple durations can be combined in the expression, e.g.
now() + 2d - 10h
now() + 2w - 1d10h
Durations consist of a number and duration unit. Supported duration units are:
-
s - Seconds
-
m - Minutes
-
h - Hours
-
d - Days
-
w - Weeks
-
M - Months
-
y - Years
Using these durations a query to get the last weeks data could be as follows:
between now() - 1w and now()
Or midnight a week ago to midnight today:
between day() - 1w and day()
Or if you just wanted data for the week so far:
greater than week()
Or all data for the previous year:
between year() - 1y and year()
Or this year so far:
greater than year()
6 - Data Retention
By default Stroom will retain all the data it ingests and creates forever. It is likely that storage constraints/costs will mean that data needs to be deleted after a certain time. It is also likely that certain types of data may need to be kept for longer than other types.
Rules
Stroom allows for a set of data retention policy rules to be created to control at a fine grained level what data is deleted and what is retained.
The data retention rules are accessible by selecting Data Retention from the Tools menu. On first use the Rules tab of the Data Retention screen will show a single rule named Default Retain All Forever Rule. This is the implicit rule in stroom that retains all data and is always in play unless another rule overrides it. This rule cannot be edited, moved or removed.
Rule Precedence
Rules have a precedence, with a lower rule number being a higher priority.
When running the data retention job, Stroom will look at each stream held on the system and the retention policy of the first rule (starting from the lowest numbered rule) that matches that stream will apply.
One a matching rule is found all other rules with higher rule numbers (lower priority) are ignored.
For example if rule 1 says to retain streams from feed X-EVENTS for 10 years and rule 2 says to retain streams from feeds *-EVENTS for 1 year then rule 1 would apply to streams from feed X-EVENTS and they would be kept for 10 years, but rule 2 would apply to feed Y-EVENTS and they would only be kept for 1 year.
Rules are re-numbered as new rules are added/deleted/moved.
Creating a Rule
To create a rule do the following:
- Click the
icon to add a new rule.
- Edit the expression to define the data that the rule will match on.
- Provide a name for the rule to help describe what its purpose is.
- Set the retention period for data matching this rule, i.e Forever or a set time period.
The new rule will be added at the top of the list of rules, i.e. with the highest priority.
The
 and
and
 icons can be used to change the priority of the rule.
Rules can be enabled/disabled by clicking the checkbox next to the rule.
Changes to rules will not take effect until the
icon is clicked.
Rules can also be deleted (
 ) and copied (
).
) and copied (
).
Impact Summary
When you have a number of complex rules it can be difficult to determine what data will actually be deleted next time the Policy Based Data Retention job runs. To help with this, Stroom has the Impact Summary tab that acts as a dry run for the active rules. The impact summary provides a count of the number of streams that will be deleted broken down by rule, stream type and feed name. On large systems with lots of data or complex rules, this query may take a long time to run.
The impact summary operates on the current state of the rules on the Rules tab whether saved or un-saved. This allows you to make a change to the rules and test its impact before saving it.
7 - Data Splitter
Data Splitter was created to transform text into XML. The XML produced is basic but can be processed further with XSLT to form any desired XML output.
Data Splitter works by using regular expressions to match a region of content or tokenizers to split content. The whole match or match group can then be output or passed to other expressions to further divide the matched data.
The root <dataSplitter> element controls the way content is read and buffered from the source. It then passes this content on to one or more child expressions that attempt to match the content. The child expressions attempt to match content one at a time in the order they are specified until one matches. The matching expression then passes the content that it has matched to other elements that either emit XML or apply other expressions to the content matched by the parent.
This process of content supply, match, (supply, match)*, emit is best illustrated in a simple CSV example. Note that the elements and attributes used in all examples are explained in detail in the element reference.
7.1 - Simple CSV Example
The following CSV data will be split up into separate fields using Data Splitter.
01/01/2010,00:00:00,192.168.1.100,SOMEHOST.SOMEWHERE.COM,user1,logon,
01/01/2010,00:01:00,192.168.1.100,SOMEHOST.SOMEWHERE.COM,user1,create,c:\test.txt
01/01/2010,00:02:00,192.168.1.100,SOMEHOST.SOMEWHERE.COM,user1,logoff,
The first thing we need to do is match each record. Each record in a CSV file is delimited by a new line character. The following configuration will split the data into records using ‘\n’ as a delimiter:
<?xml version="1.0" encoding="UTF-8"?>
<dataSplitter
    xmlns="data-splitter:3"
    xmlns:xsi="http://www.w3.org/2001/XMLSchema-instance"
    xsi:schemaLocation="data-splitter:3 file://data-splitter-v3.0.xsd"
    version="3.0">

  <!-- Match each line using a new line character as the delimiter -->
  <split delimiter="\n"/>

</dataSplitter>
In the above example the ‘split’ tokenizer matches all of the supplied content up to the end of each line ready to pass each line of content on for further treatment.
We can now add a <group> element within <split> to take content matched by the tokenizer.
<?xml version="1.0" encoding="UTF-8"?>
<dataSplitter
    xmlns="data-splitter:3"
    xmlns:xsi="http://www.w3.org/2001/XMLSchema-instance"
    xsi:schemaLocation="data-splitter:3 file://data-splitter-v3.0.xsd"
    version="3.0">

  <!-- Match each line using a new line character as the delimiter -->
  <split delimiter="\n">

    <!-- Take the matched line (using group 1 ignores the delimiters,
    without this each match would include the new line character) -->
    <group value="$1">

    </group>
  </split>
</dataSplitter>
The <group> within the <split> chooses to take the content from the <split> without including the new line ‘\n’ delimiter by using match group 1, see expression match references for details.
01/01/2010,00:00:00,192.168.1.100,SOMEHOST.SOMEWHERE.COM,user1,logon,
The content selected by the <group> from its parent match can then be passed onto sub expressions for further matching:
<?xml version="1.0" encoding="UTF-8"?>
<dataSplitter
    xmlns="data-splitter:3"
    xmlns:xsi="http://www.w3.org/2001/XMLSchema-instance"
    xsi:schemaLocation="data-splitter:3 file://data-splitter-v3.0.xsd"
    version="3.0">

  <!-- Match each line using a new line character as the delimiter -->
  <split delimiter="\n">

    <!-- Take the matched line (using group 1 ignores the delimiters,
    without this each match would include the new line character) -->
    <group value="$1">

      <!-- Match each value separated by a comma as the delimiter -->
      <split delimiter=",">

      </split>
    </group>
  </split>
</dataSplitter>
In the above example the additional <split> element within the <group> will match the content provided by the group repeatedly until it has used all of the group content.
The content matched by the inner <split> element can be passed to a <data> element to emit XML content.
<?xml version="1.0" encoding="UTF-8"?>
<dataSplitter
    xmlns="data-splitter:3"
    xmlns:xsi="http://www.w3.org/2001/XMLSchema-instance"
    xsi:schemaLocation="data-splitter:3 file://data-splitter-v3.0.xsd"
    version="3.0">

  <!-- Match each line using a new line character as the delimiter -->
  <split delimiter="\n">

    <!-- Take the matched line (using group 1 ignores the delimiters,
    without this each match would include the new line character) -->
    <group value="$1">

      <!-- Match each value separated by a comma as the delimiter -->
      <split delimiter=",">

        <!-- Output the value from group 1 (as above using group 1
        ignores the delimiters, without this each value would include
        the comma) -->
        <data value="$1" />
      </split>
    </group>
  </split>
</dataSplitter>
In the above example each match from the inner <split> is made available to the inner <data> element that chooses to output content from match group 1, see expression match references for details.
The above configuration results in the following XML output for the whole input:
<?xml version="1.0" encoding="UTF-8"?>
<records
    xmlns="records:2"
    xmlns:xsi="http://www.w3.org/2001/XMLSchema-instance"
    xsi:schemaLocation="records:2 file://records-v2.0.xsd"
    version="3.0">
  <record>
    <data value="01/01/2010" />
    <data value="00:00:00" />
    <data value="192.168.1.100" />
    <data value="SOMEHOST.SOMEWHERE.COM" />
    <data value="user1" />
    <data value="logon" />
  </record>
  <record>
    <data value="01/01/2010" />
    <data value="00:01:00" />
    <data value="192.168.1.100" />
    <data value="SOMEHOST.SOMEWHERE.COM" />
    <data value="user1" />
    <data value="create" />
    <data value="c:\test.txt" />
  </record>
  <record>
    <data value="01/01/2010" />
    <data value="00:02:00" />
    <data value="192.168.1.100" />
    <data value="SOMEHOST.SOMEWHERE.COM" />
    <data value="user1" />
    <data value="logoff" />
  </record>
</records>
7.2 - Simple CSV example with heading
In addition to referencing content produced by a parent element it is often desirable to store content and reference it later. The following example of a CSV with a heading demonstrates how content can be stored in a variable and then referenced later on.
Input
This example will use a similar input to the one in the previous CSV example but also adds a heading line.
Date,Time,IPAddress,HostName,User,EventType,Detail
01/01/2010,00:00:00,192.168.1.100,SOMEHOST.SOMEWHERE.COM,user1,logon,
01/01/2010,00:01:00,192.168.1.100,SOMEHOST.SOMEWHERE.COM,user1,create,c:\test.txt
01/01/2010,00:02:00,192.168.1.100,SOMEHOST.SOMEWHERE.COM,user1,logoff,
Configuration
<?xml version="1.0" encoding="UTF-8"?>
<dataSplitter
    xmlns="data-splitter:3"
    xmlns:xsi="http://www.w3.org/2001/XMLSchema-instance"
    xsi:schemaLocation="data-splitter:3 file://data-splitter-v3.0.xsd"
    version="3.0">

  <!-- Match heading line (note that maxMatch="1" means that only the
  first line will be matched by this splitter) -->
  <split delimiter="\n" maxMatch="1">

    <!-- Store each heading in a named list -->
    <group>
      <split delimiter=",">
        <var id="heading" />
      </split>
    </group>
  </split>

  <!-- Match each record -->
  <split delimiter="\n">

    <!-- Take the matched line -->
    <group value="$1">

      <!-- Split the line up -->
      <split delimiter=",">

        <!-- Output the stored heading for each iteration and the value
        from group 1 -->
        <data name="$heading$1" value="$1" />
      </split>
    </group>
  </split>
</dataSplitter>
Output
<?xml version="1.0" encoding="UTF-8"?>
<records
    xmlns="records:2"
    xmlns:xsi="http://www.w3.org/2001/XMLSchema-instance"
    xsi:schemaLocation="records:2 file://records-v2.0.xsd"
    version="3.0">
  <record>
    <data name="Date" value="01/01/2010" />
    <data name="Time" value="00:00:00" />
    <data name="IPAddress" value="192.168.1.100" />
    <data name="HostName" value="SOMEHOST.SOMEWHERE.COM" />
    <data name="User" value="user1" />
    <data name="EventType" value="logon" />
  </record>
  <record>
    <data name="Date" value="01/01/2010" />
    <data name="Time" value="00:01:00" />
    <data name="IPAddress" value="192.168.1.100" />
    <data name="HostName" value="SOMEHOST.SOMEWHERE.COM" />
    <data name="User" value="user1" />
    <data name="EventType" value="create" />
    <data name="Detail" value="c:\test.txt" />
  </record>
  <record>
    <data name="Date" value="01/01/2010" />
    <data name="Time" value="00:02:00" />
    <data name="IPAdress" value="192.168.1.100" />
    <data name="HostName" value="SOMEHOST.SOMEWHERE.COM" />
    <data name="User" value="user1" />
    <data name="EventType" value="logoff" />
  </record>
</records>
7.3 - Complex example with regex and user defined names
The following example uses a real world Apache log and demonstrates the use of regular expressions rather than simple ‘split’ tokenizers. The usage and structure of regular expressions is outside of the scope of this document but Data Splitter uses Java’s standard regular expression library that is POSIX compliant and documented in numerous places.
This example also demonstrates that the names and values that are output can be hard coded in the absence of field name information to make XSLT conversion easier later on. Also shown is that any match can be divided into further fields with additional expressions and the ability to nest data elements to provide structure if needed.
Input
192.168.1.100 - "-" [12/Jul/2012:11:57:07 +0000] "GET /doc.htm HTTP/1.1" 200 4235 "-" "Mozilla/4.0 (compatible; MSIE 8.0; Windows NT 5.1; Trident/4.0; .NET CLR 1.1.4322; .NET CLR 2.0.50727; .NET4.0C; .NET4.0E; .NET CLR 3.0.4506.2152; .NET CLR 3.5.30729)"
192.168.1.100 - "-" [12/Jul/2012:11:57:07 +0000] "GET /default.css HTTP/1.1" 200 3494 "http://some.server:8080/doc.htm" "Mozilla/4.0 (compatible; MSIE 7.0; Windows NT 5.1; Trident/4.0; .NET CLR 1.1.4322; .NET CLR 2.0.50727; .NET4.0C; .NET4.0E; .NET CLR 3.0.4506.2152; .NET CLR 3.5.30729)"
Configuration
<?xml version="1.0" encoding="UTF-8"?>
<dataSplitter
xmlns="data-splitter:3"
xmlns:xsi="http://www.w3.org/2001/XMLSchema-instance"
xsi:schemaLocation="data-splitter:3 file://data-splitter-v3.0.xsd"
version="3.0">
<!--
Standard Apache Format
%h - host name should be ok without quotes
%l - Remote logname (from identd, if supplied). This will return a dash unless IdentityCheck is set On.
\"%u\" - user name should be quoted to deal with DNs
%t - time is added in square brackets so is contained for parsing purposes
\"%r\" - URL is quoted
%>s - Response code doesn't need to be quoted as it is a single number
%b - The size in bytes of the response sent to the client
\"%{Referer}i\" - Referrer is quoted so that’s ok
\"%{User-Agent}i\" - User agent is quoted so also ok
LogFormat "%h %l \"%u\" %t \"%r\" %>s %b \"%{Referer}i\" \"%{User-Agent}i\"" combined
-->
<!-- Match line -->
<split delimiter="\n">
<group value="$1">
<!-- Provide a regular expression for the whole line with match
groups for each field we want to split out -->
<regex pattern="^([^ ]+) ([^ ]+) "([^"]+)" \[([^\]]+)] "([^"]+)" ([^ ]+) ([^ ]+) "([^"]+)" "([^"]+)"">
<data name="host" value="$1" />
<data name="log" value="$2" />
<data name="user" value="$3" />
<data name="time" value="$4" />
<data name="url" value="$5">
<!-- Take the 5th regular expression group and pass it to
another expression to divide into smaller components -->
<group value="$5">
<regex pattern="^([^ ]+) ([^ ]+) ([^ /]*)/([^ ]*)">
<data name="httpMethod" value="$1" />
<data name="url" value="$2" />
<data name="protocol" value="$3" />
<data name="version" value="$4" />
</regex>
</group>
</data>
<data name="response" value="$6" />
<data name="size" value="$7" />
<data name="referrer" value="$8" />
<data name="userAgent" value="$9" />
</regex>
</group>
</split>
</dataSplitter>
Output
<?xml version="1.0" encoding="UTF-8"?>
<records
    xmlns="records:2"
    xmlns:xsi="http://www.w3.org/2001/XMLSchema-instance"
    xsi:schemaLocation="records:2 file://records-v2.0.xsd"
    version="3.0">
  <record>
    <data name="host" value="192.168.1.100" />
    <data name="log" value="-" />
    <data name="user" value="-" />
    <data name="time" value="12/Jul/2012:11:57:07 +0000" />
    <data name="url" value="GET /doc.htm HTTP/1.1">
      <data name="httpMethod" value="GET" />
      <data name="url" value="/doc.htm" />
      <data name="protocol" value="HTTP" />
      <data name="version" value="1.1" />
    </data>
    <data name="response" value="200" />
    <data name="size" value="4235" />
    <data name="referrer" value="-" />
    <data name="userAgent" value="Mozilla/4.0 (compatible; MSIE 8.0; Windows NT 5.1; Trident/4.0; .NET CLR 1.1.4322; .NET CLR 2.0.50727; .NET4.0C; .NET4.0E; .NET CLR 3.0.4506.2152; .NET CLR 3.5.30729)" />
  </record>
  <record>
    <data name="host" value="192.168.1.100" />
    <data name="log" value="-" />
    <data name="user" value="-" />
    <data name="time" value="12/Jul/2012:11:57:07 +0000" />
    <data name="url" value="GET /default.css HTTP/1.1">
      <data name="httpMethod" value="GET" />
      <data name="url" value="/default.css" />
      <data name="protocol" value="HTTP" />
      <data name="version" value="1.1" />
    </data>
    <data name="response" value="200" />
    <data name="size" value="3494" />
    <data name="referrer" value="http://some.server:8080/doc.htm" />
    <data name="userAgent" value="Mozilla/4.0 (compatible; MSIE 7.0; Windows NT 5.1; Trident/4.0; .NET CLR 1.1.4322; .NET CLR 2.0.50727; .NET4.0C; .NET4.0E; .NET CLR 3.0.4506.2152; .NET CLR 3.5.30729)" />
  </record>
</records>
7.4 - Multi Line Example
Example multi line file where records are split over may lines. There are various ways this data could be treated but this example forms a record from data created when some fictitious query starts plus the subsequent query results.
Input
09/07/2016    14:49:36    User = user1
09/07/2016    14:49:36    Query = some query

09/07/2016    16:34:40    Results:
09/07/2016    16:34:40    Line 1:   result1
09/07/2016    16:34:40    Line 2:   result2
09/07/2016    16:34:40    Line 3:   result3
09/07/2016    16:34:40    Line 4:   result4

09/07/2009    16:35:21    User = user2
09/07/2009    16:35:21    Query = some other query

09/07/2009    16:45:36    Results:
09/07/2009    16:45:36    Line 1:   result1
09/07/2009    16:45:36    Line 2:   result2
09/07/2009    16:45:36    Line 3:   result3
09/07/2009    16:45:36    Line 4:   result4
Configuration
<?xml version="1.0" encoding="UTF-8"?>
<dataSplitter
    xmlns="data-splitter:3"
    xmlns:xsi="http://www.w3.org/2001/XMLSchema-instance"
    xsi:schemaLocation="data-splitter:3 file://data-splitter-v3.0.xsd"
    version="3.0">

  <!-- Match each record. We want to treat the query and results as a single event so match the two sets of data separated by a double new line -->
  <regex pattern="\n*((.*\n)+?\n(.*\n)+?\n)|\n*(.*\n?)+">
    <group>

      <!-- Split the record into query and results -->
      <regex pattern="(.*?)\n\n(.*)" dotAll="true">

        <!-- Create a data element to output query data -->
        <data name="query">
          <group value="$1">

            <!-- We only want to output the date and time from the first line. -->
            <regex pattern="([^\t]*)\t([^\t]*)[\t]*([^=:]*)[=:]*(.*)" maxMatch="1">
              <data name="date" value="$1" />
              <data name="time" value="$2" />
              <data name="$3" value="$4" />
            </regex>

            <!-- Output all other values -->
            <regex pattern="([^\t]*)\t([^\t]*)[\t]*([^=:]*)[=:]*(.*)">
              <data name="$3" value="$4" />
            </regex>
          </group>
        </data>

        <!-- Create a data element to output result data -->
        <data name="results">
          <group value="$2">

            <!-- We only want to output the date and time from the first line. -->
            <regex pattern="([^\t]*)\t([^\t]*)[\t]*([^=:]*)[=:]*(.*)" maxMatch="1">
              <data name="date" value="$1" />
              <data name="time" value="$2" />
              <data name="$3" value="$4" />
            </regex>

            <!-- Output all other values -->
            <regex pattern="([^\t]*)\t([^\t]*)[\t]*([^=:]*)[=:]*(.*)">
              <data name="$3" value="$4" />
            </regex>
          </group>
        </data>
      </regex>
    </group>
  </regex>
</dataSplitter>
Output
<?xml version="1.0" encoding="UTF-8"?>
<records
    xmlns="records:2"
        xmlns:xsi="http://www.w3.org/2001/XMLSchema-instance"
            xsi:schemaLocation="records:2 file://records-v2.0.xsd"
                version="2.0">
  <record>
    <data name="query">
      <data name="date" value="09/07/2016" />
      <data name="time" value="14:49:36" />
      <data name="User" value="user1" />
      <data name="Query" value="some query" />
    </data>
    <data name="results">
      <data name="date" value="09/07/2016" />
      <data name="time" value="16:34:40" />
      <data name="Results" />
      <data name="Line 1" value="result1" />
      <data name="Line 2" value="result2" />
      <data name="Line 3" value="result3" />
      <data name="Line 4" value="result4" />
    </data>
  </record>
  <record>
    <data name="query">
      <data name="date" value="09/07/2016" />
      <data name="time" value="16:35:21" />
      <data name="User" value="user2" />
      <data name="Query" value="some other query" />
    </data>
    <data name="results">
      <data name="date" value="09/07/2016" />
      <data name="time" value="16:45:36" />
      <data name="Results" />
      <data name="Line 1" value="result1" />
      <data name="Line 2" value="result2" />
      <data name="Line 3" value="result3" />
      <data name="Line 4" value="result4" />
    </data>
  </record>
</records>
7.5 - Element Reference
There are various elements used in a Data Splitter configuration to control behaviour. Each of these elements can be categorised as one of the following:
7.5.1 - Content Providers
Content providers take some content from the input source or elsewhere (see fixed strings and provide it to one or more expressions.
Both the root element <dataSplitter> and <group> elements are content providers.
Root element <dataSplitter>
The root element of a Data Splitter configuration is <dataSplitter>.
It supplies content from the input source to one or more expressions defined within it.
The way that content is buffered is controlled by the root element and the way that errors are handled as a result of child expressions not matching all of the content it supplies.
Attributes
The following attributes can be added to the <dataSplitter> root element:
ignoreErrors
Data Splitter generates errors if not all of the content is matched by the regular expressions beneath the <dataSplitter> or within <group> elements.
The error messages are intended to aid the user in writing good Data Splitter configurations.
The intent is to indicate when the input data is not being matched fully and therefore possibly skipping some important data.
Despite this, in some cases it is laborious to have to write expressions to match all content.
In these cases it is preferable to add this attribute to ignore these errors.
However it is often better to write expressions that capture all of the supplied content and discard unwanted characters.
This attribute also affects errors generated by the use of the minMatch attribute on <regex> which is described later on.
Take the following example input:
Name1,Name2,Name3
value1,value2,value3 # a useless comment
value1,value2,value3 # a useless comment
This could be matched with the following configuration:
<?xml version="1.0" encoding="UTF-8"?>
<dataSplitter
    xmlns="data-splitter:3"
    xmlns:xsi="http://www.w3.org/2001/XMLSchema-instance"
    xsi:schemaLocation="data-splitter:3 file://data-splitter-v3.0.xsd"
    version="3.0">
  <regex id="heading" pattern=".+" maxMatch="1">
…
  </regex>
  <regex id="body" pattern="\n[^#]+">
…
  </regex>
</dataSplitter>
The above configuration would only match up to a comment for each record line, e.g.
Name1,Name2,Name3
value1,value2,value3 # a useless comment
value1,value2,value3 # a useless comment
This may well be the desired functionality but if there was useful content within the comment it would be lost. Because of this Data Splitter warns you when expressions are failing to match all of the content presented so that you can make sure that you aren’t missing anything important. In the above example it is obvious that this is the required behaviour but in more complex cases you might be otherwise unaware that your expressions were losing data.
To maintain this assurance that you are handling all content it is usually best to write expressions to explicitly match all content even though you may do nothing with some matches, e.g.
<?xml version="1.0" encoding="UTF-8"?>
<dataSplitter
    xmlns="data-splitter:3"
    xmlns:xsi="http://www.w3.org/2001/XMLSchema-instance"
    xsi:schemaLocation="data-splitter:3 file://data-splitter-v3.0.xsd"
    version="3.0">
  <regex id="heading" pattern=".+" maxMatch="1">
…
  </regex>
  <regex id="body" pattern="\n([^#]+)#.+">
…
  </regex>
</dataSplitter>
The above example would match all of the content and would therefore not generate warnings. Sub-expressions of ‘body’ could use match group 1 and ignore the comment.
However as previously stated it might often be difficult to write expressions that will just match content that is to be discarded.
In these cases ignoreErrors can be used to suppress errors caused by unmatched content.
bufferSize (Advanced)
This is an optional attribute used to tune the size of the character buffer used by Data Splitter. The default size is 20000 characters and should be fine for most translations. The minimum value that this can be set to is 20000 characters and the maximum is 1000000000. The only reason to specify this attribute is when individual records are bigger than 10000 characters which is rarely the case.
Group element <group>
Groups behave in a similar way to the root element in that they provide content for one or more inner expressions to deal with, e.g.
<group value="$1">
  <regex pattern="([^\t]*)\t([^\t]*)[\t]*([^=:]*)[=:]*(.*)" maxMatch="1">
  ...
  <regex pattern="([^\t]*)\t([^\t]*)[\t]*([^=:]*)[=:]*(.*)">
  ...
Attributes
As the <group> element is a content provider it also includes the same ignoreErrors attribute which behaves in the same way.
The complete list of attributes for the <group> element is as follows:
id
When Data Splitter reports errors it outputs an XPath to describe the part of the configuration that generated the error, e.g.
DSParser [2:1] ERROR: Expressions failed to match all of the content provided by group: regex[0]/group[0]/regex[3]/group[1] : <group>
It is often a little difficult to identify the configuration element that generated the error by looking at the path and the element description, particularly when multiple elements are the same, e.g. many <group> elements without attributes.
To make identification easier you can add an ‘id’ attribute to any element in the configuration resulting in error descriptions as follows:
DSParser [2:1] ERROR: Expressions failed to match all of the content provided by group: regex[0]/group[0]/regex[3]/group[1] : <group id="myGroupId">
value
This attribute determines what content to present to child expressions.
By default the entire content matched by a group’s parent expression is passed on by the group to child expressions.
If required, content from a specific match group in the parent expression can be passed to child expressions using the value attribute, e.g. value="$1".
In addition to this content can be composed in the same way as it is for data names and values.
See Also
Match references for a full description of match references.
ignoreErrors
This behaves in the same way as for the root element.
matchOrder
This is an optional attribute used to control how content is consumed by expression matches.
Content can be consumed in sequence or in any order using matchOrder="sequence" or matchOrder="any".
If the attribute is not specified, Data Splitter will default to matching in sequence.
When matching in sequence, each match consumes some content and the content position is moved beyond the match ready for the subsequent match. However, in some cases the order of these constructs is not predictable, e.g. we may sometimes be presented with:
Value1=1 Value2=2
… or sometimes with:
Value2=2 Value1=1
Using a sequential match order the following example would work to find both values in Value1=1 Value2=2
<group>
  <regex pattern="Value1=([^ ]*)">
  ...
  <regex pattern="Value2=([^ ]*)">
  ...
… but this example would skip over Value2 and only find the value of Value1 if the input was Value2=2 Value1=1.
To be able to deal with content that contains these constructs in either order we need to change the match order to any.
When matching in any order, each match removes the matched section from the content rather than moving the position past the match so that all remaining content can be matched by subsequent expressions.
In the following example the first expression would match and remove Value1=1 from the supplied content and the second expression would be presented with Value2=2 which it could also match.
<group matchOrder="any">
  <regex pattern="Value1=([^ ]*)">
  ...
  <regex pattern="Value2=([^ ]*)">
  ...
If the attribute is omitted by default the match order will be sequential. This is the default behaviour as tokens are most often in sequence and consuming content in this way is more efficient as content does not need to be copied by the parser to chop out sections as is required for matching in any order. It is only necessary to use this feature when fields that are identifiable with a specific match can occur in any order.
reverse
Occasionally it is desirable to reverse the content presented by a group to child expressions. This is because it is sometimes easier to form a pattern by matching content in reverse.
Take the following example content of name, value pairs delimited by = but with no spaces between names, multiple spaces between values and only a space between subsequent pairs:
ipAddress=123.123.123.123 zones=Zone 1, Zone 2, Zone 3 location=loc1 A user=An end user serverName=bigserver
We could write a pattern that matches each name value pair by matching up to the start of the next name, e.g.
<regex pattern="([^=]+)=(.+?)( [^=]+=)">
This would match the following:
ipAddress=123.123.123.123 zones=
Here we are capturing the name and value for each pair in separate groups but the pattern has to also match the name from the next name value pair to find the end of the value. By default Data Splitter will move the content buffer to the end of the match ready for subsequent matches so the next name will not be available for matching.
In addition to matching too much content the above example also uses a reluctant qualifier .+?. Use of reluctant qualifiers almost always impacts performance so they are to be avoided if at all possible.
A better way to match the example content is to match the input in reverse, reading characters from right to left.
The following example demonstrates this:
<group reverse="true">
  <regex pattern="([^=]+)=([^ ]+)">
    <data name="$2" value="$1" />
  </regex>
</group>
Using the reverse attribute on the parent group causes content to be supplied to all child expressions in reverse order. In the above example this allows the pattern to match values followed by names which enables us to cope with the fact that values have multiple spaces but names have no spaces.
Content is only presented to child regular expressions in reverse. When referencing values from match groups the content is returned in the correct order, e.g. the above example would return:
<data name="ipAddress" value="123.123.123.123" />
<data name="zones" value="Zone 1, Zone 2, Zone 3" />
<data name="location" value="loc1" />
<data name="user" value="An end user" />
<data name="serverName" value="bigserver" />
The reverse feature isn’t needed very often but there are a few cases where it really helps produce the desired output without the complexity and performance overhead of a reluctant match.
An alternative to using the reverse attribute is to use the original reluctant expression example but tell Data Splitter to make the subsequent name available for the next match by not advancing the content beyond the end of the previous value. This is done by using the advance attribute on the <regex>. However, the reverse attribute represents a better way to solve this particular problem and allows a simpler and more efficient regular expression to be used.
7.5.2 - Expressions
Expressions match some data supplied by a parent content provider. The content matched by an expression depends on the type of expression and how it is configured.
The <split>, <regex> and <all> elements are all expressions and match content as described below.
The <split> element
The <split> element directs Data Splitter to break up content using a specified character sequence as a delimiter.
In addition to this it is possible to specify characters that are used to escape the delimiter as well as characters that contain or “quote” a value that may include the delimiter sequence but allow it to be ignored.
Attributes
The <split> element has the following attributes:
id
Optional attribute used to debug the location of expressions causing errors, see id.
delimiter
A required attribute used to specify the character string that will be used as a delimiter to split the supplied content unless it is preceded by an escape character or within a container if specified. Several of the previous examples use this attribute.
escape
An optional attribute used to specify a character sequence that is used to escape the delimiter. Many delimited text formats have an escape character that is used to tell any parser that the following delimiter should be ignored, e.g. often a character such as ‘' is used to escape the character that follows it so that it is not treated as a delimiter. When specified this escape sequence also applies to any container characters that may be specified.
containerStart
An optional attribute used to specify a character sequence that will make this expression ignore the presence of delimiters until an end container is found. If the character is preceded by the specified escape sequence then this container sequence will be ignored and the expression will continue matching characters up to a delimiter.
If used containerEnd must also be specified.
If the container characters are to be ignored from the match then match group 1 must be used instead of 0.
containerEnd
An optional attribute used to specify a character sequence that will make this expression stop ignoring the presence of delimiters if it believes it is currently in a container. If the character is preceded by the specified escape sequence then this container sequence will be ignored and the expression will continue matching characters while ignoring the presence of any delimiter.
If used containerStart must also be specified.
If the container characters are to be ignored from the match then match group 1 must be used instead of 0.
maxMatch
An optional attribute used to specify the maximum number of times this expression is allowed to match the supplied content. If you do not supply this attribute then the Data Splitter will keep matching the supplied content until it reaches the end. If specified Data Splitter will stop matching the supplied content when it has matched it the specified number of times.
This attribute is used in the ‘CSV with header line’ example to ensure that only the first line is treated as a header line.
minMatch
An optional attribute used to specify the minimum number of times this expression should match the supplied content. If you do not supply this attribute then Data Splitter will not enforce that the expression matches the supplied content. If specified Data Splitter will generate an error if the expression does not match the supplied content at least as many times as specified.
Unlike maxMatch, minMatch does not control the matching process but instead controls the production of error messages generated if the parser is not seeing the expected input.
onlyMatch
Optional attribute to use this expression only for specific instances of a match of the parent expression, e.g. on the 4th, 5th and 8th matches of the parent expression specified by ‘4,5,8’. This is used when this expression should only be used to subdivide content from certain parent matches.
The <regex> element
The <regex> element directs Data Splitter to match content using the specified regular expression pattern.
In addition to this the same match control attributes that are available on the <split> element are also present as well as attributes to alter the way the pattern works.
Attributes
The <regex> element has the following attributes:
id
Optional attribute used to debug the location of expressions causing errors, see id.
pattern
This is a required attribute used to specify a regular expression to use to match on the supplied content.
The pattern is used to match the content multiple times until the end of the content is reached while the maxMatch and onlyMatch conditions are satisfied.
dotAll
An optional attribute used to specify if the use of ‘.’ in the supplied pattern matches all characters including new lines. If ’true’ ‘.’ will match all characters including new lines, if ‘false’ it will only match up to a new line. If this attribute is not specified it defaults to ‘false’ and will only match up to a new line.
This attribute is used in many of the multi-line examples above.
caseInsensitive
An optional attribute used to specify if the supplied pattern should match content in a case insensitive way. If ’true’ the expression will match content in a case insensitive manner, if ‘false’ it will match the content in a case sensitive manner. If this attribute is not specified it defaults to ‘false’ and will match the content in a case sensitive manner.
maxMatch
This is used in the same way it is on the <split> element, see maxMatch.
minMatch
This is used in the same way it is on the <split> element, see minMatch.
onlyMatch
This is used in the same way it is on the <split> element, see onlyMatch.
advance
After an expression has matched content in the buffer, the buffer start position is advanced so that it moves to the end of the entire match. This means that subsequent expressions operating on the content buffer will not see the previously matched content again. This is normally required behaviour, but in some cases some of the content from a match is still required for subsequent matches. Take the following example of name value pairs:
name1=some value 1 name2=some value 2 name3=some value 3
The first name value pair could be matched with the following expression:
<regex pattern="([^=]+)=(.+?) [^= ]+=">
The above expression would match as follows:
name1=some value 1 name2=some value 2 name3=some value 3
In this example we have had to do a reluctant match to extract the value in group 2 and not include the subsequent name. Because the reluctant match requires us to specify what we are reluctantly matching up to, we have had to include an expression after it that matches the next name.
By default the parser will move the character buffer to the end of the entire match so the next expression will be presented with the following:
some value 2 name3=some value 3
Therefore name2 will have been lost from the content buffer and will not be available for matching.
This behaviour can be altered by telling the expression how far to advance the character buffer after matching. This is done with the advance attribute and is used to specify the match group whose end position should be treated as the point the content buffer should advance to, e.g.
<regex pattern="([^=]+)=(.+?) [^= ]+=" advance="2">
In this example the content buffer will only advance to the end of match group 2 and subsequent expressions will be presented with the following content:
name2=some value 2 name3=some value 3
Therefore name2 will still be available in the content buffer.
It is likely that the advance feature will only be useful in cases where a reluctant match is performed. Reluctant matches are discouraged for performance reasons so this feature should rarely be used. A better way to tackle the above example would be to present the content in reverse, however this is only possible if the expression is within a group, i.e. is not a root expression. There may also be more complex cases where reversal is not an option and the use of a reluctant match is the only option.
The <all> element
The <all> element matches the entire content of the parent group and makes it available to child groups or <data> elements.
The purpose of <all> is to act as a catch all expression to deal with content that is not handled by a more specific expression, e.g. to output some other unknown, unrecognised or unexpected data.
<group>
  <regex pattern="^\s*([^=]+)=([^=]+)\s*">
    <data name="$1" value="$2" />
  </regex>

  <!-- Output unexpected data -->
  <all>
    <data name="unknown" value="$" />
  </all>
</group>
The <all> element provides the same functionality as using .* as a pattern in a <regex> element and where dotAll is set to true, e.g. <regex pattern=".*" dotAll="true">.
However it performs much faster as it doesn’t require pattern matching logic and is therefore always preferred.
Attributes
The <all> element has the following attributes:
id
Optional attribute used to debug the location of expressions causing errors, see id.
7.5.3 - Variables
A variable is added to Data Splitter using the <var> element. A variable is used to store matches from a parent expression for use in a reference elsewhere in the configuration, see variable reference.
The most recent matches are stored for use in local references, i.e. references that are in the same match scope as the variable. Multiple matches are stored for use in references that are in a separate match scope. The concept of different variable scopes is described in scopes.
The <var> element
The <var> element is used to tell Data Splitter to store matches from a parent expression for use in a reference.
Attributes
The <var> element has the following attributes:
id
Mandatory attribute used to uniquely identify it within the configuration (see id) and is the means by which a variable is referenced, e.g. $VAR_ID$.
7.5.4 - Output
As with all other aspects of Data Splitter, output XML is determined by adding certain elements to the Data Splitter configuration.
The <data> element
Output is created by Data Splitter using one or more <data> elements in the configuration.
The first <data> element that is encountered within a matched expression will result in parent <record> elements being produced in the output.
Attributes
The <data> element has the following attributes:
id
Optional attribute used to debug the location of expressions causing errors, see id.
name
Both the name and value attributes of the <data> element can be specified using match references.
value
Both the name and value attributes of the <data> element can be specified using match references.
Single <data> element example
The simplest example that can be provided uses a single <data> element within a <split> expression.
Given the following input:
This is line 1
This is line 2
This is line 3
… and the following configuration:
<?xml version="1.0" encoding="UTF-8"?>
<dataSplitter
    xmlns="data-splitter:3"
    xmlns:xsi="http://www.w3.org/2001/XMLSchema-instance"
    xsi:schemaLocation="data-splitter:3 file://data-splitter-v3.0.xsd"
    version="3.0">
  <split delimiter="\n" >
    <data value="$1"/>
  </split>
</dataSplitter>
… you would get the following output:
<?xml version="1.0" encoding="UTF-8"?>
<records
    xmlns="records:2"
    xmlns:xsi="http://www.w3.org/2001/XMLSchema-instance"
    xsi:schemaLocation="records:2 file://records-v2.0.xsd"
    version="3.0">
  <record>
    <data value="This is line 1" />
  </record>
  <record>
    <data value="This is line 2" />
  </record>
  <record>
    <data value="This is line 3" />
  </record>
</records>
Multiple <data> element example
You could also output multiple <data> elements for the same <record> by adding multiple elements within the same expression:
Given the following input:
ip=1.1.1.1 user=user1
ip=2.2.2.2 user=user2
ip=3.3.3.3 user=user3
… and the following configuration:
<?xml version="1.0" encoding="UTF-8"?>
<dataSplitter
    xmlns="data-splitter:3"
    xmlns:xsi="http://www.w3.org/2001/XMLSchema-instance"
    xsi:schemaLocation="data-splitter:3 file://data-splitter-v3.0.xsd"
    version="3.0">
  <regex pattern="ip=([^ ]+) user=([^ ]+)\s*">
    <data name="ip" value="$1"/>
    <data name="user" value="$2"/>
  </split>
</dataSplitter>
… you would get the following output:
<?xml version="1.0" encoding="UTF-8"?>
<records
    xmlns="records:2"
    xmlns:xsi="http://www.w3.org/2001/XMLSchema-instance"
    xsi:schemaLocation="records:2 file://records-v2.0.xsd"
    version="3.0">
  <record>
    <data name="ip" value="1.1.1.1" />
    <data name="user" value="user1" />
  </record>
  <record>
    <data name="ip" value="2.2.2.2" />
    <data name="user" value="user2" />
  </record>
  <record>
    <data name="ip" value="3.3.3.3" />
    <data name="user" value="user3" />
  </record>
</records>
Multi level <data> elements
As long as all data elements occur within the same parent/ancestor expression, all data elements will be output within the same record.
Given the following input:
ip=1.1.1.1 user=user1
ip=2.2.2.2 user=user2
ip=3.3.3.3 user=user3
… and the following configuration:
<?xml version="1.0" encoding="UTF-8"?>
<dataSplitter
    xmlns="data-splitter:3"
    xmlns:xsi="http://www.w3.org/2001/XMLSchema-instance"
    xsi:schemaLocation="data-splitter:3 file://data-splitter-v3.0.xsd"
    version="3.0">
  <split delimiter="\n" >
    <data name="line" value="$1"/>

    <group value="$1">
      <regex pattern="ip=([^ ]+) user=([^ ]+)">
        <data name="ip" value="$1"/>
        <data name="user" value="$2"/>
      </regex>
    </group>
  </split>
</dataSplitter>
… you would get the following output:
<?xml version="1.0" encoding="UTF-8"?>
<records
    xmlns="records:2"
    xmlns:xsi="http://www.w3.org/2001/XMLSchema-instance"
    xsi:schemaLocation="records:2 file://records-v2.0.xsd"
    version="3.0">
  <record>
    <data name="line" value="ip=1.1.1.1 user=user1" />
    <data name="ip" value="1.1.1.1" />
    <data name="user" value="user1" />
  </record>
  <record>
    <data name="line" value="ip=2.2.2.2 user=user2" />
    <data name="ip" value="2.2.2.2" />
    <data name="user" value="user2" />
  </record>
  <record>
    <data name="line" value="ip=3.3.3.3 user=user3" />
    <data name="ip" value="3.3.3.3" />
    <data name="user" value="user3" />
  </record>
</records>
Nesting <data> elements
Rather than having <data> elements all appear as children of <record> it is possible to nest them either as direct children or within child groups.
Direct children
Given the following input:
ip=1.1.1.1 user=user1
ip=2.2.2.2 user=user2
ip=3.3.3.3 user=user3
… and the following configuration:
<?xml version="1.0" encoding="UTF-8"?>
<dataSplitter
    xmlns="data-splitter:3"
    xmlns:xsi="http://www.w3.org/2001/XMLSchema-instance"
    xsi:schemaLocation="data-splitter:3 file://data-splitter-v3.0.xsd"
    version="3.0">
  <regex pattern="ip=([^ ]+) user=([^ ]+)\s*">
    <data name="line" value="$">
      <data name="ip" value="$1"/>
      <data name="user" value="$2"/>
    </data>
  </split>
</dataSplitter>
… you would get the following output:
<?xml version="1.0" encoding="UTF-8"?>
<record
    xmlns="records:2"
    xmlns:xsi="http://www.w3.org/2001/XMLSchema-instance"
    xsi:schemaLocation="records:2 file://records-v2.0.xsd"
    version="3.0">
  <record>
    <data name="line" value="ip=1.1.1.1 user=user1">
      <data name="ip" value="1.1.1.1" />
      <data name="user" value="user1" />
    </data>
  </record>
  <record>
    <data name="line" value="ip=2.2.2.2 user=user2">
      <data name="ip" value="2.2.2.2" />
      <data name="user" value="user2" />
    </data>
  </record>
  <record>
    <data name="line" value="ip=3.3.3.3 user=user3">
      <data name="ip" value="3.3.3.3" />
      <data name="user" value="user3" />
    </data>
  </record>
</records>
Within child groups
Given the following input:
ip=1.1.1.1 user=user1
ip=2.2.2.2 user=user2
ip=3.3.3.3 user=user3
… and the following configuration:
<?xml version="1.0" encoding="UTF-8"?>
<dataSplitter
    xmlns="data-splitter:3"
    xmlns:xsi="http://www.w3.org/2001/XMLSchema-instance"
    xsi:schemaLocation="data-splitter:3 file://data-splitter-v3.0.xsd"
    version="3.0">
  <split delimiter="\n" >
    <data name="line" value="$1">
      <group value="$1">
        <regex pattern="ip=([^ ]+) user=([^ ]+)">
          <data name="ip" value="$1"/>
          <data name="user" value="$2"/>
        </regex>
      </group>
    </data>
  </split>
</dataSplitter>
… you would get the following output:
<?xml version="1.0" encoding="UTF-8"?>
<records
    xmlns="records:2"
    xmlns:xsi="http://www.w3.org/2001/XMLSchema-instance"
    xsi:schemaLocation="records:2 file://records-v2.0.xsd"
    version="3.0">
  <record>
    <data name="line" value="ip=1.1.1.1 user=user1">
      <data name="ip" value="1.1.1.1" />
      <data name="user" value="user1" />
    </data>
  </record>
  <record>
    <data name="line" value="ip=2.2.2.2 user=user2">
      <data name="ip" value="2.2.2.2" />
      <data name="user" value="user2" />
    </data>
  </record>
  <record>
    <data name="line" value="ip=3.3.3.3 user=user3">
      <data name="ip" value="3.3.3.3" />
      <data name="user" value="user3" />
    </data>
  </record>
</records>
The above example produces the same output as the previous but could be used to apply much more complex expression logic to produce the child <data> elements, e.g. the inclusion of multiple child expressions to deal with different types of lines.
7.6 - Match References, Variables and Fixed Strings
The <group> and <data> elements can reference match groups from parent expressions or from stored matches in variables. In the case of the <group> element, referenced values are passed on to child expressions whereas the <data> element can use match group references for name and value attributes. In the case of both elements the way of specifying references is the same.
7.6.1 - Expression match references
Referencing matches in expressions is done using $. In addition to this a match group number may be added to just retrieve part of the expression match. The applicability and effect that this has depends on the type of expression used.
References to <split> Match Groups
In the following example a line matched by a parent <split> expression is referenced by a child <data> element.
<split delimiter="\n" >
  <data name="line" value="$"/>
</split>
A <split> element matches content up to and including the specified delimiter, so the above reference would output the entire line plus the delimiter. However there are various match groups that can be used by child <group> and <data> elements to reference sections of the matched content.
To illustrate the content provided by each match group, take the following example:
"This is some text\, that we wish to match", "This is the next text"
And the following <split> element:
<split delimiter="," escape="\">
The match groups are as follows:
- $ or $0: The entire content that is matched including the specified delimiter at the end
"This is some text\, that we wish to match",
- $1: The content up to the specified delimiter at the end
"This is some text\, that we wish to match"
- $2: The content up to the specified delimiter at the end and filtered to remove escape characters (more expensive than $1)
"This is some text, that we wish to match"
In addition to this behaviour match groups 1 and 2 will omit outermost whitespace and container characters if specified, e.g. with the following content:
" This is some text\, that we wish to match " , "This is the next text"
And the following <split> element:
<split delimiter="," escape="\" containerStart=""" containerEnd=""">
The match groups are as follows:
- $ or $0: The entire content that is matched including the specified delimiter at the end
" This is some text\, that we wish to match " ,
- $1: The content up to the specified delimiter at the end and strips outer containers.
This is some text\, that we wish to match
- $2: The content up to the specified delimiter at the end and strips outer containers and filtered to remove escape characters (more computationally expensive than $1)
This is some text, that we wish to match
References to Match Groups
Like the <split> element various match groups can be referenced in a <regex> expression to retrieve portions of matched content. This content can be used as values for <group> and <data> elements.
Given the following input:
ip=1.1.1.1 user=user1
And the following <regex> element:
<regex pattern="ip=([^ ]+) user=([^ ]+)">
The match groups are as follows:
- $ or $0: The entire content that is matched by the expression
ip=1.1.1.1 user=user1
- $1: The content of the first match group
1.1.1.1
- $2: The content of the second match group
user1
Match group numbers in regular expressions are determined by the order that their open bracket appears in the expression.
References to <any> Match Groups
The <any> element does not have any match groups and always returns the entire content that was passed to it when referenced with $.
7.6.2 - Variable reference
Variables are added to Data Splitter configuration using the <var> element, see variables. Each variable must have a unique id so that it can be referenced. References to variables have the form $VARIABLE_ID$, e.g.
<data name="$heading$" value="$" />
Identification
Data Splitter validates the configuration on load and ensures that all element ids are unique and that referenced ids belong to a variable.
A variable will only store data if it is referenced so variables that are not referenced will do nothing. In addition to this a variable will only store data for match groups that are referenced, e.g. if $heading$1 is the only reference to a variable with an id of ‘heading’ then only data for match group 1 will be stored for reference lookup.
Scopes
Variables have two scopes which affect how data is retrieved when referenced:
Local Scope
Variables are local to a reference if the reference exists as a descendant of the variables parent expression, e.g.
<split delimiter="\n" >
  <var id="line" />

  <group value="$1">
    <regex pattern="ip=([^ ]+) user=([^ ]+)">
      <data name="line" value="$line$"/>
      <data name="ip" value="$1"/>
      <data name="user" value="$2"/>
    </regex>
  </group>
</split>
In the above example, matches for the outermost <split> expression are stored in the variable with the id of line. The only reference to this variable is in a data element that is a descendant of the variables parent expression <split>, i.e. it is nested within split/group/regex.
Because the variable is referenced locally only the most recent parent match is relevant, i.e. no retrieval of values by iteration, iteration offset or fixed position is applicable. These features only apply to remote variables that store multiple values.
Remote Scope
The CSV example with a heading is an example of a variable being referenced from a remote scope.
<?xml version="1.0" encoding="UTF-8"?>
<dataSplitter
    xmlns="data-splitter:3"
    xmlns:xsi="http://www.w3.org/2001/XMLSchema-instance"
    xsi:schemaLocation="data-splitter:3 file://data-splitter-v3.0.xsd"
    version="3.0">

  <!-- Match heading line (note that maxMatch="1" means that only the first line will be matched by this splitter) -->
  <split delimiter="\n" maxMatch="1">

    <!-- Store each heading in a named list -->
    <group>
      <split delimiter=",">
        <var id="heading" />
      </split>
    </group>
  </split>

  <!-- Match each record -->
  <split delimiter="\n">

    <!-- Take the matched line -->
    <group value="$1">

      <!-- Split the line up -->
      <split delimiter=",">

        <!-- Output the stored heading for each iteration and the value from group 1 -->
        <data name="$heading$1" value="$1" />
      </split>
    </group>
  </split>
</dataSplitter>
In the above example the parent expression of the variable is not the ancestor of the reference in the <data> element. This makes the <data> elements reference to the variable a remote one. In this situation the variable knows that it must store multiple values as the remote reference <data> may retrieve one of many values from the variable based on:
- The match count of the parent expression.
- The match count of the parent expression, plus or minus an offset.
- A fixed position in the variable store.
Retrieval of value by iteration
In the above example the first line is taken then repeatedly matched by delimiting with commas. This results in multiple values being stored in the ‘heading’ variable. Once this is done subsequent lines are matched and then also repeatedly matched by delimiting with commas in the same way the heading is.
Each time a line is matched the internal match count of all sub expressions, (e.g. the <split> expression that is delimited by comma) is reset to 0. Every time the sub <split> expression matches up to a comma delimiter the match count is incremented. Any references to remote variables will, by default, use the current match count as an index to retrieve one of the many values stored in the variable. This means that the <data> element in the above example will retrieve the corresponding heading for each value as the match count of the values will match the storage position of each heading.
Retrieval of value by iteration offset
In some cases there may be a mismatch between the position where a value is stored in a variable and the match count applicable when remotely referencing the variable.
Take the following input:
BAD,Date,Time,IPAddress,HostName,User,EventType,Detail
01/01/2010,00:00:00,192.168.1.100,SOMEHOST.SOMEWHERE.COM,user1,logon,
In the above example we can see that the first heading ‘BAD’ is not correct for the first value of every line. In this situation we could either adjust the way the heading line is parsed to ignore ‘BAD’ or just adjust the way the heading variable is referenced.
To make this adjustment the reference just needs to be told what offset to apply to the current match count to correctly retrieve the stored value. In the above example this would be done like this:
<data name="$heading$1[+1]" value="$1" />
The above reference just uses the match count plus 1 to retrieve the stored value. Any integral offset plus or minus may be used, e.g. [+4] or [-10]. Offsets that result in a position that is outside of the storage range for the variable will not return a value.
Retrieval of value by fixed position
In addition to retrieval by offset from the current match count, a stored value can be returned by a fixed position that has no relevance to the current match count.
In the following example the value retrieved from the ‘heading’ variable will always be ‘IPAddress’ as this is the fourth value stored in the ‘heading’ variable and the position index starts at 0.
<data name="$heading$1[3]" value="$1" />
7.6.3 - Use of fixed strings
Any <group> value or <data> name and value can use references to matched content, but in addition to this it is possible just to output a known string, e.g.
<data name="somename" value="$" />
The above example would output somename as the <data> name attribute. This can often be useful where there are no headings specified in the input data but we want to associate certain names with certain values.
Given the following data:
01/01/2010,00:00:00,192.168.1.100,SOMEHOST.SOMEWHERE.COM,user1,logon,
We could provide useful headings with the following configuration:
<regex pattern="([^,]*),([^,]*),([^,]*),([^,]*),([^,]*),([^,]*),">
  <data name="date" value="$1" />
  <data name="time" value="$2" />
  <data name="ipAddress" value="$3" />
  <data name="hostName" value="$4" />
  <data name="user" value="$5" />
  <data name="action" value="$6" />
</regex>
7.6.4 - Concatenation of references
It is possible to concatenate multiple fixed strings and match group references using the + character. As with all references and fixed strings this can be done in <group> value and <data> name and value attributes. However concatenation does have some performance overhead as new buffers have to be created to store concatenated content.
A good example of concatenation is the production of ISO8601 date format from data in the previous example:
01/01/2010,00:00:00
Here the following <regex> could be used to extract the relevant date, time groups:
<regex pattern="(\d{2})/(\d{2})/(\d{4}),(\d{2}):(\d{2}):(\d{2})">
The match groups from this expression can be concatenated with the following value output pattern in the data element:
<data name="dateTime" value="$3+’-‘+$2+’-‘+$1+’-‘+’T’+$4+’:’+$5+’:’+$6+’.000Z’" />
Using the original example, this would result in the output:
<data name="dateTime" value="2010-01-01T00:00:00.000Z" />
Note that the value output pattern wraps all fixed strings in single quotes. This is necessary when concatenating strings and references so that Data Splitter can determine which parts are to be treated as fixed strings. This also allows fixed strings to contain $ and + characters.
As single quotes are used for this purpose, a single quote needs to be escaped with another single quote if one is desired in a fixed string, e.g.
‘this ‘’is quoted text’’’
This will result in:
this ‘is quoted text’
8 - Editing and Viewing Data
Viewing Data
The data viewer is shown on the Data tab when you open (by double clicking) one of these items in the explorer tree:
- Feed - to show all data for that feed.
- Folder - to show all data for all feeds that are descendants of the folder.
- System Root Folder - to show all data for all feeds that are ancestors of the folder.
In all cases the data shown is dependant on the permissions of the user performing the action and any permissions set on the feeds/folders being viewed.
The Data Viewer screen is made up of the following three parts which are shown as three panes split horizontally.
Stream List
This shows all streams within the opened entity (feed or folder).
The streams are shown in reverse chronological order.
By default Deleted and Locked streams are filtered out.
The filtering can be changed by clicking on the ![]() icon.
This will show all stream types by default so may be a mixture of Raw events, Events, Errors, etc. depending on the feed/folder in question.
icon.
This will show all stream types by default so may be a mixture of Raw events, Events, Errors, etc. depending on the feed/folder in question.
Related Stream List
This list only shows data when a stream is selected in the streams list above it. It shows all streams related to the currently selected stream. It may show streams that are ‘ancestors’ of the selected stream, e.g. showing the Raw Events stream for an Events stream, or show descendants, e.g. showing the Errors stream which resulted from processing the selected Raw Events stream.
Content Viewer Pane
This pane shows the contents of the stream selected in the Related Streams List. The content of a stream will differ depending on the type of stream selected and the child stream types in that stream. For more information on the anatomy of streams, see Streams. This pane is split into multiple sub tabs depending on the different types of content available.
Info Tab
This sub-tab shows the information for the stream, such as creation times, size, physical file location, state, etc.
Error Tab
This sub-tab is only visible for an Error stream. It shows a table of errors and warnings with associated messages and locations in the stream that it relates to.
Data Preview Tab
This sub-tab shows the content of the data child stream, formatted if it is XML. It will only show a limited amount of data so if the data child stream is large then it will only show the first n characters.
If the stream is multi-part then you will see Part navigation controls to switch between parts. For each part you will be shown the first n character of that part (formatted if applicable).
If the stream is a Segmented stream stream then you will see the Record navigation controls to switch between records. Only one record is shown at once. If a record is very large then only the first n characters of the record will be shown.
This sub-tab is intended for seeing a quick preview of the data in a form that is easy to read, i.e. formatted. If you want to see the full data in its original form then click on the View Source link at the top right of the sub-tab.
The Data Preview tab shows a ‘progress’ bar to indicate what portion of the content is visible in the editor.
Context Tab
This sub-tab is only shown for non-segmented streams, e.g. Raw Events and Raw_Reference that have an associated context data child stream. For more details of context streams, see Context This sub-tab works in exactly the same way as the Data Preview sub-tab except that it shows a different child stream.
Meta Tab
This sub-tab is only shown for non-segmented streams, e.g. Raw Events and Raw_Reference that have an associated meta data child stream. For more details of meta streams, see Meta This sub-tab works in exactly the same way as the Data Preview sub-tab except that it shows a different child stream.
Source View
The source view is accessed by clicking the View Source link on the Data Preview sub-tab or from the data() dashboard column function.
Its purpose is to display the selected child stream (data, context, meta, etc) or record in the form in which it was received, i.e un-formatted.
The Data Preview tab shows a ‘progress’ bar to indicate what portion of the content is visible in the editor.
In order to navigate through the data you have three options
- Click on the ‘progress bar’ to show a porting of the data starting from the position clicked on.
- Page through the data using the navigation controls.
- Select a source range to display using the Set Source Range dialog which is accessed by clicking on the Lines or Chars links.
This allows you to precisely select the range to display.
You can either specify a range with a just start point or a start point and some form of size/position limit.
If no limit is specified then Stroom will limit the data shown to the configured maximum (
stroom.ui.source.maxCharactersPerFetch). If a range is entered that is too big to display Stroom will limit the data to its maximum.
A Note About Characters
Stroom does not know the size of a stream in terms of character lines/cols, it only knows the size in bytes. Due to the way character data is encoded into bytes it is not possible to say how many characters are in a stream based on its size in bytes. Stroom can only provide an estimate based on the ratio of characters to bytes seen so far in the stream.
Data Progress Bar
Stroom often handles very large streams of data and it is not feasible to show all of this data in the editor at once. Therefore Stroom will show a limited amount of the data in the editor at a time. The ‘progress’ bar at the top of the Data Preview and Source View screens shows what percentage of the data is visible in the editor and where in the stream the visible portion is located. If all of the data is visible in the editor (which includes scrolling down to see it) the bar will be green and will occupy the full width. If only some of the data is visible then the bar will be blue and the coloured part will only occupy part of the width.
Editor
Stroom uses the Ace editor for editing and viewing text, such as XSLTs, raw data, cooked events, stepping, etc.
Keyboard shortcuts
The following are some useful keyboard shortcuts in the editor:
ctrl-z- Undo last action.ctrl-shift-z- Redo previously undone action.ctrl-/- Toggle commenting of current line/selection. Applies when editing XML, XSLT or Javascript.alt-up/alt-down- Move line/selection up/down respectivelyctrl-d- Delete current line.ctrl-f- Open find dialog.ctrl-h- Open find/replace dialog.ctrl-k- Find next match.ctrl-shift-k- Find previous match.tab- Indent selection.shift-tab- Outdent selection.ctrl-u- Make selection upper-case.
See here for more.
Vim key bindings
If you are familiar with the Vi/Vim text editors then it is possible to enable Vim key bindings in Stroom. This is currently done by enabling Vim bindings in the editor context menu in each editor screen. In future versions of Stroom it will be possible to store these preferences on a per user basis.
The Ace editor does not support all features of Vim however the core navigation/editing key bindings are present. The key supported features of Vim are:
- Visual mode and visual block mode.
- Searching with
/(javascript flavour regex) - Search/replace with commands like
:%s/foo/bar/g - Incrementing/decrementing numbers with
ctrl-a/ctrl-x - Code (un-)folding with
zo,zc, etc. - Text objects, e.g.
>,),],',",pparagraph,wword. - Repetition with the
.command. - Jumping to a line with
:<line no>.
Notable features not supported by the Ace editor:
- The following text objects are not supported
b- Braces, i.e{or[.t- Tags, i.e. XML tags<value>.s- Sentence.
- The
gcommand mode command, i.e.:g/foo/d - Splits
For a list of useful Vim key bindings see this cheat sheet , though not all bindings will be available in Stroom’s Ace editor.
Auto-Completion And Snippets
The editor supports a number of different types of auto-completion of text. Completion suggestions are triggered by the following mechanisms:
ctrl-space- when live auto-complete is disabled.- Typing - when live auto-complete is enabled.
When completion suggestions are triggered the follow types of completion may be available depending on the text being edited.
- Local - any word/token found in the existing text. Useful if you have typed a long word and need to type it again.
- Keyword - A word/token that has been defined in the syntax highlighting rules for the text type, i.e.
functionis a keyword when editing Javascript. - Snippet - A block of text that has been defined as a snippet for the editor mode (XML, Javascript, etc.).
Snippets
Snippets allow you to quickly entry pre-defined blocks of common text. For example when editing an XSLT you may want to insert a call-template with parameters. To do this using snippets you can do the following:
- Type
callthen hitctrl-space. - In the list of options use the cursor keys to select
call-template with-paramthen hitenterortabto insert the snippet. The snippet will look like<xsl:call-template name="template"> <xsl:with-param name="param"></xsl:with-param> </xsl:call-template> - The cursor will be positioned on the first tab stop (the template name) with the tab stop text selected.
- At this point you can type in your template name, e.g.
MyTemplate, then hittabto advance to the next tab stop (the param name) - Now type the name of the param, e.g.
MyParam, then hittabto advance to the last tab stop positioned within the<with-param>ready to enter the param value.
Snippets can be disabled from the list of suggestions by selecting the option in the editor context menu.
9 - Event Feeds
In order for Stroom to be able to handle the various data types as described in the previous section, Stroom must be told what the data is when it is received. This is achieved using Event Feeds. Each feed has a unique name within the system.
Events Feeds can be related to one or more Reference Feed. Reference Feeds are used to provide look up data for a translation. E.g. lookup a computer name by it’s IP address.
Feeds can also have associated context data. Context data used to provide look up information that is only applicable for the events file it relates to. E.g. if the events file is missing information relating to the computer it was generated on, and you don’t want to create separate feeds for each computer, an associated context file could be used to provide this information.
Feed Identifiers
Feed identifiers must be unique within the system. Identifiers can be in any format but an established convetnion is to use the following format
<SYSTEM>-<ENVIRONMENT>-<TYPE>-<EVENTS/REFERENCE>-<VERSION>
If feeds in a certain site need different reference data then the site can be broken down further.
_ may be used to represent a space.
10 - Finding Things
Explorer Tree
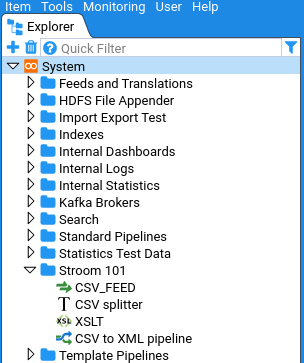
The Explorer Tree in stroom is the primary means of finding user created content, for example Feeds, XSLTs, Pipelines, etc.
Branches of the Explorer Tree can be expanded and collapsed to reveal/hide the content at different levels.
Filtering by Type
The Explorer Tree can be filtered by the type of content, e.g. to display only Feeds, or only Feeds and XSLTs.
This is done by clicking the filter icon
.
The following is an example of filtering by Feeds and XSLTs.
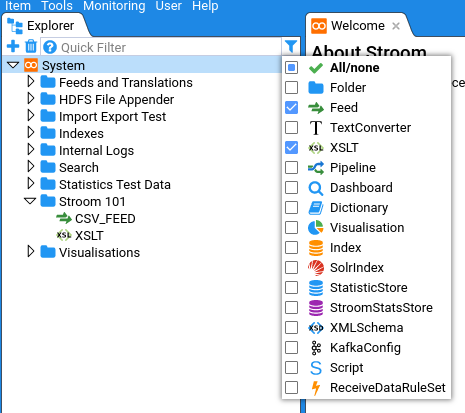
Clicking All/None toggles between all types selected and no types selected.
Filtering by type can also be achieved using the Quick Filter by entering the type name (or a partial form of the type name), prefixed with type:.
I.e:
type:feed
For example:
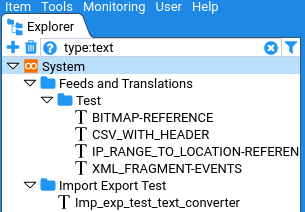
NOTE: If both the type picker and the Quick Filter are used to filter on type then the two filters will be combined as an AND.
Filtering by Name
The Explorer Tree can be filtered by the name of the entity. This is done by entering some text in the Quick Filter field. The tree will then be updated to only show entities matching the Quick Filter. The way the matching works for entity names is described in Common Fuzzy Matching
Filtering by UUID
What is a UUID?
The Explorer Tree can be filtered by the UUID of the entity. The UUID Universally unique identifier is an identifier that can be relied on to be unique both within the system and universally across all other systems. Stroom uses UUIDs as the primary identifier for all content (Feeds, XSLTs, Pipelines, etc.) created in Stroom. An entity’s UUID is generated randomly by Stroom upon creation and is fixed for the life of that entity.
When an entity is exported it is exported with its UUID and if it is then imported into another instance of Stroom the same UUID will be used. The name of an entity can be changed within Stroom but its UUID remains un-changed.
With the exception of Feeds, Stroom allows multiple entities to have the same name. This is because entities may exist that a user does not have access to see so restricting their choice of names based on existing invisible entities would be confusing. Where there are multiple entities with the same name the UUID can be used to distinguish between them.
The UUID of an entity can be viewed using the context menu for the entity. The context menu is accessed by right-clicking on the entity.
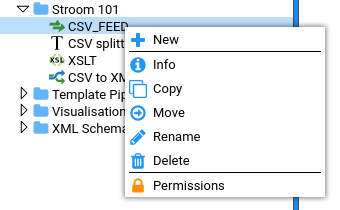
Clicking Info displays the entities UUID.
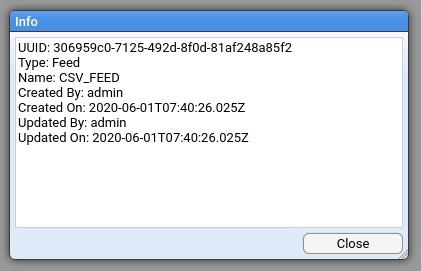
The UUID can be copied by selecting it and then pressing ctrl-c.
UUID Quick Filter Matching
In the Explorer Tree Quick Filter you can filter by UUIDs in the following ways:
To show the entity matching a UUID, enter the full UUID value (with dashes) prefixed with the field qualifier uuid, e.g. uuid:a95e5c59-2a3a-4f14-9b26-2911c6043028.
To filter on part of a UUID you can do uuid:/2a3a to find an entity whose UUID contains 2a3a or uuid:^2a3a to find an entity whose UUID starts with 2a3a.
Quick Filters
Quick Filter controls are used in a number of screens in Stroom. The most prominent use of a Quick Filter is in the Explorer Tree as described above. Quick filters allow for quick searching of a data set or a list of items using a text based query language. The basis of the query language is described in Common Fuzzy Matching.
A number of the Quick Filters are used for filter tables of data that have a number of fields.
The quick filter query language supports matching in specified fields.
Each Quick Filter will have a number of named fields that it can filter on.
The field to match on is specified by prefixing the match term with the name of the field followed by a :, i.e. type:.
Multiple field matches can be used, each separate by a space.
E.g:
name:^xml name:events$ type:feed
In the above example the filter will match on items with a name beginning xml, a name ending events and a type partially matching feed.
All the match terms are combined together with an AND operator.
The same field can be used multiple times in the match.
The list of filterable fields and their qualifier names (sometimes a shortened form) are listed by clicking on the help icon
 .
.
One or more of the fields will be defined as default fields. This means the if no qualifier is entered the match will be applied to all default fields using an OR operator. Sometimes all fields may be considered default which means a match term will be tested against all fields and an item will be included in the results if one or more of those fields match.
For example if the Quick Filter has fields Name, Type and Status, of which Name and Type are default:
feed status:ok
The above would match items where the Name OR Type fields match feed AND the Status field matches ok.
Match Negation
Each match item can be negated using the ! prefix.
This is also described in Common Fuzzy Matching.
The prefix is applied after the field qualifier.
E.g:
name:xml source:!/default
In the above example it would match on items where the Name field matched xml and the Source field does NOT match the regex pattern default.
Spaces and Quotes
If your match term contains a space then you can surround the match term with double quotes.
Also if your match term contains a double quote you can escape it with a \ character.
The following would be valid for example.
"name:csv splitter" "default field match" "symbol:\""
Multiple Terms
If multiple terms are provided for the same field then an AND is used to combine them. This can be useful where you are not sure of the order of words within the items being filtered.
For example:
User input: spain plain rain
Will match:
The rain in spain stays mainly in the plain
    ^^^^    ^^^^^                     ^^^^^
rainspainplain
^^^^^^^^^^^^^^
spain plain rain
^^^^^ ^^^^^ ^^^^
raining spain plain
^^^^^^^ ^^^^^ ^^^^^
Won’t match: sprain, rain, spain
OR Logic
There is no support for combining terms with an OR. However you can acheive this using a sinlge regular expression term. For example
User input: status:/(disabled|locked)
Will match:
Locked
^^^^^^
Disabled
^^^^^^^^
Won’t match: A MAN, HUMAN
Suggestion Input Fields
Stroom uses a number of suggestion input fields, such as when selecting Feeds, Pipelines, types, status values, etc. in the pipeline processor filter screen.
These fields will typically display the full list of values or a truncated list where the total number of value is too large. Entering text in one of these fields will use the fuzzy matching algorithm to partially/fully match on values. See CommonFuzzy Matching below for details of how the matching works.
Common Fuzzy Matching
A common fuzzy matching mechanism is used in a number of places in Stroom. It is used for partially matching the user input to a list of a list of possible values.
In some instances, the list of matched items will be truncated to a more manageable size with the expectation that the filter will be refined.
The fuzzy matching employs a number of approaches that are attempted in the following order:
NOTE: In the following examples the ^ character is used to indicate which characters have been matched.
No Input
If no input is provided all items will match.
Contains (Default)
If no prefixes or suffixes are used then all characters in the user input will need to be contained as a whole somewhere within the string being tested. The matching is case insensitive.
User input: bad
Will match:
bad angry dog
^^^
BAD
^^^
very badly
     ^^^
Very bad
     ^^^
Won’t match: dab, ba d, ba
Characters Anywhere Matching
If the user input is prefixed with a ~ (tilde) character then characters anywher matching will be employed.
The matching is case insensitive.
User input: bad
Will match:
Big Angry Dog
^   ^     ^
bad angry dog
^^^
BAD
^^^
badly
^^^
Very bad
     ^^^
b a d
^ ^ ^
bbaadd
^ ^ ^
Won’t match: dab, ba
Word Boundary Matching
If the user input is prefixed with a ? character then word boundary matching will be employed.
This approache uses upper case letters to denote the start of a word.
If you know the some or all of words in the item you are looking for, and their order, then condensing those words down to their first letters (capitalised) makes this a more targeted way to find what you want than the characters anywhere matching above.
Words can either be separated by characters like _- ()[]., or be distinguished with lowerCamelCase or upperCamelCase format.
An upper case letter in the input denotes the beginning of a word and any subsequent lower case characters are treated as contiguously following the character at the start of the word.
User input: ?OTheiMa
Will match:
the cat sat on their mat
            ^  ^^^^  ^^
ON THEIR MAT
^  ^^^^  ^^
Of their magic
^  ^^^^  ^^
o thei ma
^ ^^^^ ^^
onTheirMat
^ ^^^^ ^^
OnTheirMat
^ ^^^^ ^^
Won’t match: On the mat, the cat sat on there mat, On their moat
User input: ?MFN
Will match:
MY_FEED_NAME
^  ^    ^
MY FEED NAME
^  ^    ^
MY_FEED_OTHER_NAME
^  ^          ^
THIS_IS_MY_FEED_NAME_TOO
        ^  ^    ^
myFeedName
^ ^   ^
MyFeedName
^ ^   ^
also-my-feed-name
     ^  ^    ^
MFN
^^^
stroom.something.somethingElse.maxFileNumber
                               ^  ^   ^
Won’t match: myfeedname, MY FEEDNAME
Regular Expression Matching
If the user input is prefixed with a / character then the remaining user input is treated as a Java syntax regular expression.
An string will be considered a match if any part of it matches the regular expression pattern.
The regular expression operates in case insensitive mode.
For more details on the syntax of java regular expressions see this internet link https://docs.oracle.com/en/java/javase/15/docs/api/java.base/java/util/regex/Pattern.html.
User input: /(^|wo)man
Will match:
MAN
^^^
A WOMAN
  ^^^^^
Manly
^^^
Womanly
^^^^^
Won’t match: A MAN, HUMAN
Exact Match
If the user input is prefixed with a ^ character and suffixed with a $ character then a case-insensitive exact match will be used.
E.g:
User input: ^xml-events$
Will match:
xml-events
^^^^^^^^^^
XML-EVENTS
^^^^^^^^^^
Won’t match: xslt-events, XML EVENTS, SOME-XML-EVENTS, AN-XML-EVENTS-PIPELINE
Note: Despite the similarity in syntax, this is NOT regular expression matching.
Starts With
If the user input is prefixed with a ^ character then a case-insensitive starts with match will be used.
E.g:
User input: ^events
Will match:
events
^^^^^^
EVENTS_FEED
^^^^^^
events-xslt
^^^^^^
Won’t match: xslt-events, JSON_EVENTS
Note: Despite the similarity in syntax, this is NOT regular expression matching.
Ends With
If the user input is suffixed with a $ character then a case-insensitive ends with match will be used.
E.g:
User input: events$
Will match:
events
^^^^^^
xslt-events
     ^^^^^^
JSON_EVENTS
     ^^^^^^
Won’t match: EVENTS_FEED, events-xslt
Note: Despite the similarity in syntax, this is NOT regular expression matching.
Wild-Carded Case Sensitive Exact Matching
If one or more * characters are found in the user input then this form of matching will be used.
This form of matching is to support those fields that accept wild-carded values, e.g. a whild-carded feed name expression term.
In this instance you are NOT picking a value from the suggestion list but entering a wild-carded value that will be evaluated when the expression/filter is actually used.
The user may want an expression term that matches on all feeds starting with XML_, in which case they would enter XML_*.
To give an indication of what it would match on if the list of feeds remains the same, the list of suggested items will reflect the wild-carded input.
User input: XML_*
Will match:
XML_
^^^^
XML_EVENTS
^^^^
Won’t match: BAD_XML_EVENTS, XML-EVENTS, xml_events
User input: XML_*EVENTS*
Will match:
XML_EVENTS
^^^^^^^^^^
XML_SEC_EVENTS
^^^^    ^^^^^^
XML_SEC_EVENTS_FEED
^^^^    ^^^^^^
Won’t match: BAD_XML_EVENTS, xml_events
Match Negation
A match can be negated, ie. the NOT operator using the prefix !.
This prefix can be applied before all the match prefixes listed above.
E.g:
!/(error|warn)
In the above example it will match everything except those matched by the regex pattern (error|warn).
11 - Nodes
All nodes in an Stroom cluster must be configured correctly for them to communicate with each other.
Configuring nodes
Open Monitoring/Nodes from the top menu. The nodes screen looks like this:
TODO
ScreenshotYou need to edit each line by selecting it and then clicking the edit
 icon at the bottom.
The URL for each node needs to be set as above but obviously substituting in the host name of the individual node, e.g.
icon at the bottom.
The URL for each node needs to be set as above but obviously substituting in the host name of the individual node, e.g. http://<HOST_NAME>:8080/stroom/clustercall.rpc
Nodes are expected communicate with each other on port 8080 over http. Ensure you have configured your firewall to allow nodes to talk to each other over this port. You can configure the URL to use a different port and possibly HTTPS but performance will be better with HTTP as no SSL termination is required.
Once you have set the URLs of each node you should also set the master assignment priority for each node to be different to all of the others. In the image above the priorities have been set in a random fashion to ensure that node3 assumes the role of master node for as long as it is enabled. You also need to check all of the nodes are enabled that you want to take part in processing or any other jobs.
Keep refreshing the table until all nodes show healthy pings as above. If you do not get ping results for each node then they are not configured correctly.
Once a cluster is configured correctly you will get proper distribution of processing tasks and search will be able to access all nodes to take part in a distributed query.
12 - Pipelines
Pipelines
Every feed has an associated translation. The translation is used to convert the input text or XML into event logging XML format.
XSLT is used to translate from XML to event logging XML.
12.1 - Parser
The following capabilities are available to parse input data:
- XML - XML input can be parsed with the XML parser.
- XML Fragment - Treat input data as an XML fragment, i.e. XML that does not have an XML declaration or root elements.
- Data Splitter - Delimiter and regular expression based language for turning non XML data into XML (e.g. CSV)
12.1.1 - Context Data
Context File
Input File:
<?xml version="1.0" encoding="UTF-8"?>
<SomeData>
	<SomeEvent>
			<SomeTime>01/01/2009:12:00:01</SomeTime>
			<SomeAction>OPEN</SomeAction>
			<SomeUser>userone</SomeUser>
			<SomeFile>D:\TranslationKit\example\VerySimple\OpenFileEvents.txt</SomeFile>
	</SomeEvent>
</SomeData>
Context File:
<?xml version="1.0" encoding="UTF-8"?>
<SomeContext>
<Machine>MyMachine</Machine>
</SomeContext>
Context XSLT:
<?xml version="1.0" encoding="UTF-8" ?>
<xsl:stylesheet
xmlns="reference-data:2"
xmlns:evt="event-logging:3"
xmlns:xsi="http://www.w3.org/2001/XMLSchema-instance"
xmlns:xsl="http://www.w3.org/1999/XSL/Transform"
version="2.0">
<xsl:template match="SomeContext">
<referenceData
xsi:schemaLocation="event-logging:3 file://event-logging-v3.0.0.xsd reference-data:2 file://reference-data-v2.0.1.xsd"
version="2.0.1">
<xsl:apply-templates/>
</referenceData>
</xsl:template>
<xsl:template match="Machine">
<reference>
<map>CONTEXT</map>
<key>Machine</key>
<value><xsl:value-of select="."/></value>
</reference>
</xsl:template>
</xsl:stylesheet>
Context XML Translation:
<?xml version="1.0" encoding="UTF-8"?>
<referenceData xmlns:evt="event-logging:3"
xmlns:xsi="http://www.w3.org/2001/XMLSchema-instance"
xmlns="reference-data:2"
xsi:schemaLocation="event-logging:3 file://event-logging-v3.0.0.xsd reference-data:2 file://reference-data-v2.0.1.xsd"
version="2.0.1">
<reference>
<map>CONTEXT</map>
<key>Machine</key>
<value>MyMachine</value>
</reference>
</referenceData>
Input File:
<?xml version="1.0" encoding="UTF-8"?>
<SomeData>
<SomeEvent>
<SomeTime>01/01/2009:12:00:01</SomeTime>
<SomeAction>OPEN</SomeAction>
<SomeUser>userone</SomeUser>
<SomeFile>D:\TranslationKit\example\VerySimple\OpenFileEvents.txt</SomeFile>
</SomeEvent>
</SomeData>
Main XSLT (Note the use of the context lookup):
<?xml version="1.0" encoding="UTF-8" ?>
<xsl:stylesheet
xmlns="event-logging:3"
xmlns:xsl="http://www.w3.org/1999/XSL/Transform"
xmlns:xsi="http://www.w3.org/2001/XMLSchema-instance"
version="2.0">
<xsl:template match="SomeData">
<Events xsi:schemaLocation="event-logging:3 file://event-logging-v3.0.0.xsd" Version="3.0.0">
<xsl:apply-templates/>
</Events>
</xsl:template>
<xsl:template match="SomeEvent">
<xsl:if test="SomeAction = 'OPEN'">
<Event>
<EventTime>
<TimeCreated>
<xsl:value-of select="s:format-date(SomeTime, 'dd/MM/yyyy:hh:mm:ss')"/>
</TimeCreated>
</EventTime>
<EventSource>
<System>Example</System>
<Environment>Example</Environment>
<Generator>Very Simple Provider</Generator>
<Device>
<IPAddress>182.80.32.132</IPAddress>
<Location>
<Country>UK</Country>
<Site><xsl:value-of select="s:lookup('CONTEXT', 'Machine')"/></Site>
<Building>Main</Building>
<Floor>1</Floor>
<Room>1aaa</Room>
</Location>
</Device>
<User><Id><xsl:value-of select="SomeUser"/></Id></User>
</EventSource>
<EventDetail>
<View>
<Document>
<Title>UNKNOWN</Title>
<File>
<Path><xsl:value-of select="SomeFile"/></Path>
</File>
</Document>
</View>
</EventDetail>
</Event>
</xsl:if>
</xsl:template>
</xsl:stylesheet>
Main Output XML:
<?xml version="1.0" encoding="UTF-8"?>
<Events xmlns:xsi="http://www.w3.org/2001/XMLSchema-instance"
xmlns="event-logging:3"
xsi:schemaLocation="event-logging:3 file://event-logging-v3.0.0.xsd"
Version="3.0.0">
<Event Id="6:1">
<EventTime>
<TimeCreated>2009-01-01T00:00:01.000Z</TimeCreated>
</EventTime>
<EventSource>
<System>Example</System>
<Environment>Example</Environment>
<Generator>Very Simple Provider</Generator>
<Device>
<IPAddress>182.80.32.132</IPAddress>
<Location>
<Country>UK</Country>
<Site>MyMachine</Site>
<Building>Main</Building>
<Floor>1</Floor>
<Room>1aaa</Room>
</Location>
</Device>
<User>
<Id>userone</Id>
</User>
</EventSource>
<EventDetail>
<View>
<Document>
<Title>UNKNOWN</Title>
<File>
<Path>D:\TranslationKit\example\VerySimple\OpenFileEvents.txt</Path>
</File>
</Document>
</View>
</EventDetail>
</Event>
</Events>
12.1.2 - XML Fragments
Some input XML data may be missing an XML declaration and root level enclosing elements. This data is not a valid XML document and must be treated as an XML fragment. To use XML fragments the input type for a translation must be set to ‘XML Fragment’. A fragment wrapper must be defined in the XML conversion that tells Stroom what declaration and root elements to place around the XML fragment data.
Here is an example:
<?xml version="1.1" encoding="UTF-8"?>
<!DOCTYPE records [
<!ENTITY fragment SYSTEM "fragment">
]>
<records
xmlns="records:2"
xmlns:xsi="http://www.w3.org/2001/XMLSchema-instance"
xsi:schemaLocation="records:2 file://records-v2.0.xsd"
version="2.0">
&fragment;
</records>
During conversion Stroom replaces the fragment text entity with the input XML fragment data. Note that XML fragments must still be well formed so that they can be parsed correctly.
12.2 - XSLT Conversion
Once the text file has been converted into Intermediary XML (or the feed is already XML), XSLT is used to translate the XML into event logging XML format.
Event Feeds must be translated into the events schema and Reference into the reference schema. You can browse documentation relating to the schemas within the application.
Here is an example XSLT:
<?xml version="1.0" encoding="UTF-8" ?>
<xsl:stylesheet
xmlns="event-logging:3"
xmlns:s="stroom"
xmlns:xsl="http://www.w3.org/1999/XSL/Transform"
xmlns:xsi="http://www.w3.org/2001/XMLSchema-instance"
version="2.0">
<xsl:template match="SomeData">
<Events
xsi:schemaLocation="event-logging:3 file://event-logging-v3.0.0.xsd"
Version="3.0.0">
<xsl:apply-templates/>
</Events>
</xsl:template>
<xsl:template match="SomeEvent">
<xsl:variable name="dateTime" select="SomeTime"/>
<xsl:variable name="formattedDateTime" select="s:format-date($dateTime, 'dd/MM/yyyyhh:mm:ss')"/>
<xsl:if test="SomeAction = 'OPEN'">
<Event>
<EventTime>
<TimeCreated>
<xsl:value-of select="$formattedDateTime"/>
</TimeCreated>
</EventTime>
<EventSource>
<System>Example</System>
<Environment>Example</Environment>
<Generator>Very Simple Provider</Generator>
<Device>
<IPAddress>3.3.3.3</IPAddress>
</Device>
<User>
<Id><xsl:value-of select="SomeUser"/></Id>
</User>
</EventSource>
<EventDetail>
<View>
<Document>
<Title>UNKNOWN</Title>
<File>
<Path><xsl:value-of select="SomeFile"/></Path>
<File>
</Document>
</View>
</EventDetail>
</Event>
</xsl:if>
</xsl:template>
</xsl:stylesheet>
12.2.1 - XSLT Functions
By including the following namespace:
xmlns:s="stroom"
E.g.
<?xml version="1.0" encoding="UTF-8" ?>
<xsl:stylesheet
xmlns="event-logging:3"
xmlns:s="stroom"
xmlns:xsl="http://www.w3.org/1999/XSL/Transform"
xmlns:xsi="http://www.w3.org/2001/XMLSchema-instance"
version="2.0">
The following functions are available to aid your translation:
bitmap-lookup(String map, String key)- Bitmap based look up against reference data map using the period start timebitmap-lookup(String map, String key, String time)- Bitmap based look up against reference data map using a specified time, e.g. the event timebitmap-lookup(String map, String key, String time, Boolean ignoreWarnings)- Bitmap based look up against reference data map using a specified time, e.g. the event time, and ignore any warnings generated by a failed lookupbitmap-lookup(String map, String key, String time, Boolean ignoreWarnings, Boolean trace)- Bitmap based look up against reference data map using a specified time, e.g. the event time, and ignore any warnings generated by a failed lookup and get trace information for the path taken to resolve the lookup.classification()- The classification of the feed for the data being processedcol-from()- The column in the input that the current record begins on (can be 0).col-to()- The column in the input that the current record ends at.current-time()- The current system timecurrent-user()- The current user logged into Stroom (only relevant for interactive use, e.g. search)decode-url(String encodedUrl)- Decode the provided url.dictionary(String name)- Loads the contents of the named dictionary for use within the translationencode-url(String url)- Encode the provided url.feed-attribute(String attributeKey)- NOTE: This function is deprecated, usemeta(String key)instead. The value for the supplied feedattributeKey.feed-name()- Name of the feed for the data being processedfetch-json(String url)- Simplistic version ofhttp-callthat sends a request to the passedurland converts the JSON response body to XML usingjson-to-xml. Currently does not support SSL configuration likehttp-calldoes.format-date(String date, String pattern)- Format a date that uses the specified pattern using the default time zoneformat-date(String date, String pattern, String timeZone)- Format a date that uses the specified pattern with the specified time zoneformat-date(String date, String patternIn, String timeZoneIn, String patternOut, String timeZoneOut)- Parse a date with the specified input pattern and time zone and format the output with the specified output pattern and time zoneformat-date(String milliseconds)- Format a date that is specified as a number of milliseconds since a standard base time known as “the epoch”, namely January 1, 1970, 00:00:00 GMTget(String key)- Returns the value associated with akeythat has been stored in a map using theput()function. The map is in the scope of the current pipeline process so values do not live after the stream has been processed.hash(String value)- Hash a string value using the defaultSHA-256algorithm and no salthash(String value, String algorithm, String salt)- Hash a string value using the specified hashing algorithm and supplied salt value. Supported hashing algorithms includeSHA-256,SHA-512,MD5.hex-to-dec(String hex)- Convert hex to dec representationhex-to-oct(String hex)- Convert hex to oct representationhost-address(String hostname)- Convert a hostname into an IP address.host-name(String ipAddress)- Convert an IP address into a hostname.http-call(String url, String headers, String mediaType, String data, String clientConfig)- Makes an HTTP(S) request to a remote server.json-to-xml(String json)- Returns an XML representation of the supplied JSON value for use in XPath expressionsline-from()- The line in the input that the current record begins on (1 based).line-to()- The line in the input that the current record ends at.link(String url)- Creates a stroom dashboard table link.link(String title, String url)- Creates a stroom dashboard table link.link(String title, String url, String type)- Creates a stroom dashboard table link.log(String severity, String message)- Logs a message to the processing log with the specified severitylookup(String map, String key)- Look up a reference data map using the period start timelookup(String map, String key, String time)- Look up a reference data map using a specified time, e.g. the event timelookup(String map, String key, String time, Boolean ignoreWarnings)- Look up a reference data map using a specified time, e.g. the event time, and ignore any warnings generated by a failed lookuplookup(String map, String key, String time, Boolean ignoreWarnings, Boolean trace)- Look up a reference data map using a specified time, e.g. the event time, ignore any warnings generated by a failed lookup and get trace information for the path taken to resolve the lookup.meta(String key)- Lookup a meta data value for the current stream using the specified key. The key can beFeed,StreamType,CreatedTime,EffectiveTime,Pipelineor any other attribute supplied when the stream was sent to Stroom, e.g. meta(‘System’).meta-keys()- Returns an array of meta keys for the current stream. Each key can then be used to retrieve its corresponding meta value, by callingmeta($key).numeric-ip(String ipAddress)- Convert an IP address to a numeric representation for range comparisonpart-no()- The current part within a multi part aggregated input stream (AKA the substream number) (1 based)parse-uri(String URI)- Returns an XML structure of the URI providingauthority,fragment,host,path,port,query,scheme,schemeSpecificPart, anduserInfocomponents if present.pipeline-name()- Get the name of the pipeline currently processing the stream.pointIsInsideXYPolygon(Number xPos, Number yPos, Number[] xPolyData, Number[] yPolyData)- Get the name of the pipeline currently processing the stream.random()- Get a system generated random number between 0 and 1.record-no()- The current record number within the current part (substream) (1 based).search-id()- Get the id of the batch search when a pipeline is processing as part of a batch searchsource()- Returns an XML structure with thestroom-metanamespace detailing the current source location.source-id()- Get the id of the current input stream that is being processedstream-id()- An alias forsource-idincluded for backward compatibility.pipeline-name()- Name of the current processing pipeline using the XSLTput(String key, String value)- Store a value for use later on in the translation
bitmap-lookup()
The bitmap-lookup() function looks up a bitmap key from reference or context data a value (which can be an XML node set) for each set bit position and adds it to the resultant XML.
bitmap-lookup(String map, String key)
bitmap-lookup(String map, String key, String time)
bitmap-lookup(String map, String key, String time, Boolean ignoreWarnings)
bitmap-lookup(String map, String key, String time, Boolean ignoreWarnings, Boolean trace)
map- The name of the reference data map to perform the lookup against.key- The bitmap value to lookup. This can either be represented as a decimal integer (e.g.14) or as hexadecimal by prefixing with0x(e.g0xE).time- Determines which set of reference data was effective at the requested time. If no reference data exists with an effective time before the requested time then the lookup will fail. Time is in the formatyyyy-MM-dd'T'HH:mm:ss.SSSXX, e.g.2010-01-01T00:00:00.000Z.ignoreWarnings- If true, any lookup failures will be ignored, else they will be reported as warnings.trace- If true, additional trace information is output as INFO messages.
If the look up fails no result will be returned.
The key is a bitmap expressed as either a decimal integer or a hexidecimal value, e.g. 14/0xE is 1110 as a binary bitmap.
For each bit position that is set, (i.e. has a binary value of 1) a lookup will be performed using that bit position as the key.
In this example, positions 1, 2 & 3 are set so a lookup would be performed for these bit positions.
The result of each lookup for the bitmap are concatenated together in bit position order, separated by a space.
If ignoreWarnings is true then any lookup failures will be ignored and it will return the value(s) for the bit positions it was able to lookup.
This function can be useful when you have a set of values that can be represented as a bitmap and you need them to be converted back to individual values. For example if you have a set of additive account permissions (e.g Admin, ManageUsers, PerformExport, etc.), each of which is associated with a bit position, then a user’s permissions could be defined as a single decimal/hex bitmap value. Thus a bitmap lookup with this value would return all the permissions held by the user.
For example the reference data store may contain:
| Key (Bit position) | Value |
|---|---|
| 0 | Administrator |
| 1 | Manage_Users |
| 2 | Perform_Export |
| 3 | View_Data |
| 4 | Manage_Jobs |
| 5 | Delete_Data |
| 6 | Manage_Volumes |
The following are example lookups using the above reference data:
| Lookup Key (decimal) | Lookup Key (Hex) | Bitmap | Result |
|---|---|---|---|
0 |
0x0 |
0000000 |
- |
1 |
0x1 |
0000001 |
Administrator |
74 |
0x4A |
1001010 |
Manage_Users View_Data Manage_Volumes |
2 |
0x2 |
0000010 |
Manage_Users |
96 |
0x60 |
1100000 |
Delete_Data Manage_Volumes |
dictionary()
The dictionary() function gets the contents of the specified dictionary for use during translation. The main use for this function is to allow users to abstract the management of a set of keywords from the XSLT so that it is easier for some users to make quick alterations to a dictionary that is used by some XSLT, without the need for the user to understand the complexities of XSLT.
format-date()
The format-date() function takes a Pattern and optional TimeZone arguments and replaces the parsed contents with an XML standard Date Format. The pattern must be a Java based SimpleDateFormat. If the optional TimeZone argument is present the pattern must not include the time zone pattern tokens (z and Z). A special time zone value of “GMT/BST” can be used to guess the time based on the date (BST during British Summer Time).
E.g. Convert a GMT date time “2009/12/01 12:34:11”
<xsl:value-of select="s:format-date('2009/08/01 12:34:11', 'yyyy/MM/dd HH:mm:ss')"/>
E.g. Convert a GMT or BST date time “2009/08/01 12:34:11”
<xsl:value-of select="s:format-date('2009/08/01 12:34:11', 'yyyy/MM/dd HH:mm:ss', 'GMT/BST')"/>
E.g. Convert a GMT+1:00 date time “2009/08/01 12:34:11”
<xsl:value-of select="s:format-date('2009/08/01 12:34:11', 'yyyy/MM/dd HH:mm:ss', 'GMT+1:00')"/>
E.g. Convert a date time specified as milliseconds since the epoch “1269270011640”
<xsl:value-of select="s:format-date('1269270011640')"/>
Time Zone Must be as per the rules defined in SimpleDateFormat under General Time Zone syntax.
http-call()
Executes an HTTP(S) request to a remote server and returns the response.
http-call(String url, [String headers], [String mediaType], [String data], [String clientConfig])
The arguments are as follows:
url- The URL to send the request to.headers- A newline ( ) delimited list of HTTP headers to send. Each header is of the formkey:value.mediaType- The media (or MIME) type of the requestdata, e.g.application/json. If not setapplication/json; charset=utf-8will be used.data- The data to send. The data type should be consistent withmediaType. Supplying thedataargument means a POST request method will be used rather than the default GET.clientConfig- A JSON object containing the configuration for the HTTP client to use, including any SSL configuration.
The function returns the response as XML with namespace stroom-http.
The XML includes the body of the response in addition to the status code, success status, message and any headers.
clientConfig
The client can be configured using a JSON object containing various optional configuration items. The following is an example of the client configuration object with all keys populated.
{
"callTimeout": "PT30S",
"connectionTimeout": "PT30S",
"followRedirects": false,
"followSslRedirects": false,
"httpProtocols": [
"http/2",
"http/1.1"
],
"readTimeout": "PT30S",
"retryOnConnectionFailure": true,
"sslConfig": {
"keyStorePassword": "password",
"keyStorePath": "/some/path/client.jks",
"keyStoreType": "JKS",
"trustStorePassword": "password",
"trustStorePath": "/some/path/ca.jks",
"trustStoreType": "JKS",
"sslProtocol": "TLSv1.2",
"hostnameVerificationEnabled": false
},
"writeTimeout": "PT30S"
}
If you are using two-way SSL then you may need to set the protocol to HTTP/1.1.
"httpProtocols": [
"http/1.1"
],
Example output
The following is an example of the XML returned from the http-call function:
<response xmlns="stroom-http">
<successful>true</successful>
<code>200</code>
<message>OK</message>
<headers>
<header>
<key>cache-control</key>
<value>public, max-age=600</value>
</header>
<header>
<key>connection</key>
<value>keep-alive</value>
</header>
<header>
<key>content-length</key>
<value>108</value>
</header>
<header>
<key>content-type</key>
<value>application/json;charset=iso-8859-1</value>
</header>
<header>
<key>date</key>
<value>Wed, 29 Jun 2022 13:03:38 GMT</value>
</header>
<header>
<key>expires</key>
<value>Wed, 29 Jun 2022 13:13:38 GMT</value>
</header>
<header>
<key>server</key>
<value>nginx/1.21.6</value>
</header>
<header>
<key>vary</key>
<value>Accept-Encoding</value>
</header>
<header>
<key>x-content-type-options</key>
<value>nosniff</value>
</header>
<header>
<key>x-frame-options</key>
<value>sameorigin</value>
</header>
<header>
<key>x-xss-protection</key>
<value>1; mode=block</value>
</header>
</headers>
<body>{"buildDate":"2022-06-29T09:22:41.541886118Z","buildVersion":"SNAPSHOT","upDate":"2022-06-29T11:06:26.869Z"}</body>
</response>
Example usage
This is an example of how to use the function call in your XSLT.
It is recommended to place the clientConfig JSON in a
Dictionary
to make it easier to edit and to avoid having to escape all the quotes.
...
<xsl:template match="record">
...
<!-- Read the client config from a Dictionary into a variable -->
<xsl:variable name="clientConfig" select="stroom:dictionary('HTTP Client Config')" />
<!-- Make the HTTP call and store the response in a variable -->
<xsl:variable name="response" select="stroom:http-call('https://reqbin.com/echo', null, null, null, $clientConfig)" />
<!-- Apply 'response' templates to the response -->
<xsl:apply-templates mode="response" select="$response" />
...
</xsl:template>
<xsl:template mode="response" match="http:response">
<!-- Extract just the body of the response -->
<val><xsl:value-of select="./http:body/text()" /></val>
</xsl:template>
...
link()
Create a string that represents a hyperlink for display in a dashboard table.
link(url)
link(title, url)
link(title, url, type)
Example
link('http://www.somehost.com/somepath')
> [http://www.somehost.com/somepath](http://www.somehost.com/somepath)
link('Click Here','http://www.somehost.com/somepath')
> [Click Here](http://www.somehost.com/somepath)
link('Click Here','http://www.somehost.com/somepath', 'dialog')
> [Click Here](http://www.somehost.com/somepath){dialog}
link('Click Here','http://www.somehost.com/somepath', 'dialog|Dialog Title')
> [Click Here](http://www.somehost.com/somepath){dialog|Dialog Title}
Type can be one of:
dialog: Display the content of the link URL within a stroom popup dialog.tab: Display the content of the link URL within a stroom tab.browser: Display the content of the link URL within a new browser tab.dashboard: Used to launch a stroom dashboard internally with parameters in the URL.
If you wish to override the default title or URL of the target link in either a tab or dialog you can. Both dialog and tab types allow titles to be specified after a |, e.g. dialog|My Title.
log()
The log() function writes a message to the processing log with the specified severity. Severities of INFO, WARN, ERROR and FATAL can be used. Severities of ERROR and FATAL will result in records being omitted from the output if a RecordOutputFilter is used in the pipeline. The counts for RecWarn, RecError will be affected by warnings or errors generated in this way therefore this function is useful for adding business rules to XML output.
E.g. Warn if a SID is not the correct length.
<xsl:if test="string-length($sid) != 7">
<xsl:value-of select="s:log('WARN', concat($sid, ' is not the correct length'))"/>
</xsl:if>
lookup()
The lookup() function looks up from reference or context data a value (which can be an XML node set) and adds it to the resultant XML.
lookup(String map, String key)
lookup(String map, String key, String time)
lookup(String map, String key, String time, Boolean ignoreWarnings)
lookup(String map, String key, String time, Boolean ignoreWarnings, Boolean trace)
map- The name of the reference data map to perform the lookup against.key- The key to lookup. The key can be a simple string, an integer value in a numeric range or a nested lookup key.time- Determines which set of reference data was effective at the requested time. If no reference data exists with an effective time before the requested time then the lookup will fail. Time is in the formatyyyy-MM-dd'T'HH:mm:ss.SSSXX, e.g.2010-01-01T00:00:00.000Z.ignoreWarnings- If true, any lookup failures will be ignored, else they will be reported as warnings.trace- If true, additional trace information is output as INFO messages.
If the look up fails no result will be returned. By testing the result a default value may be output if no result is returned.
E.g. Look up a SID given a PF
<xsl:variable name="pf" select="PFNumber"/>
<xsl:if test="$pf">
<xsl:variable name="sid" select="s:lookup('PF_TO_SID', $pf, $formattedDateTime)"/>
<xsl:choose>
<xsl:when test="$sid">
<User>
<Id><xsl:value-of select="$sid"/></Id>
</User>
</xsl:when>
<xsl:otherwise>
<data name="PFNumber">
<xsl:attribute name="Value"><xsl:value-of select="$pf"/></xsl:attribute>
</data>
</xsl:otherwise>
</xsl:choose>
</xsl:if>
Range lookups
Reference data entries can either be stored with single string key or a key range that defines a numeric range, e.g 1-100. When a lookup is preformed the passed key is looked up as if it were a normal string key. If that lookup fails Stroom will try to convert the key to an integer (long) value. If it can be converted to an integer than a second lookup will be performed against entries with key ranges to see if there is a key range that includes the requested key.
Range lookups can be used for looking up an IP address where the reference data values are associated with ranges of IP addresses.
In this use case, the IP address must first be converted into a numeric value using numeric-ip(), e.g:
stroom:lookup('IP_TO_LOCATION', numeric-ip($ipAddress))
Similarly the reference data must be stored with key ranges whose bounds were created using this function.
Nested Maps
The lookup function allows you to perform chained lookups using nested maps.
For example you may have a reference data map called USER_ID_TO_LOCATION that maps user IDs to some location information for that user and a map called USER_ID_TO_MANAGER that maps user IDs to the user ID of their manager.
If you wanted to decorate a user’s event with the location of their manager you could use a nested map to achieve the lookup chain.
To perform the lookup set the map argument to the list of maps in the lookup chain, separated by a /, e.g. USER_ID_TO_MANAGER/USER_ID_TO_LOCATION.
This will perform a lookup against the first map in the list using the requested key.
If a value is found the value will be used as the key in a lookup against the next map.
The value from each map lookup is used as the key in the next map all the way down the chain.
The value from the last lookup is then returned as the result of the lookup() call.
If no value is found at any point in the chain then that results in no value being returned from the function.
In order to use nested map lookups each intermediate map must contain simple string values. The last map in the chain can either contain string values or XML fragment values.
put() and get()
You can put values into a map using the put() function.
These values can then be retrieved later using the get() function.
Values are stored against a key name so that multiple values can be stored.
These functions can be used for many purposes but are most commonly used to count a number of records that meet certain criteria.
The map is in the scope of the current pipeline process so values do not live after the stream has been processed.
Also, the map will only contain entries that were put() within the current pipeline process.
An example of how to count records is shown below:
<!-- Get the current record count -->
<xsl:variable name="currentCount" select="number(s:get('count'))" />
<!-- Increment the record count -->
<xsl:variable name="count">
<xsl:choose>
<xsl:when test="$currentCount">
<xsl:value-of select="$currentCount + 1" />
</xsl:when>
<xsl:otherwise>
<xsl:value-of select="1" />
</xsl:otherwise>
</xsl:choose>
</xsl:variable>
<!-- Store the count for future retrieval -->
<xsl:value-of select="s:put('count', $count)" />
<!-- Output the new count -->
<data name="Count">
<xsl:attribute name="Value" select="$count" />
</data>
meta-keys()
When calling this function and assigning the result to a variable, you must specify the variable data type of xs:string* (array of strings).
The following fragment is an example of using meta-keys() to emit all meta values for a given stream, into an Event/Meta element:
<Event>
<xsl:variable name="metaKeys" select="stroom:meta-keys()" as="xs:string*" />
<Meta>
<xsl:for-each select="$metaKeys">
<string key="{.}"><xsl:value-of select="stroom:meta(.)" /></string>
</xsl:for-each>
</Meta>
</Event>
parse-uri()
The parse-uri() function takes a Uniform Resource Identifier (URI) in string form and returns an XML node with a namespace of uri containing the URI’s individual components of authority, fragment, host, path, port, query, scheme, schemeSpecificPart and userInfo. See either RFC 2306: Uniform Resource Identifiers (URI): Generic Syntax or Java’s java.net.URI Class for details regarding the components.
The following xml
<!-- Display and parse the URI contained within the text of the rURI element -->
<xsl:variable name="u" select="s:parseUri(rURI)" />
<URI>
<xsl:value-of select="rURI" />
</URI>
<URIDetail>
<xsl:copy-of select="$v"/>
</URIDetail>
given the rURI text contains
http://foo:bar@w1.superman.com:8080/very/long/path.html?p1=v1&p2=v2#more-details
would provide
<URL>http://foo:bar@w1.superman.com:8080/very/long/path.html?p1=v1&p2=v2#more-details</URL>
<URIDetail>
<authority xmlns="uri">foo:bar@w1.superman.com:8080</authority>
<fragment xmlns="uri">more-details</fragment>
<host xmlns="uri">w1.superman.com</host>
<path xmlns="uri">/very/long/path.html</path>
<port xmlns="uri">8080</port>
<query xmlns="uri">p1=v1&p2=v2</query>
<scheme xmlns="uri">http</scheme>
<schemeSpecificPart xmlns="uri">//foo:bar@w1.superman.com:8080/very/long/path.html?p1=v1&p2=v2</schemeSpecificPart>
<userInfo xmlns="uri">foo:bar</userInfo>
</URIDetail>
pointIsInsideXYPolygon()
Returns true if the specified point is inside the specified polygon. Useful for determining if a user is inside a physical zone based on their location and the boundary of that zone.
pointIsInsideXYPolygon(Number xPos, Number yPos, Number[] xPolyData, Number[] yPolyData)
Arguments:
xPos- The X value of the point to be tested.yPos- The Y value of the point to be tested.xPolyData- A sequence of X values that define the polygon.yPolyData- A sequence of Y values that define the polygon.
The list of values supplied for xPolyData must correspond with the list of values supplied for yPolyData.
The points that define the polygon must be provided in order, i.e. starting from one point on the polygon and then traveling round the path of the polygon until it gets back to the beginning.
12.2.2 - XSLT Includes
You can use an XSLT import to include XSLT from another translation. E.g.
<xsl:import href="ApacheAccessCommon" />
This would include the XSLT from the ApacheAccessCommon translation.
12.3 - File Output
When outputting files with Stroom, the output file names and paths can include various substitution variables to form the file and path names.
Context Variables
The following replacement variables are specific to the current processing context.
${feed}- The name of the feed that the stream being processed belongs to${pipeline}- The name of the pipeline that is producing output${sourceId}- The id of the input data being processed${partNo}- The part number of the input data being processed where data is in aggregated batches${searchId}- The id of the batch search being performed. This is only available during a batch search${node}- The name of the node producing the output
Time Variables
The following replacement variables can be used to include aspects of the current time in UTC.
${year}- Year in 4 digit form, e.g. 2000${month}- Month of the year padded to 2 digits${day}- Day of the month padded to 2 digits${hour}- Hour padded to 2 digits using 24 hour clock, e.g. 22${minute}- Minute padded to 2 digits${second}- Second padded to 2 digits${millis}- Milliseconds padded to 3 digits${ms}- Milliseconds since the epoch
System (Environment) Variables
System variables (environment variables) can also be used, e.g. ${TMP}.
File Name References
rolledFileName in RollingFileAppender can use references to the fileName to incorporate parts of the non rolled file name.
${fileName}- The complete file name${fileStem}- Part of the file name before the file extension, i.e. everything before the last ‘.’${fileExtension}- The extension part of the file name, i.e. everything after the last ‘.’
Other Variables
${uuid}- A randomly generated UUID to guarantee unique file names
12.4 - Element Reference
Reader
Reader elements read and transform the data at the character level before they are parsed into a structured form.
BOMRemovalFilterInput
Removes the Byte Order Mark (if present) from the stream.
BadTextXMLFilterReader
TODO - Add description
Element properties:
| Name | Description | Default Value |
|---|---|---|
| tags | A comma separated list of XML elements between which non-escaped characters will be escaped. | - |
FindReplaceFilter
Replaces strings or regexes with new strings.
Element properties:
| Name | Description | Default Value |
|---|---|---|
| bufferSize | The number of characters to buffer when matching the regex. | 1000 |
| dotAll | Let ‘.’ match all characters in a regex. | false |
| escapeFind | Whether or not to escape find pattern or text. | true |
| escapeReplacement | Whether or not to escape replacement text. | true |
| find | The text or regex pattern to find and replace. | - |
| maxReplacements | The maximum number of times to try and replace text. There is no limit by default. | - |
| regex | Whether the pattern should be treated as a literal or a regex. | false |
| replacement | The replacement text. | - |
| showReplacementCount | Show total replacement count | true |
InvalidCharFilterReader
TODO - Add description
Element properties:
| Name | Description | Default Value |
|---|---|---|
| xmlVersion | XML version, e.g. 1.0 or 1.1 | 1.1 |
InvalidXMLCharFilterReader
Strips out any characters that are not within the standard XML character set.
Element properties:
| Name | Description | Default Value |
|---|---|---|
| xmlVersion | XML version, e.g. 1.0 or 1.1 | 1.1 |
Reader
TODO - Add description
Parser
Parser elements parse raw text data that conforms to some kind of structure (e.g. XML, JSON, CSV) into XML events (elements, attributes, text, etc) that can be further validated or transformed using. The choice of Parser will be dictated by the structure of the data. Parsers read the data using the character encoding defined on the feed.
CombinedParser

The original general-purpose reader/parser that covers all source data types but provides less flexibility than the source format-specific parsers such as dsParser.
Element properties:
| Name | Description | Default Value |
|---|---|---|
| fixInvalidChars | Fix invalid XML characters from the input stream. | false |
| namePattern | A name pattern to load a text converter dynamically. | - |
| suppressDocumentNotFoundWarnings | If the text converter cannot be found to match the name pattern suppress warnings. | false |
| textConverter | The text converter configuration that should be used to parse the input data. | - |
| type | The parser type, e.g. ‘JSON’, ‘XML’, ‘Data Splitter’. | - |
DSParser
A parser for data that uses Data Splitter code.
Element properties:
| Name | Description | Default Value |
|---|---|---|
| namePattern | A name pattern to load a data splitter dynamically. | - |
| suppressDocumentNotFoundWarnings | If the data splitter cannot be found to match the name pattern suppress warnings. | false |
| textConverter | The data splitter configuration that should be used to parse the input data. | - |
JSONParser

A built-in parser for JSON source data in JSON fragment format into an XML document.
Element properties:
| Name | Description | Default Value |
|---|---|---|
| addRootObject | Add a root map element. | true |
| allowBackslashEscapingAnyCharacter | Feature that can be enabled to accept quoting of all character using backslash quoting mechanism: if not enabled, only characters that are explicitly listed by JSON specification can be thus escaped (see JSON spec for small list of these characters) | false |
| allowComments | Feature that determines whether parser will allow use of Java/C++ style comments (both ‘/’+’*’ and ‘//’ varieties) within parsed content or not. | false |
| allowMissingValues | Feature allows the support for “missing” values in a JSON array: missing value meaning sequence of two commas, without value in-between but only optional white space. | false |
| allowNonNumericNumbers | Feature that allows parser to recognize set of “Not-a-Number” (NaN) tokens as legal floating number values (similar to how many other data formats and programming language source code allows it). | false |
| allowNumericLeadingZeros | Feature that determines whether parser will allow JSON integral numbers to start with additional (ignorable) zeroes (like: 000001). | false |
| allowSingleQuotes | Feature that determines whether parser will allow use of single quotes (apostrophe, character ‘'’) for quoting Strings (names and String values). If so, this is in addition to other acceptable markers but not by JSON specification). | false |
| allowTrailingComma | Feature that determines whether we will allow for a single trailing comma following the final value (in an Array) or member (in an Object). These commas will simply be ignored. | false |
| allowUnquotedControlChars | Feature that determines whether parser will allow JSON Strings to contain unquoted control characters (ASCII characters with value less than 32, including tab and line feed characters) or not. If feature is set false, an exception is thrown if such a character is encountered. | false |
| allowUnquotedFieldNames | Feature that determines whether parser will allow use of unquoted field names (which is allowed by Javascript, but not by JSON specification). | false |
| allowYamlComments | Feature that determines whether parser will allow use of YAML comments, ones starting with ‘#’ and continuing until the end of the line. This commenting style is common with scripting languages as well. | false |
XMLFragmentParser
A parser to convert multiple XML fragments into an XML document.
Element properties:
| Name | Description | Default Value |
|---|---|---|
| namePattern | A name pattern to load a text converter dynamically. | - |
| suppressDocumentNotFoundWarnings | If the text converter cannot be found to match the name pattern suppress warnings. | false |
| textConverter | The XML fragment wrapper that should be used to wrap the input XML. | - |
XMLParser
TODO - Add description
Filter
Filter elements work with XML events that have been generated by a parser. They can consume the events without modifying them, e.g. RecordCountFilter or modify them in some way, e.g. XSLTFilter. Multiple filters can be used one after another with each using the output from the last as its input.
ElasticIndexingFilter
TODO - Add description
Element properties:
| Name | Description | Default Value |
|---|---|---|
| batchSize | Maximum number of documents to index in each bulk request | 10000 |
| cluster | Target Elasticsearch cluster | - |
| indexBaseName | Name of the Elasticsearch index | - |
| indexNameDateFieldName | Name of the field containing the DateTime value to use when determining the index date suffix |
@timestamp |
| indexNameDateFormat | Format of the date to append to the index name (example: -yyyy). If unspecified, no date is appended. |
- |
| indexNameDateMaxFutureOffset | Do not append a time suffix to the index name for events occurring after the current time plus the specified offset | P1D |
| indexNameDateMin | Do not append a time suffix to the index name for events occurring before this date. Date is assumed to be in UTC and of the format specified in indexNameDateMinFormat |
- |
| indexNameDateMinFormat | Date format of the supplied indexNameDateMin property |
yyyy |
| ingestPipeline | Name of the Elasticsearch ingest pipeline to execute when indexing | - |
| purgeOnReprocess | When reprocessing a stream, first delete any documents from the index matching the stream ID | true |
| refreshAfterEachBatch | Refresh the index after each batch is processed, making the indexed documents visible to searches | false |
HttpPostFilter
TODO - Add description
Element properties:
| Name | Description | Default Value |
|---|---|---|
| receivingApiUrl | The URL of the receiving API. | - |
IdEnrichmentFilter
TODO - Add description
IndexingFilter

A filter to send source data to an index.
Element properties:
| Name | Description | Default Value |
|---|---|---|
| index | The index to send records to. | - |
RecordCountFilter
TODO - Add description
Element properties:
| Name | Description | Default Value |
|---|---|---|
| countRead | Is this filter counting records read or records written? | true |
RecordOutputFilter

TODO - Add description
ReferenceDataFilter

Takes XML input (conforming to the reference-data:2 schema) and loads the data into the Reference Data Store. Reference data values can be either simple strings or XML fragments.
Element properties:
| Name | Description | Default Value |
|---|---|---|
| overrideExistingValues | Allow duplicate keys to override existing values? | true |
| warnOnDuplicateKeys | Warn if there are duplicate keys found in the reference data? | false |
SafeXMLFilter
TODO - Add description
SchemaFilter
Checks the format of the source data against one of a number of XML schemas. This ensures that if non-compliant data is generated, it will be flagged as in error and will not be passed to any subsequent processing elements.
Element properties:
| Name | Description | Default Value |
|---|---|---|
| namespaceURI | Limits the schemas that can be used to validate data to those with a matching namespace URI. | - |
| schemaGroup | Limits the schemas that can be used to validate data to those with a matching schema group name. | - |
| schemaLanguage | The schema language that the schema is written in. | http://www.w3.org/2001/XMLSchema |
| schemaValidation | Should schema validation be performed? | true |
| systemId | Limits the schemas that can be used to validate data to those with a matching system id. | - |
SearchResultOutputFilter

TODO - Add description
SolrIndexingFilter

Delivers source data to the specified index in an external Solr instance/cluster.
Element properties:
| Name | Description | Default Value |
|---|---|---|
| batchSize | How many documents to send to the index in a single post. | 1000 |
| commitWithinMs | Commit indexed documents within the specified number of milliseconds. | -1 |
| index | The index to send records to. | - |
| softCommit | Perform a soft commit after every batch so that docs are available for searching immediately (if using NRT replicas). | true |
SplitFilter
Splits multi-record source data into smaller groups of records prior to delivery to an XSLT. This allows the XSLT to process data more efficiently than loading a potentially huge input stream into memory.
Element properties:
| Name | Description | Default Value |
|---|---|---|
| splitCount | The number of elements at the split depth to count before the XML is split. | 10000 |
| splitDepth | The depth of XML elements to split at. | 1 |
| storeLocations | Should this split filter store processing locations. | true |
StatisticsFilter

An element to allow the source data (conforming to the statistics XML Schema) to be sent to the MySQL based statistics data store.
Element properties:
| Name | Description | Default Value |
|---|---|---|
| statisticsDataSource | The statistics data source to record statistics against. | - |
StroomStatsFilter

An element to allow the source data (conforming to the statistics XML Schema) to be sent to an external stroom-stats service.
Element properties:
| Name | Description | Default Value |
|---|---|---|
| flushOnSend | At the end of the stream, wait for acknowledgement from the Kafka broker for all the messages sent. This ensures errors are caught in the pipeline process. | true |
| kafkaConfig | The Kafka config to use. | - |
| statisticsDataSource | The stroom-stats data source to record statistics against. | - |
XPathExtractionOutputFilter

TODO - Add description
Element properties:
| Name | Description | Default Value |
|---|---|---|
| multipleValueDelimiter | The string to delimit multiple simple values. | , |
XSLTFilter
An element used to transform XML data from one form to another using XSLT. The specified XSLT can be used to transform the input XML into XML conforming to another schema or into other forms such as JSON, plain text, etc.
Element properties:
| Name | Description | Default Value |
|---|---|---|
| pipelineReference | A list of places to load reference data from if required. | - |
| suppressXSLTNotFoundWarnings | If XSLT cannot be found to match the name pattern suppress warnings. | false |
| usePool | Advanced: Choose whether or not you want to use cached XSLT templates to improve performance. | true |
| xslt | The XSLT to use. | - |
| xsltNamePattern | A name pattern to load XSLT dynamically. | - |
Writer
Writers consume XML events (from Parsers and Filters) and convert them into a stream of bytes using the character encoding configured on the Writer (if applicable). The output data can then be fed to a Destination.
JSONWriter
Writer to convert XML data conforming to the http://www.w3.org/2013/XSL/json XML Schema into JSON format.
Element properties:
| Name | Description | Default Value |
|---|---|---|
| encoding | The output character encoding to use. | UTF-8 |
| indentOutput | Should output JSON be indented and include new lines (pretty printed)? | false |
TextWriter
Writer to convert XML character data events into plain text output.
Element properties:
| Name | Description | Default Value |
|---|---|---|
| encoding | The output character encoding to use. | UTF-8 |
| footer | Footer text that can be added to the output at the end. | - |
| header | Header text that can be added to the output at the start. | - |
XMLWriter
Writer to convert XML events data into XML output in the specified character encoding.
Element properties:
| Name | Description | Default Value |
|---|---|---|
| encoding | The output character encoding to use. | UTF-8 |
| indentOutput | Should output XML be indented and include new lines (pretty printed)? | false |
| suppressXSLTNotFoundWarnings | If XSLT cannot be found to match the name pattern suppress warnings. | false |
| xslt | A previously saved XSLT, used to modify the output via xsl:output attributes. | - |
| xsltNamePattern | A name pattern for dynamic loading of an XSLT, that will modfy the output via xsl:output attributes. | - |
Destination
Destination elements consume a stream of bytes from a Writer and persist then to a destination. This could be a file on a file system or to Stroom’s stream store.
AnnotationWriter
TODO - Add description
FileAppender

A destination used to write an output stream to a file on the file system. If multiple paths are specified in the ‘outputPaths’ property it will pick one at random to write to.
Element properties:
| Name | Description | Default Value |
|---|---|---|
| filePermissions | Set file system permissions of finished files (example: ‘rwxr–r–’) | - |
| outputPaths | One or more destination paths for output files separated with commas. Replacement variables can be used in path strings such as ${feed}. | - |
| rollSize | When the current output file exceeds this size it will be closed and a new one created. | - |
| splitAggregatedStreams | Choose if you want to split aggregated streams into separate output files. | false |
| splitRecords | Choose if you want to split individual records into separate output files. | false |
| useCompression | Apply GZIP compression to output files | false |
HDFSFileAppender
A destination used to write an output stream to a file on a Hadoop Distributed File System. If multiple paths are specified in the ‘outputPaths’ property it will pick one at random.
Element properties:
| Name | Description | Default Value |
|---|---|---|
| fileSystemUri | URI for the Hadoop Distributed File System (HDFS) to connect to, e.g. hdfs://mynamenode.mydomain.com:8020 | - |
| outputPaths | One or more destination paths for output files separated with commas. Replacement variables can be used in path strings such as ${feed}. | - |
| rollSize | When the current output file exceeds this size it will be closed and a new one created. | - |
| runAsUser | The user to connect to HDFS as | - |
| splitAggregatedStreams | Choose if you want to split aggregated streams into separate output files. | false |
| splitRecords | Choose if you want to split individual records into separate output files. | false |
HTTPAppender
A destination used to write an output stream to a remote HTTP(s) server.
Element properties:
| Name | Description | Default Value |
|---|---|---|
| connectionTimeout | How long to wait before we abort sending data due to connection timeout | - |
| contentType | The content type | application/json |
| forwardChunkSize | Should data be sent in chunks and if so how big should the chunks be | - |
| forwardUrl | The URL to send data to | - |
| hostnameVerificationEnabled | Verify host names | true |
| httpHeadersIncludeStreamMetaData | Provide stream metadata as HTTP headers | true |
| httpHeadersUserDefinedHeader1 | Additional HTTP Header 1, format is ‘HeaderName: HeaderValue’ | - |
| httpHeadersUserDefinedHeader2 | Additional HTTP Header 2, format is ‘HeaderName: HeaderValue’ | - |
| httpHeadersUserDefinedHeader3 | Additional HTTP Header 3, format is ‘HeaderName: HeaderValue’ | - |
| keyStorePassword | The key store password | - |
| keyStorePath | The key store file path on the server | - |
| keyStoreType | The key store type | JKS |
| logMetaKeys | Which meta data values will be logged in the send log | guid,feed,system,environment,remotehost,remoteaddress |
| readTimeout | How long to wait for data to be available before closing the connection | - |
| requestMethod | The request method, e.g. POST | POST |
| rollSize | When the current output exceeds this size it will be closed and a new one created. | - |
| splitAggregatedStreams | Choose if you want to split aggregated streams into separate output. | false |
| splitRecords | Choose if you want to split individual records into separate output. | false |
| sslProtocol | The SSL protocol to use | TLSv1.2 |
| trustStorePassword | The trust store password | - |
| trustStorePath | The trust store file path on the server | - |
| trustStoreType | The trust store type | JKS |
| useCompression | Should data be compressed when sending | true |
| useJvmSslConfig | Use JVM SSL config. Set this to true if the Stroom node has been configured with key/trust stores using java system properties like ‘javax.net.ssl.keyStore’.Set this to false if you are explicitly setting key/trust store properties on this HttpAppender. | true |
RollingFileAppender

A destination used to write an output stream to a file on the file system.
If multiple paths are specified in the ‘outputPaths’ property it will pick one at random to write to.
This is distinct from the FileAppender in that when the rollSize is reached it will move the current file to the path specified in rolledFileName and resume writing to the original path.
This allows other processes to follow the changes to a single file path, e.g. when using tail.
Element properties:
| Name | Description | Default Value |
|---|---|---|
| fileName | Choose the name of the file to write. | - |
| filePermissions | Set file system permissions of finished files (example: ‘rwxr–r–’) | - |
| frequency | Choose how frequently files are rolled. | 1h |
| outputPaths | One or more destination paths for output files separated with commas. Replacement variables can be used in path strings such as ${feed}. | - |
| rollSize | When the current output file exceeds this size it will be closed and a new one created, e.g. 10M, 1G. | 100M |
| rolledFileName | Choose the name that files will be renamed to when they are rolled. | - |
| schedule | Provide a cron expression to determine when files are rolled. | - |
| useCompression | Apply GZIP compression to output files | false |
RollingStreamAppender
A destination used to write one or more output streams to a new stream which is then rolled when it reaches a certain size or age. A new stream will be created after the size or age criteria has been met.
Element properties:
| Name | Description | Default Value |
|---|---|---|
| feed | The feed that output stream should be written to. If not specified the feed the input stream belongs to will be used. | - |
| frequency | Choose how frequently streams are rolled. | 1h |
| rollSize | Choose the maximum size that a stream can be before it is rolled. | 100M |
| schedule | Provide a cron expression to determine when streams are rolled. | - |
| segmentOutput | Should the output stream be marked with indexed segments to allow fast access to individual records? | true |
| streamType | The stream type that the output stream should be written as. This must be specified. | - |
StandardKafkaProducer

TODO - Add description
Element properties:
| Name | Description | Default Value |
|---|---|---|
| flushOnSend | At the end of the stream, wait for acknowledgement from the Kafka broker for all the messages sent. This ensures errors are caught in the pipeline process. | true |
| kafkaConfig | Kafka configuration details relating to where and how to send Kafka messages. | - |
StreamAppender
TODO - Add description
Element properties:
| Name | Description | Default Value |
|---|---|---|
| feed | The feed that output stream should be written to. If not specified the feed the input stream belongs to will be used. | - |
| rollSize | When the current output stream exceeds this size it will be closed and a new one created. | - |
| segmentOutput | Should the output stream be marked with indexed segments to allow fast access to individual records? | true |
| splitAggregatedStreams | Choose if you want to split aggregated streams into separate output streams. | false |
| splitRecords | Choose if you want to split individual records into separate output streams. | false |
| streamType | The stream type that the output stream should be written as. This must be specified. | - |
StroomStatsAppender
TODO - Add description
Element properties:
| Name | Description | Default Value |
|---|---|---|
| flushOnSend | At the end of the stream, wait for acknowledgement from the Kafka broker for all the messages sent. This ensures errors are caught in the pipeline process. | true |
| kafkaConfig | The Kafka config to use. | - |
| maxRecordCount | Choose the maximum number of records or events that a message will contain | 1 |
| statisticsDataSource | The stroom-stats data source to record statistics against. | - |
12.5 - Reference Data
In Stroom reference data is primarily used to decorate events using stroom:lookup() calls in XSLTs.
For example you may have reference data feed that associates the FQDN of a device to the physical location.
You can then perform a stroom:lookup() in the XSLT to decorate an event with the physical location of a device by looking up the FQDN found in the event.
Reference data is time sensitive and each stream of reference data has an Effective Date set against it. This allows reference data lookups to be performed using the date of the event to ensure the reference data that was actually effective at the time of the event is used.
Using reference data involves the following steps/processes:
- Ingesting the raw reference data into Stroom.
- Creating (and processing) a pipeline to transform the raw reference into
reference-data:2format XML. - Creating a reference loader pipeline with a Reference Data Filter element to load cooked reference data into the reference data store.
- Adding reference pipeline/feeds to an XSLT Filter in your event pipeline.
- Adding the lookup call to the XSLT.
- Processing the raw events through the event pipeline.
The process of creating a reference data pipeline is described in the HOWTO linked at the top of this document.
Reference Data Structure
A reference data entry essentially consists of the following:
- Effective time - The data/time that the entry was effective from, i.e the time the raw reference data was received.
- Map name - A unique name for the key/value map that the entry will be stored in. The name only needs to be unique within all map names that may be loaded within an XSLT Filter. In practice it makes sense to keep map names globally unique.
- Key - The text that will be used to lookup the value in the reference data map. Mutually exclusive with Range.
- Range - The inclusive range of integer keys that the entry applies to. Mutually exclusive with Key.
- Value - The value can either be simple text, e.g. an IP address, or an XML fragment that can be inserted into another XML document. XML values must be correctly namespaced.
The following is an example of some reference data that has been converted from its raw form into reference-data:2 XML.
In this example the reference data contains three entries that each belong to a different map.
Two of the entries are simple text values and the last has an XML value.
<?xml version="1.1" encoding="UTF-8"?>
<referenceData
xmlns="reference-data:2"
xmlns:xsi="http://www.w3.org/2001/XMLSchema-instance"
xmlns:stroom="stroom"
xmlns:evt="event-logging:3"
xsi:schemaLocation="reference-data:2 file://reference-data-v2.0.xsd"
version="2.0.1">
<!-- A simple string value -->
<reference>
<map>FQDN_TO_IP</map>
<key>stroomnode00.strmdev00.org</key>
<value>
<IPAddress>192.168.2.245</IPAddress>
</value>
</reference>
<!-- A simple string value -->
<reference>
<map>IP_TO_FQDN</map>
<key>192.168.2.245</key>
<value>
<HostName>stroomnode00.strmdev00.org</HostName>
</value>
</reference>
<!-- A key range -->
<reference>
<map>USER_ID_TO_COUNTRY_CODE</map>
<range>
<from>1</from>
<to>1000</to>
</range>
<value>GBR</value>
</reference>
<!-- An XML fragment value -->
<reference>
<map>FQDN_TO_LOC</map>
<key>stroomnode00.strmdev00.org</key>
<value>
<evt:Location>
<evt:Country>GBR</evt:Country>
<evt:Site>Bristol-S00</evt:Site>
<evt:Building>GZero</evt:Building>
<evt:Room>R00</evt:Room>
<evt:TimeZone>+00:00/+01:00</evt:TimeZone>
</evt:Location>
</value>
</reference>
</referenceData>
Reference Data Namespaces
When XML reference data values are created, as in the example XML above, the XML values must be qualified with a namespace to distinguish them from the reference-data:2 XML that surrounds them.
In the above example the XML fragment will become as follows when injected into an event:
<evt:Location xmlns:evt="event-logging:3" >
<evt:Country>GBR</evt:Country>
<evt:Site>Bristol-S00</evt:Site>
<evt:Building>GZero</evt:Building>
<evt:Room>R00</evt:Room>
<evt:TimeZone>+00:00/+01:00</evt:TimeZone>
</evt:Location>
Even if evt is already declared in the XML being injected into it, if it has been declared for the reference fragment then it will be explicitly declared in the destination.
While duplicate namespacing may appear odd it is valid XML.
The namespacing can also be achieved like this:
<?xml version="1.1" encoding="UTF-8"?>
<referenceData
xmlns="reference-data:2"
xmlns:xsi="http://www.w3.org/2001/XMLSchema-instance"
xmlns:stroom="stroom"
xsi:schemaLocation="reference-data:2 file://reference-data-v2.0.xsd"
version="2.0.1">
<!-- An XML value -->
<reference>
<map>FQDN_TO_LOC</map>
<key>stroomnode00.strmdev00.org</key>
<value>
<Location xmlns="event-logging:3">
<Country>GBR</Country>
<Site>Bristol-S00</Site>
<Building>GZero</Building>
<Room>R00</Room>
<TimeZone>+00:00/+01:00</TimeZone>
</Location>
</value>
</reference>
</referenceData>
This reference data will be injected into event XML exactly as it, i.e.:
<Location xmlns="event-logging:3">
<Country>GBR</Country>
<Site>Bristol-S00</Site>
<Building>GZero</Building>
<Room>R00</Room>
<TimeZone>+00:00/+01:00</TimeZone>
</Location>
Reference Data Storage
Reference data is stored in two different places on a Stroom node. All reference data is only visible to the node where it is located. Each node that is performing reference data lookups will need to load and store its own reference data. While this will result in duplicate data being held by nodes it makes the storage of reference data and its subsequent lookup very performant.
On-Heap Store
The On-Heap store is the reference data store that is held in memory in the Java Heap. This store is volatile and will be lost on shut down of the node. The On-Heap store is only used for storage of context data.
Off-Heap Store
The Off-Heap store is the reference data store that is held in memory outside of the Java Heap and is persisted to to local disk. As the store is also persisted to local disk it means the reference data will survive the shutdown of the stroom instance. Storing the data off-heap means Stroom can run with a much smaller Java Heap size.
The Off-Heap store is based on the Lightning Memory-Mapped Database (LMDB). LMDB makes use of the Linux page cache to ensure that hot portions of the reference data are held in the page cache (making use of all available free memory). Infrequently used portions of the reference data will be evicted from the page cache by the Operating System. Given that LMDB utilises the page cache for holding reference data in memory the more free memory the host has the better as there will be less shifting of pages in/out of the OS page cache. When storing large amounts of data you may experience the OS reporting very little free memory as a large amount will be in use by the page cache. This is not an issue as the OS will evict pages when memory is needed for other applications, e.g. the Java Heap.
Local Disk
The Off-Heap store is intended to be located on local disk on the Stroom node.
The location of the store is set using the property stroom.pipeline.referenceData.localDir.
Using LMDB on remote storage is NOT advised, see http://www.lmdb.tech/doc.
Using the fastest storage (i.g. fast SSDs) is advised to reduce load times and lookups of data that is not in memory.
Warning
If you are running stroom on AWS EC2 instances then you will need to attach some local instance storage to the host, e.g. SSD, to use for the reference data store. In tests EBS storage was found to be VERY slow.
It should be noted that AWS instance storage is not persistent between instance stops, terminations and hardware failure. However any loss of the reference data store will mean that the next time Stroom boots a new store will be created and reference data will be loaded on demand as normal.
Transactions
LMDB is a transactional database with ACID semantics. All interaction with LMDB is done within a read or write transaction. There can only be one write transaction at a time so if there are a number of concurrent reference data loads then they will have to wait in line.
Read transactions, i.e. lookups, are not blocked by each other but may be blocked by a write transaction depending on the value of the system property stroom.pipeline.referenceData.lmdb.readerBlockedByWriter.
LMDB can operate such that readers are not blocked by writers but if there is an open read transaction while a write transaction is writing data to the store then it is unable to make use of free space (from previous deletes, see Store Size & Compaction) so will result in the store increasing in size.
If read transactions are likely while writes are taking place then this can lead to excessive growth of the store.
Setting stroom.pipeline.referenceData.lmdb.readerBlockedByWriter to true will block all reads while a load is happening so any free space can be re-used, at the cost of making all lookups wait for the load to complete.
Use of this setting will depend on how likely it is that loads will clash with lookups and the store size should be monitored.
Read-Ahead Mode
When data is read from the store, if the data is not already in the page cache then it will be read from disk and added to the page cache by the OS.
Read-ahead is the process of speculatively reading ahead to load more pages into the page cache than were requested.
This is on the basis that future requests for data may need the pages speculatively read into memory as it is more efficient to read multiple pages at once.
If the reference data store is very large or is larger than the available memory then it is recommended to turn read-ahead off as the result will be to evict hot reference data from the page cache to make room for speculative pages that may not be needed.
It can be tuned off with the system property stroom.pipeline.referenceData.readAheadEnabled.
Key Size
When reference data is created care must be taken to ensure that the Key used for each entry is less than 507 bytes. For simple ASCII characters then this means less than 507 characters. If non-ASCII characters are in the key then these will take up more than one byte per character so the length of the key in characters will be less. This is a limitation inherent to LMDB.
Commit intervals
The property stroom.pipeline.referenceData.maxPutsBeforeCommit controls the number of entries that are put into the store between each commit.
As there can be only one transaction writing to the store at a time, committing periodically allows other process to jump in and make writes.
There is a trade off though as reducing the number of entries put between each commit can seriously affect performance.
For the fastest single process performance a value of 0 should be used which means it will not commit mid-load.
This however means all other processes wanting to write to the store will need to wait.
Low values (e.g. in the hundreds) mean very frequent commits so will hamper performance.
Cloning The Off Heap Store
If you are provisioning a new stroom node it is possible to copy the off heap store from another node.
Stroom should not be running on the node being copied from.
Simply copy the contents of stroom.pipeline.referenceData.localDir into the same configured location on the other node.
The new node will use the copied store and have access to its reference data.
Store Size & Compaction
Due to the way LMDB works the store can only grow in size, it will never shrink, even if reference data is deleted. Deleted data frees up space for new writes to the store so will be reused but will never be freed back to the operating system. If there is a regular process of purging old data and adding new reference data then this should not be an issue as the new reference data will use the space made available by the purged data.
If store size becomes an issue then it is possible to compact the store.
lmdb-utils is package that is available on some package managers and this has an mdb_copy command that can be used with the -c switch to copy the LMDB environment to a new one, compacting it in the process.
This should be done when Stroom is down to avoid writes happening to the store while the copy is happening.
The following is an example of how to compact the store assuming Stroom has been shut down first.
Now you can re-start Stroom and it will use the new compacted store, creating a lock file for it.
The compaction process is fast. A test compaction of a 4Gb store, compacted down to 1.6Gb took about 7s on non-flash HDD storage.
Alternatively, given that the store is essentially a cache and all data can be re-loaded another option is to delete the contents of stroom.pipeline.referenceData.localDir when Stroom is not running.
On boot Stroom will create a brand new empty store and reference data will be re-loaded as required.
This approach will result in all data having to be re-loaded so will slow lookups down until it has been loaded.
The Loading Process
Reference data is loaded into the store on demand during the processing of a stroom:lookup() method call.
Reference data will only be loaded if it does not already exist in the store, however it is always loaded as a complete stream, rather than entry by entry.
The test for existence in the store is based on the following criteria:
- The UUID of the reference loader pipeline.
- The version of the reference loader pipeline.
- The Stream ID for the stream of reference data that has been deemed effective for the lookup.
- The Stream Number (in the case of multi part streams).
If a reference stream has already been loaded matching the above criteria then no additional load is required.
IMPORTANT: It should be noted that as the version of the reference data pipeline forms part of the criteria, if the reference loader pipeline is changed, for whatever reason, then this will invalidate ALL existing reference data associated with that reference loader pipeline.
Typically the reference loader pipeline is very static so this should not be an issue.
Standard practice is to convert raw reference data into reference:2 XML on receipt using a pipeline separate to the reference loader.
The reference loader is then only concerned with reading cooked reference:2 into the Reference Data Filter.
In instances where reference data streams are infrequently used it may be preferable to not convert the raw reference on receipt but instead to do it in the reference loader pipeline.
Duplicate Keys
The Reference Data Filter pipeline element has a property overrideExistingValues which if set to true means if an entry is found in an effective stream with the same key as an entry already loaded then it will overwrite the existing one.
Entries are loaded in the order they are found in the reference:2 XML document.
If set to false then the existing entry will be kept.
If warnOnDuplicateKeys is set to true then a warning will be logged for any duplicate keys, whether an overwrite happens or not.
Value De-Duplication
Only unique values are held in the store to reduce the storage footprint. This is useful given that typically, reference data updates may be received daily and each one is a full snapshot of the whole reference data. As a result this can mean many copies of the same value being loaded into the store. The store will only hold the first instance of duplicate values.
Querying the Reference Data Store
The reference data store can be queried within a Dashboard in Stroom by selecting Reference Data Store in the data source selection pop-up.
Querying the store is currently an experimental feature and is mostly intended for use in fault finding.
Given the localised nature of the reference data store the dashboard can currently only query the store on the node that the user interface is being served from.
In a multi-node environment where some nodes are UI only and most are processing only, the UI nodes will have no reference data in their store.
Purging Old Reference Data
Reference data loading and purging is done at the level of a reference stream. Whenever a reference lookup is performed the last accessed time of the reference stream in the store is checked. If it is older than one hour then it will be updated to the current time. This last access time is used to determine reference streams that are no longer in active use and thus can be purged.
The Stroom job Ref Data Off-heap Store Purge is used to perform the purge operation on the Off-Heap reference data store.
No purge is required for the On-Heap store as that only holds transient data.
When the purge job is run it checks the time since each reference stream was accessed against the purge cut-off age.
The purge age is configured via the property stroom.pipeline.referenceData.purgeAge.
It is advised to schedule this job for quiet times when it is unlikely to conflict with reference loading operations as they will fight for access to the single write transaction.
Lookups
Lookups are performed in XSLT Filters using the XSLT functions.
In order to perform a lookup one or more reference feeds must be specified on the XSLT Filter pipeline element.
Each reference feed is specified along with a reference loader pipeline that will ingest the specified feed (optional convert it into reference:2 XML if it is not already) and pass it into a Reference Data Filter pipeline element.
Reference Feeds & Loaders
In the XSLT Filter pipeline element multiple combinations of feed and reference loader pipeline can be specified. There must be at least one in order to perform lookups. If there are multiple then when a lookup is called for a given time, the effective stream for each feed/loader combination is determined. The effective stream for each feed/loader combination will be loaded into the store, unless it is already present.
When the actual lookup is performed Stroom will try to find the key in each of the effective streams that have been loaded and that contain the map in the lookup call. If the lookup is unsuccessful in the effective stream for the first feed/loader combination then it will try the next, and so on until it has tried all of them. For this reason if you have multiple feed/loader combinations then order is important. It is possible for multiple effective streams to contain the same map/key so a feed/loader combination higher up the list will trump one lower down with the same map/key. Also if you have some lookups that may not return a value and others that should always return a value then the feed/loader for the latter should be higher up the list so it is searched first.
Effective Streams
Reference data lookups have the concept of Effective Streams.
An effective stream is the most recent stream for a given
Feed
that has an effective date that is less than or equal to the date used for the lookup.
When performing a lookup, Stroom will search the stream store to find all the effective streams in a time bucket that surrounds the lookup time.
These sets of effective streams are cached so if a new reference stream is created it will not be used until the cached set has expired.
To rectify this you can clear the cache Reference Data - Effective Stream Cache on the Caches screen accessed from:

Standard Key/Value Lookups
Standard key/value lookups consist of a simple string key and a value that is either a simple string or an XML fragment.
Standard lookups are performed using the various forms of the stroom:lookup() XSLT function.
Note
If the key is not found and the key is an integer then it will attempt a range lookup using the same key. This is to allow for maps that contain a mixture of key/value pairs and range/value pairs.Range Lookups
Range lookups consist of a key that is an integer and a value that is either a simple string or an XML fragment.
For more detail on range lookups see the XSLT function stroom:lookup().
Note
The lookup will initially look for a single key that matches the lookup key. If an exact match is not found then it will look for a range that contains the key. This is to allow for maps that contain a mixture of key/value pairs and range/value pairs.Nested Map Lookups
Nested map lookups involve chaining a number of lookups with the value of each map being used as the key for the next.
For more detail on nested lookups see the XSLT function stroom:lookup().
Bitmap Lookups
A bitmap lookup is a special kind of lookup that actually performs a lookup for each enabled bit position of the passed bitmap value.
For more detail on bitmap lookups see the XSLT function stroom:bitmap-lookup().
Values can either be a simple string or an XML fragment.
Context data lookups
Some event streams have a Context stream associated with them. Context streams allow the system sending the events to Stroom to supply an additional stream of data that provides context to the raw event stream. This can be useful when the system sending the events has no control over the event content but needs to supply additional information. The context stream can be used in lookups as a reference source to decorate events on receipt. Context reference data is specific to a single event stream so is transient in nature, therefore the On Heap Store is used to hold it for the duration of the event stream processing only.
Typically the reference loader for a context stream will include a translation step to convert the raw context data into reference:2 XML.
Reference Data API
See Reference Data API.
13 - Properties
Properties are the means of configuring the Stroom application and are typically maintained by the Stroom system administrator. The value of some properties are required in order for Stroom to function, e.g. database connection details, and thus need to be set prior to running Stroom. Some properties can be changed at runtime to alter the behaviour of Stroom.
Sources
Property values can be defined in the following locations.
System Default
The system defaults are hard-coded into the Stroom application code by the developers and can’t be changed. These represent reasonable defaults, where applicable, but may need to be changed, e.g. to reflect the scale of the Stroom system or the specific environment.
The default property values can either be viewed in the Stroom user interface or in the file config/config-defaults.yml in the Stroom distribution.
Properties can be accessed in the user interface by selecting this from the top menu:

Global Database Value
Global database values are property values stored in the database that are global across the whole cluster.
The global database value is defined as a record in the config table in the database.
The database record will only exist if a database value has explicitly been set.
The database value will apply to all nodes in the cluster, overriding the default value, unless a node also has a value set in its YAML configuration.
Database values can be set from the Stroom user interface, accessed by selecting this from the top menu:
Some properties are marked Read Only which means they cannot have a database value set for them. These properties can only be altered via the YAML configuration file on each node. Such properties are typically used to configure values required for Stroom to be able to boot, so it does not make sense for them to be configurable from the User Interface.
YAML Configuration file
Stroom is built on top of a framework called Drop Wizard.
Drop Wizard uses a YAML configuration file on each node to configure the application.
This is typically config.yml and is located in the config directory.
This file contains both the Drop Wizard configuration settings (settings for ports, paths and application logging) and the Stroom specific properties configuration.
The file is in YAML format and the Stroom properties are located under the appConfig key.
For details of the Drop Wizard configuration structure, see
here
.
The file is split into three sections using these keys:
server- Configuration of the web server, e.g. ports, paths, request logging.logging- Configuration of application loggingappConfig- The stroom configuration properties
The following is an example of the YAML configuration file:
# Drop Wizard configuration section
server:
# e.g. ports and paths
logging:
# e.g. logging levels/appenders
# Stroom properties configuration section
appConfig:
commonDbDetails:
connection:
jdbcDriverClassName: ${STROOM_JDBC_DRIVER_CLASS_NAME:-com.mysql.cj.jdbc.Driver}
jdbcDriverUrl: ${STROOM_JDBC_DRIVER_URL:-jdbc:mysql://localhost:3307/stroom?useUnicode=yes&characterEncoding=UTF-8}
jdbcDriverUsername: ${STROOM_JDBC_DRIVER_USERNAME:-stroomuser}
jdbcDriverPassword: ${STROOM_JDBC_DRIVER_PASSWORD:-stroompassword1}
contentPackImport:
enabled: true
...
In the Stroom user interface properties are named with a dot notation key, e.g. stroom.contentPackImport.enabled. Each part of the dot notation property name represents a key in the YAML file, e.g. for this example, the location in the YAML would be:
appConfig:
contentPackImport:
enabled: true # stroom.contentPackImport.enabled
The stroom part of the dot notation name is replaced with appConfig.
Variable Substitution
The YAML configuration file supports Bash style variable substitution in the form of:
${ENV_VAR_NAME:-value_if_not_set}
This allows values to be set either directly in the file or via an environment variable, e.g.
jdbcDriverClassName: ${STROOM_JDBC_DRIVER_CLASS_NAME:-com.mysql.cj.jdbc.Driver}
In the above example, if the STROOM_JDBC_DRIVER_CLASS_NAME environment variable is not set then the value com.mysql.cj.jdbc.Driver will be used instead.
Typed Values
YAML supports typed values rather than just strings, see https://yaml.org/refcard.html. YAML understands booleans, strings, integers, floating point numbers, as well as sequences/lists and maps. Some properties will be represented differently in the user interface to the YAML file. This is due to how values are stored in the database and how the current user interface works. This will likely be improved in future versions. For details of how different types are represented in the YAML and the UI, see Data Types.
Source Precedence
The three sources (Default, Database & YAML) are listed in increasing priority, i.e YAML trumps Database, which trumps Default.
For example, in a two node cluster, this table shows the effective value of a property on each node.
A - indicates the value has not been set in that source.
NULL indicates that the value has been explicitly set to NULL.
| Source | Node1 | Node2 |
|---|---|---|
| Default | red | red |
| Database | - | - |
| YAML | - | blue |
| Effective | red | blue |
Or where a Database value is set.
| Source | Node1 | Node2 |
|---|---|---|
| Default | red | red |
| Database | green | green |
| YAML | - | blue |
| Effective | green | blue |
Or where a YAML value is explicitly set to NULL.
| Source | Node1 | Node2 |
|---|---|---|
| Default | red | red |
| Database | green | green |
| YAML | - | NULL |
| Effective | green | NULL |
Data Types
Stroom property values can be set using a number of different data types. Database property values are currently set in the user interface using the string form of the value. For each of the data types defined below, there will be an example of how the data type is recorded in its string form.
| Data Type | Example UI String Forms | Example YAML form |
|---|---|---|
| Boolean | true false |
true false |
| String | This is a string |
"This is a string" |
| Integer/Long | 123 |
123 |
| Float | 1.23 |
1.23 |
| Stroom Duration | P30D P1DT12H PT30S 30d 30s 30000 |
"P30D" "P1DT12H" "PT30S" "30d" "30s" "30000" See Stroom Duration Data Type. |
| List | #red#Green#Blue ,1,2,3 |
See List Data Type |
| Map | ,=red=FF0000,Green=00FF00,Blue=0000FF |
See Map Data Type |
| DocRef | ,docRef(MyType,a56ff805-b214-4674-a7a7-a8fac288be60,My DocRef name) |
See DocRef Data Type |
| Enum | HIGH LOW |
"HIGH" "LOW" |
| Path | /some/path/to/a/file |
"/some/path/to/a/file" |
| ByteSize | 32, 512Kib |
32, 512Kib See Byte Size Data Type |
Stroom Duration Data Type
The Stroom Duration data type is used to specify time durations, for example the time to live of a cache or the time to keep data before it is purged. Stroom Duration uses a number of string forms to support legacy property values.
ISO 8601 Durations
Stroom Duration can be expressed using
ISO 8601
duration strings.
It does NOT support the full ISO 8601 format, only D, H, M and S.
For details of how the string is parsed to a Stroom Duration, see
Duration
The following are examples of ISO 8601 duration strings:
P30D- 30 daysP1DT12H- 1 day 12 hours (36 hours)PT30S- 30 secondsPT0.5S- 500 milliseconds
Legacy Stroom Durations
This format was used in versions of Stroom older than v7 and is included to support legacy property values.
The following are examples of legacy duration strings:
30d- 30 days12h- 12 hours10m- 10 minutes30s- 30 seconds500- 500 milliseconds
Combinations such as 1m30s are not supported.
List Data Type
This type supports ordered lists of items, where an item can be of any supported data type, e.g. a list of strings or list of integers.
The following is an example of how a property (statusValues) that is is List of strings is represented in the YAML:
annotation:
statusValues:
- "New"
- "Assigned"
- "Closed"
This would be represented as a string in the User Interface as:
|New|Assigned|Closed.
See Delimiters in String Conversion for details of how the items are delimited in the string.
The following is an example of how a property (cpu) that is is List of DocRefs is represented in the YAML:
statistics:
internal:
cpu:
- type: "StatisticStore"
uuid: "af08c4a7-ee7c-44e4-8f5e-e9c6be280434"
name: "CPU"
- type: "StroomStatsStore"
uuid: "1edfd582-5e60-413a-b91c-151bd544da47"
name: "CPU"
This would be represented as a string in the User Interface as:
|,docRef(StatisticStore,af08c4a7-ee7c-44e4-8f5e-e9c6be280434,CPU)|,docRef(StroomStatsStore,1edfd582-5e60-413a-b91c-151bd544da47,CPU)
See Delimiters in String Conversion for details of how the items are delimited in the string.
Map Data Type
This type supports a collection of key/value pairs where the key is unique within the collection. The type of the key must be string, but the type of the value can be any supported type.
The following is an example of how a property (mapProperty) that is a map of string => string would be represented in the YAML:
mapProperty:
red: "FF0000"
green: "00FF00"
blue: "0000FF"
This would be represented as a string in the User Interface as:
,=red=FF0000,Green=00FF00,Blue=0000FF
The delimiter between pairs is defined first, then the delimiter for the key and value.
See Delimiters in String Conversion for details of how the items are delimited in the string.
DocRef Data Type
A DocRef (or Document Reference) is a type specific to Stroom that defines a reference to an instance of a Document within Stroom, e.g. an XLST, Pipeline, Dictionary, etc. A DocRef consists of three parts, the type, the UUID and the name of the Document.
The following is an example of how a property (aDocRefProperty) that is a DocRef would be represented in the YAML:
aDocRefProperty:
type: "MyType"
uuid: "a56ff805-b214-4674-a7a7-a8fac288be60"
name: "My DocRef name"
This would be represented as a string in the User Interface as:
,docRef(MyType,a56ff805-b214-4674-a7a7-a8fac288be60,My DocRef name)
See Delimiters in String Conversion for details of how the items are delimited in the string.
Byte Size Data Type
The Byte Size data type is used to represent a quantity of bytes using the IEC standard. Quantities are represented as powers of 1024, i.e. a Kib (Kibibyte) means 1024 bytes.
Examples of Byte Size values in string form are (a YAML value would optionally be surrounded with double quotes):
32,32b,32B,32bytes- 32 bytes32K,32KB,32KiB- 32 kibibytes32M,32MB,32MiB- 32 mebibytes32G,32GB,32GiB- 32 gibibytes32T,32TB,32TiB- 32 tebibytes32P,32PB,32PiB- 32 pebibytes
The *iB form is preferred as it is more explicit and avoids confusion with SI units.
Delimiters in String Conversion
The string conversion used for collection types like List, Map etc. relies on the string form defining the delimiter(s) to use for the collection.
The delimiter(s) are added as the first n characters of the string form, e.g. |red|green|blue or |=red=FF0000|Green=00FF00|Blue=0000FF.
It is possible to use a number of different delimiters to allow for delimiter characters appearing in the actual value, e.g. #some text#some text with a | in it
The following are the delimiter characters that can be used.
|, :, ;, ,, !, /, \, #, @, ~, -, _, =, +, ?
When Stroom records a property value to the database it may use a delimiter of its own choosing, ensuring that it picks a delimiter that is not used in the property value.
Restart Required
Some properties are marked as requiring a restart. There are two scopes for this:
Requires UI Refresh
If a property is marked in UI as requiring a UI refresh then this means that a change to the property requires that the Stroom nodes serving the UI are restarted for the new value to take effect.
Requires Restart
If a property is marked in UI as requiring a restart then this means that a change to the property requires that all Stroom nodes are restarted for the new value to take effect.
14 - Roles
TODO
Describe application level permissions and how users and groups behave15 - Security
Shared Storage
For most large installations Stroom uses shared storage for its data store. This storage could be a CIFS, NFS or similar shared file system. It is recommended that access to this shared storage is protected so that only the application can access it. This could be achieved by placing the storage and application behind a firewall and by requiring appropriate authentication to the shared storage. It should be noted that NFS is unauthenticated so should be used with appropriate safeguards.
MySQL
Accounts
It is beyond the scope of this article to discuss this in detail but all MySQL accounts should be secured on initial install. Official guidance for doing this can be found here .
Communication
Communication between MySQL and the application should be secured. This can be achieved in one of the following ways:
- Placing MySQL and the application behind a firewall
- Securing communication through the use of iptables
- Making MySQL and the application communicate over SSL (see here for instructions)
The above options are not mutually exclusive and may be combined to better secure communication.
Application
Node to node communication
In a multi node Stroom deployment each node communicates with the master node. This can be configured securely in one of several ways:
- Direct communication to Tomcat on port 8080 - Secured by being behind a firewall or using iptables
- Direct communication to Tomcat on port 8443 - Secured using SSL and certificates
- Removal of Tomcat connectors other than AJP and configuration of Apache to communicate on port 443 using SSL and certificates
Application to Stroom Proxy Communication
The application can be configured to share some information with Stroom Proxy so that Stroom Proxy can decide whether or not to accept data for certain feeds based on the existence of the feed or it’s reject/accept status. The amount of information shared between the application and the proxy is minimal but could be used to discover what feeds are present within the system. Securing this communication is harder as both the application and the proxy will not typically reside behind the same firewall. Despite this communication can still be performed over SSL thus protecting this potential attack vector.
Admin port
Stroom (v6 and above) and its associated family of stroom-* DropWizard based services all expose an admin port (8081 in the case of stroom). This port serves up various health check and monitoring pages as well as a number of restful services for initiating admin tasks. There is currently no authentication on this admin port so it is assumed that access to this port will be tightly controlled using a firewall, iptables or similar.
Servlets
There are several servlets in Stroom that are accessible by certain URLs. Considerations should be made about what URLs are made available via Apache and who can access them. The servlets, path and function are described below:
| Servlet | Path | Function | Risk |
|---|---|---|---|
| DataFeed | /datafeed or /datafeed/* | Used to receive data | Possible denial of service attack by posting too much data/noise |
| RemoteFeedService | /remoting/remotefeedservice.rpc | Used by proxy to ask application about feed status (described in previous section) | Possible to systematically discover which feeds are available. Communication with this service should be secured over SSL discussed above |
| DynamicCSSServlet | /stroom/dynamic.css | Serves dynamic CSS based on theme configuration | Low risk as no important data is made available by this servlet |
| DispatchService | /stroom/dispatch.rpc | Service for UI and server communication | All back-end services accessed by this umbrella service are secured appropriately by the application |
| ImportFileServlet | /stroom/importfile.rpc | Used during configuration upload | Users must be authenticated and have appropriate permissions to import configuration |
| ScriptServlet | /stroom/script | Serves user defined visualisation scripts to the UI | The visualisation script is considered to be part of the application just as the CSS so is not secured |
| ClusterCallService | /clustercall.rpc | Used for node to node communication as discussed above | Communication must be secured as discussed above |
| ExportConfig | /export/* | Servlet used to export configuration data | Servlet access must be restricted with Apache to prevent configuration data being made available to unauthenticated users |
| Status | /status | Shows the application status including volume usage | Needs to be secured so that only appropriate users can see the application status |
| Echo | /echo | Block GZIP data posted to the echo servlet is sent back uncompressed. This is a utility servlet for decompression of external data | URL should be secured or not made available |
| Debug | /debug | Servlet for echoing HTTP header arguments including certificate details | Should be secured in production environments |
| SessionList | /sessionList | Lists the logged in users | Needs to be secured so that only appropriate users can see who is logged in |
| SessionResourceStore | /resourcestore/* | Used to create, download and delete temporary files liked to a users session such as data for export | This is secured by using the users session and requiring authentication |
HDFS, Kafka, HBase, Zookeeper
Stroom and stroom-stats can integrate with HDFS, Kafka, HBase and Zookeeper. It should be noted that communication with these external services is currently not secure. Until additional security measures (e.g. authentication) are put in place it is assumed that access to these services will be careful controlled (using a firewall, iptables or similar) so that only stroom nodes can access the open ports.
Content
It may be possible for a user to write XSLT, Data Splitter or other content that may expose data that we do not wish to or to cause the application some harm. At present processing operations are not isolated processes and so it is easy to cripple processing performance with a badly written translation whether written accidentally or on purpose. To mitigate this risk it is recommended that users that are given permission to create XSLT, Data Splitter and Pipeline configurations are trusted to do so.
Visualisations can be completely customised with javascript. The javascript that is added is executed in a clients browser potentially opening up the possibility of XSS attacks, an attack on the application to access data that a user shouldn’t be able to access, an attack to destroy data or simply failure/incorrect operation of the user interface. To mitigate this risk all user defined javascript is executed within a separate browser IFrame. In addition all javascript should be examined before being added to a production system unless the author is trusted. This may necessitate the creation of a separate development and testing environment for user content.
16 - Stroom Jobs
There are various jobs that run in the background within Stroom. Among these are jobs that control pipeline processing, removing old files from the file system, checking the status of nodes and volumes etc. Each task executes at a different time depending on the purpose of the task. There are three ways that a task can be executed:
- Scheduled jobs execute periodically according to a cron schedule. These include jobs such as cleaning the file system where Stroom only needs to perform this action once a day and can do so overnight.
- Frequency controlled jobs are executed every X seconds, minutes, hours etc. Most of the jobs that execute with a given frequency are status checking jobs that perform a short lived action fairly frequently.
- Distributed jobs are only applicable to stream processing with a pipeline. Distributed jobs are executed by a worker node as soon as a worker has available threads to execute a jobs and the task distributor has work available.
A list of task types and their execution method can be seen by opening Monitoring/Jobs from the main menu.
TODO: image
Expanding each task type allows you to configure how a task behaves on each node:
TODO: image
Account Maintenance
This job checks user accounts on the system and de-activates them under the following conditions:
- An unused account that has been inactive for longer than the age configured by
stroom.security.identity.passwordPolicy.neverUsedAccountDeactivationThreshold. - An account that has been inactive for longer than the age configured by
stroom.security.identity.passwordPolicy.unusedAccountDeactivationThreshold.
Attribute Value Data Retention
Deletes Meta attribute values (additional and less valuable metadata) older than stroom.data.meta.metaValue.deleteAge.
Data Delete
Before data is physically removed from the database and file system it is marked as logically deleted by adding a flag to the metadata record in the database.
Data can be logically deleted by a user from the UI or via a process such as data retention.
Data is deleted logically as it is faster to do than a physical delete (important in the UI), and it also allows for data to be restored (undeleted) from the UI.
This job performs the actual physical deletion of data that has been marked logically deleted for longer than the duration configured with stroom.data.store.deletePurgeAge.
All data files associated with a metadata record are deleted from the file system before the metadata is physically removed from the database.
Data Processor
Processes data by finding data that matches processing filters on each pipeline.
When enabled, each worker node asks the master node for data processing tasks.
The master node creates tasks based on processing filters added to the Processors screen of each pipeline and supplies them to the requesting workers.
Feed Based Data Retention
This job uses the retention property of each feed to logically delete data from the associated feed that is older than the retention period. The recommended way of specifying data retention rules is via the data retention policy feature, but feed based retention still exists for backwards compatibility. Feed based data retention will be removed in a future release and should be considered deprecated.
File System Clean (deprecated)
This is the previous incarnation of the Data Delete job.
This job scans the file system looking for files that are no longer associated with metadata in the database or where the metadata is marked as deleted and deletes the files if this is the case.
The process is slow to run as it has to traverse all stored data files and examine each.
However, this version of the data deletion process was created when metadata was deleted immediately, i.e. not marked for future physical deletion, so was the only way to perform this clean up activity at the time.
This job will be removed in a future release. The Data Delete job should be used instead from now on.
File System Volume Status
Scans your data volumes to ensure they are available and determines how much free space they have. Records this status in the Volume Status table.
Index Searcher Cache Refresh
Refresh references to Lucene index searchers that have been cached for a while.
Index Shard Delete
How frequently index shards that have been logically deleted are physically deleted from the file system.
Index Shard Retention
How frequently index shards that are older then their retention period are logically deleted.
Index Volume Status
Scans your index volumes to ensure they are available and determines how much free space they have. Records this status in the Index Volume Status table.
Index Writer Cache Sweep
How frequently entries in the Index Shard Writer cache are evicted based on the time-to-live, time-to-idle and cache size settings.
Index Writer Flush
How frequently in-memory changes to the index shards are flushed to the file system and committed to the index.
Java Heap Histogram Statistics
How frequently heap histogram statistics will be captured. This can be useful for diagnosing issues or seeing where memory is being used. Each run will result in a JVM pause so car should be taken when running this on a production system.
Node Status
How frequently we try write stats about node status including JVM and memory usage.
Pipeline Destination Roll
How frequently rolling pipeline destinations, e.g. a Rolling File Appender are checked to see if they need to be rolled. This frequency should be at least as short as the most frequent rolling frequency.
Policy Based Data Retention
Run the policy based data retention rules over the data and logically delete and data that should no longer be retained.
Processor Task Queue Statistics
How frequently statistics about the state of the stream processing task queue are captured.
Processor Task Retention
This job is responsible for cleaning up redundant processors, tasks and filters. If it is not run then these will build up on the system consuming space in the database.
This job relies on the property stroom.processor.deleteAge to govern what is deemed old.
The deleteAge is used to derive the delete threshold, i.e. the current time minus deleteAge.
When the job runs it executes the following steps:
-
Logically Delete Processor Tasks - Logically delete all processor tasks belonging to processor filters that have been logically deleted.
-
Logically Delete Processor Filters - Logically delete old processor filters with a state of
COMPLETEand no associated tasks. Filters are considered old if the last poll time is less than the delete threshold. -
Physically Delete Processor Tasks - Physically delete all old processor tasks with a status of
COMPLETEorDELETED. Tasks are considered old if they have no status time or the status time (the time the status was last changed) is less than the delete threshold. -
Physically Delete Processor Filters - Physically delete all old processor filters that have already been logically deleted. Filters are considered old if the last update time is less than the delete threshold. A filter can be logically deleted either by the step above or explicitly by a user in the user interface.
-
Physically Delete Processors - Physically delete all old processors that have already been logically deleted. Processors are considered old if the last update time is less than the delete threshold. A processor can only be logically deleted by the user in the user interface.
Therefore for items not deleted by a user, there will be a delay equal to deleteAge before logical deletion, then another delay equal to deleteAge before final physical deletion.
Property Cache Reload
Stroom’s configuration properties can each be configured globally in the database. This job controls the frequency that each node refreshes the values of its properties cache from the global database values. See also Properties.
Proxy Aggregation
If you front Stroom with an Stroom proxy which is configured to ‘store’ rather than ‘store/forward’, then this task when run will pick up all files in the proxy repository dir, aggregate them by feed and bring them into Stroom.
It uses the system property stroom.proxyDir.
Query History Clean
How frequently items in the query history are removed from the history if their age is older than stroom.history.daysRetention or if the number of items in the history exceeds stroom.history.itemsRetention.
Ref Data Off-heap Store Purge
Purges all data older than the purge age defined by property stroom.pipeline.purgeAge.
See also Reference Data.
Solr Index Optimise
How frequently Solr index segments are explicitly optimised by merging them into one.
Solr Index Retention
How frequently a process is run to delete items from the Solr indexes that don’t meet the retention rule of that index.
SQL Stats Database Aggregation
This job controls the frequency that the database statistics aggregation process is run.
This process takes the entries in SQL_STAT_VAL_SRC and merges them into the main statistics tables SQL_STAT_KEY and SQL_STAT_KEY.
As this process is reliant on data flushed by the SQL Stats In Memory Flush job it is advisable to schedule it to run after that, leaving some time for the in-memory flush to finish.
SQL Stats In Memory Flush
SQL Statistics are initially held and aggregated in memory.
This job controls the frequency that the in memory statistics are flushed from the in memory buffer to the staging table SQL_STAT_VAL_SRC in the database.
17 - Tools
17.1 - Command Line Tools
Stroom has a number of tools that are available from the command line in addition to starting the main application.
Running commands
The basic structure of the shell command for starting one of stroom’s commands depends on whether you are running the zip distribution of stroom or a docker stack.
In either case, COMMAND is the name of the stroom command to run, as specified by the various headings on this page.
Each command value is described in its own section and may take no arguments or a mixture of mandatory and optional arguments.
Note
These commands are very powerful and potentially dangerous in the wrong hands, e.g. they allow the changing of user’s passwords. Access to these commands should be strictly limited. Also, each command will run in its own JVM so are not really intended to be run when Stroom is running on the node.Running commands with the zip distribution
The commands are run by passing the command and any of its arguments to the java command.
The jar file is in the bin directory of the zip distribution.
For example:
Running commands in a stroom Docker stack
Commands are run in a Docker stack using the command.sh script found in the root of the stack directory structure.
Note
You do not specify the config file location as the script does this for you.For example:
Command reference
Note
All the examples below assume you are running stroom as part of the zip distribution. If you are running a Docker stack then you will need to use thecommand.sh script (as described above) with the same arguments but omitting the config file path.
server
This is the normal command for starting the Stroom application using the supplied YAML configuration file.
The example above will start the application as a foreground process.
Stroom would typically be started using the start.sh shell script, but the command above is listed for completeness.
When stroom starts it will check the database to see if any migration is required. If migration from an earlier version (including from an empty database) is required then this will happen as part of the application start process.
migrate
There may be occasions where you want to migrate an old version but not start the application, e.g. during migration testing or to initiate the migration before starting up a cluster. This command will run the process that checks for any required migrations and then performs them. On completion of the process it exits. This runs as a foreground process.
create_account
Where the named arguments are:
-u--user- The username for the user.-p--password- The password for the user.-e--email- The email address of the user.-f--firstName- The first name of the user.-s--lastName- The last name of the user.--noPasswordChange- If set do not require a password change on first login.--neverExpires- If set, the account will never expire.
This command will create an account in the internal identity provider within Stroom. Stroom is able to use third party OpenID identity providers such as Google or AWS Cognito but by default will use its own. When configured to use its own (the default) it will auto create an admin account when starting up a fresh instance. There are times when you may wish to create this account manually which this command allows.
Authentication Accounts and Stroom Users
The user account used for authentication is distinct to the Stroom user entity that is used for authorisation within Stroom. If an external IDP is used then the mechanism for creating the authentication account will be specific to that IDP. If using the default internal Stroom IDP then an account must be created in order to authenticate, either from within the UI if you are already authenticated as a privileged used or using this command. In either case a Stroom user will need to exist with the same username as the authentication account.
The command will fail if the user already exists. This command should NOT be run if you are using a third party identity provider.
This command will also run any necessary database migrations to ensure it is working with the correct version of the database schema.
reset_password
Where the named arguments are:
-u--user- The username for the user.-p--password- The password for the user.
This command is used for changing the password of an existing account in stroom’s internal identity provider. It will also reset all locked/inactive/disabled statuses to ensure the account can be logged into. This command should NOT be run if you are using a third party identity provider. It will fail if the account does not exist.
This command will also run any necessary database migrations to ensure it is working with the correct version of the database schema.
manage_users
Where the named arguments are:
--createUser USER_NAME- Creates a Stroom user with the supplied username.--greateGroup GROUP_NAME- Creates a Stroom user group with the supplied group name.--addToGroup USER_OR_GROUP_NAME TARGET_GROUP- Adds a user/group to an existing group.--removeFromGroup USER_OR_GROUP_NAME TARGET_GROUP- Removes a user/group from an existing group.--grantPermission USER_OR_GROUP_NAME PERMISSION_NAME- Grants the named application permission to the user/group.--revokePermission USER_OR_GROUP_NAME PERMISSION_NAME- Revokes the named application permission from the user/group.--listPermissions- Lists all the valid permission names.
This command allows you to manage the account permissions within stroom regardless of whether the internal identity provider or a 3rd party one is used. A typical use case for this is when using a third party identity provider. In this instance Stroom has no way of auto creating an admin account when first started so the association between the account on the 3rd party IDP and the stroom user account needs to be made manually. To set up an admin account to enable you to login to stroom you can do:
This command is not intended for automation of user management tasks on a running Stroom instance that you can authenticate with.
It is only intended for cases where you cannot authenticate with Stroom, i.e. when setting up a new Stroom with a 3rd party IDP or when scripting the creation of a test environment.
If you want to automate actions that can be performed in the UI then you can make use of the REST API that is described at /stroom/noauth/swagger-ui.
Warning
See the section above about the distinction between authentication accounts and stroom users.
Where jbloggs is the user name of the account on the 3rd party IDP.
This command will also run any necessary database migrations to ensure it is working with the correct version of the database schema.
The named arguments can be used as many times as you like so you can create multiple users/groups/grants/etc. Regardless of the order of the arguments, the changes are executed in the following order:
- Create users
- Create groups
- Add users/groups to a group
- Remove users/groups from a group
- Grant permissions to users/groups
- Revoke permissions from users/groups
17.2 - Stream Dump Tool
Data within Stroom can be exported to a directory using the StreamDumpTool.
The tool is contained within the core Stroom Java library and can be accessed via the command line, e.g.
java -cp "apache-tomcat-7.0.53/lib/*:lib/*:instance/webapps/stroom/WEB-INF/lib/*" stroom.util.StreamDumpTool outputDir=output
Note the classpath may need to be altered depending on your installation.
The above command will export all content from Stroom and output it to a directory called output. Data is exported to zip files in the same format as zip files in proxy repositories. The structure of the exported data is ${feed}/${pathId}/${id} by default with a .zip extension.
To provide greater control over what is exported and how the following additional parameters can be used:
feed - Specify the name of the feed to export data for (all feeds by default).
streamType - The single stream type to export (all stream types by default).
createPeriodFrom - Exports data created after this time specified in ISO8601 UTC format, e.g. 2001-01-01T00:00:00.000Z (exports from earliest data by default).
createPeriodTo - Exports data created before this time specified in ISO8601 UTC format, e.g. 2001-01-01T00:00:00.000Z (exports up to latest data by default).
outputDir - The output directory to write data to (required).
format - The format of the output data directory and file structure (${feed}/${pathId}/${id} by default).
Format
The format parameter can include several replacement variables:
feed - The name of the feed for the exported data.
streamType - The data type of the exported data, e.g. RAW_EVENTS.
streamId - The id of the data being exported.
pathId - A incrementing numeric id that creates sub directories when required to ensure no directory ends up containing too many files.
id - A incrementing numeric id similar to pathId but without sub directories.